
How to Make a Beautiful Vertical Shiplap Half Wall
Ah! We’re halfway through the Jeffrey Court Renovation Challenge. I can’t believe it! Have you been voting?? I hope so! We’re on week 3 of 6. This week I took on a vertical shiplap half wall in my bathroom.
I wanted to make sure that it lasted a long time so I did something crazy and didn’t use wood for it. Wait. What?? Yup, you read that right. I didn’t use wood for a vertical shiplap half wall. Keep reading to find out what I used instead!
What’s the Jeffrey Court Renovation Challenge?
It’s an amazing 6-week challenge where Home DIYers compete against one another for a grand prize of $5,000. I’m one of the DIYers!
The challenge is sponsored by Jeffrey Court, FrogTape and Sinkology. I have 6 weeks to completely renovate my bathroom. How is the winner chosen? Based on votes from people like YOU!
You can vote once a day so I’d love for you to vote and support me in my work. Click HERE to vote now! Thank you SO much for your support and encouragement.
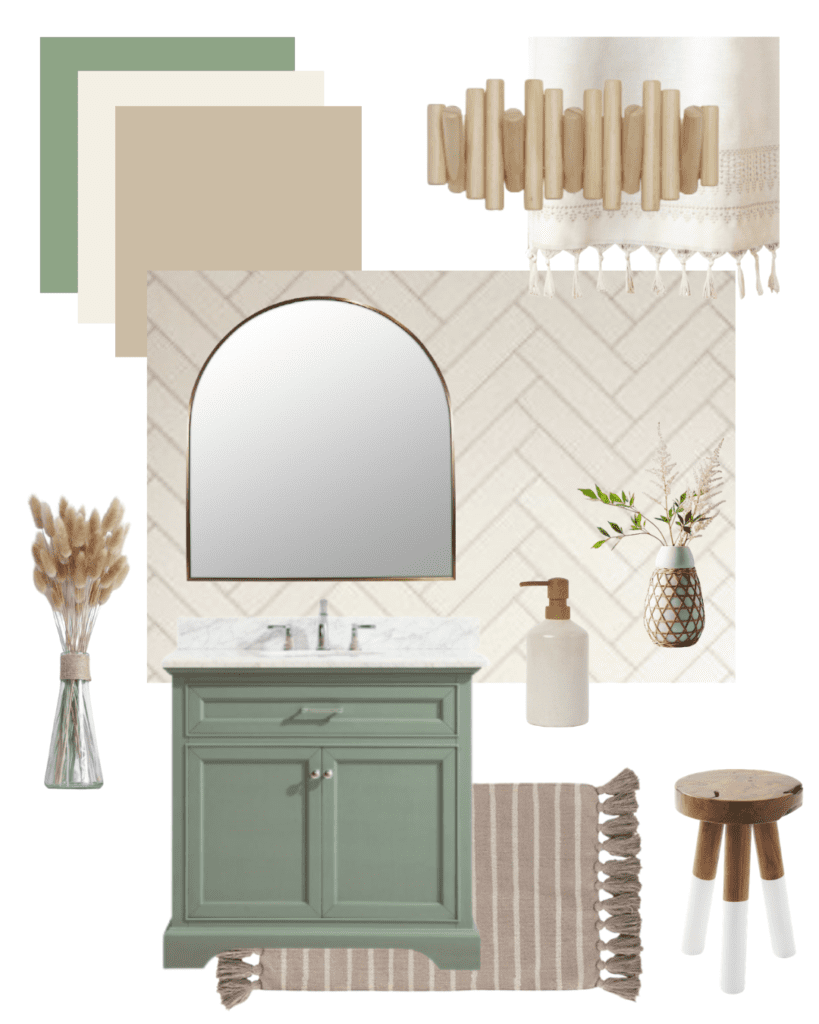
In case you missed it, here’s my mood board! I’m going for a soft, earthy look with clean, modern lines softened with some curves and varying textures.
How to Make a Vertical Shiplap Half Wall in a Bathroom
First off, let’s talk about shiplap in a bathroom. Bathrooms with showers naturally have a lot of moisture in them. Therefore, wood doesn’t tend to work well long-term in bathrooms. Therefore, I decided to opt for a more durable material – I used PVC boards instead!
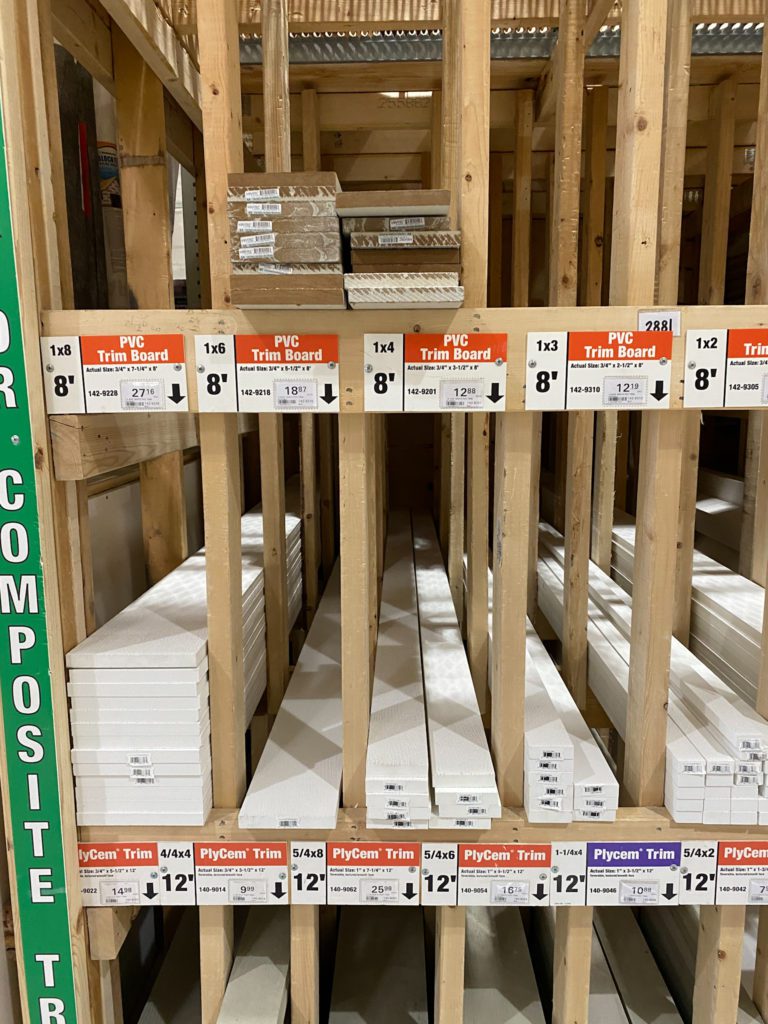
You can find these boards by all the other lumber at your local home or lumber store. These boards are often used for exterior work since they hold up well against the elements.
Tools & Materials
- 1 x 6 PVC Boards (Select as many as your half wall will need. I used 7 boards.)
- 1 x 4 PVC Board (Select as many as your half wall will need. I used one 6′ board.)
- 1 x 2 PVC Board (Select as many as your half wall will need. I used one 6′ board.)
- Miter Saw
- Sherwin-Williams Extreme Bond Primer
- Sherwin-Williams Emerald Urethane Trim Enamel (in SW Accessible Beige)
- Purdy Nylox Paint Brush
- Purdy Mini Roller & White Dove 1/4 Nap Roller Cover
- Nail Gun
- Construction Adhesive
- Jigsaw
- Purdy Paint Pail
- Pencil
- Crowbar and Putty Knife
- 1/8″ tile spacers
- Stud Finder
- Tape Measure
- Wood Filler
- 220 Grit Sandpaper
- Quick Paint Caulk
- Tack Cloth
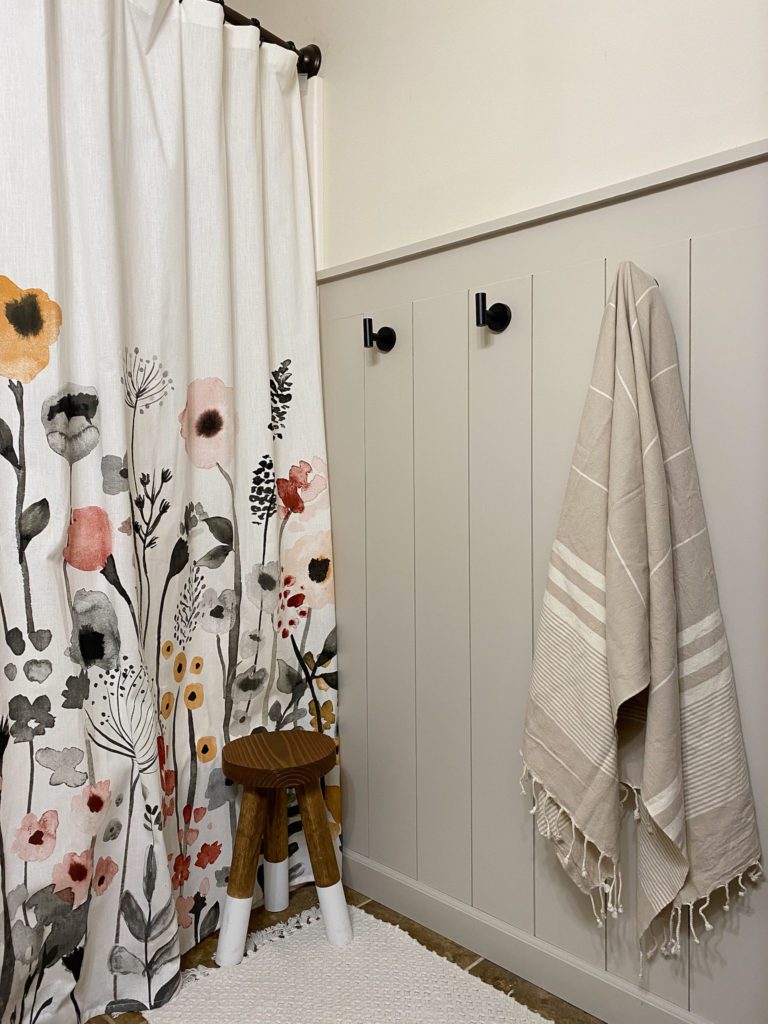
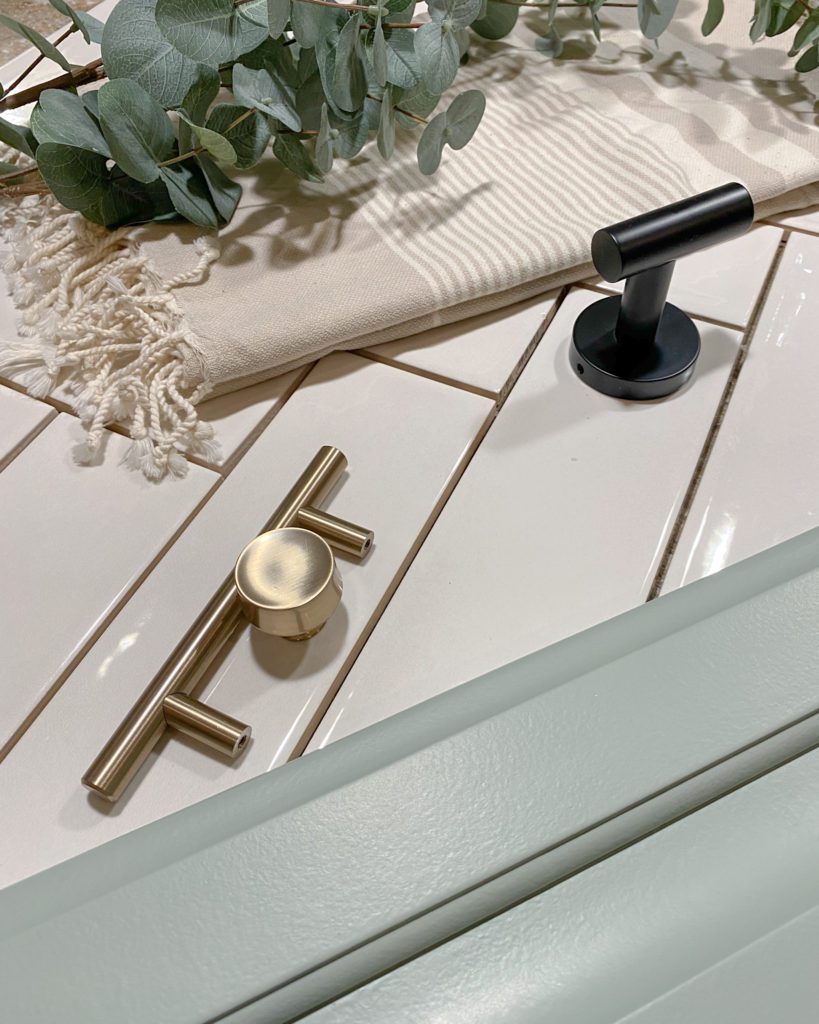
- Towel Hooks
Time to Complete
It took me about a week to fully finish this but you could finish it in a day or two if you had a lot of time during the day.
Vertical Shiplap Half Wall Tutorial
Step 1: Cut your Boards
First cut your 8′ 1 x 6 boards in half using a miter saw. Then cut your 1 x 4 and 1 x 2 boards to the appropriate length to fit on your wall horizontally.

Step 2: Prime your Boards
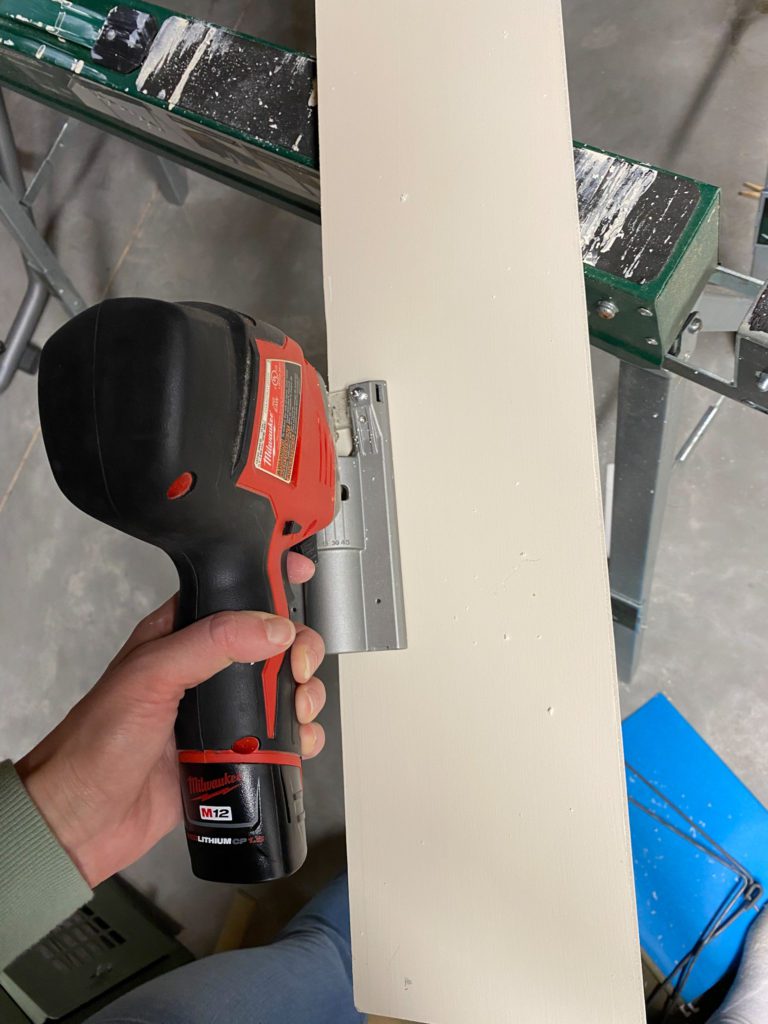
Prime the boards with Sherwin-Williams Extreme Bond Primer. I used a combination of a mini roller with a White Dove 1/4 nap roller cover and a Purdy Nylox paint brush to get full coverage on the boards. These applicators helped me get a nice smooth finish on my boards.
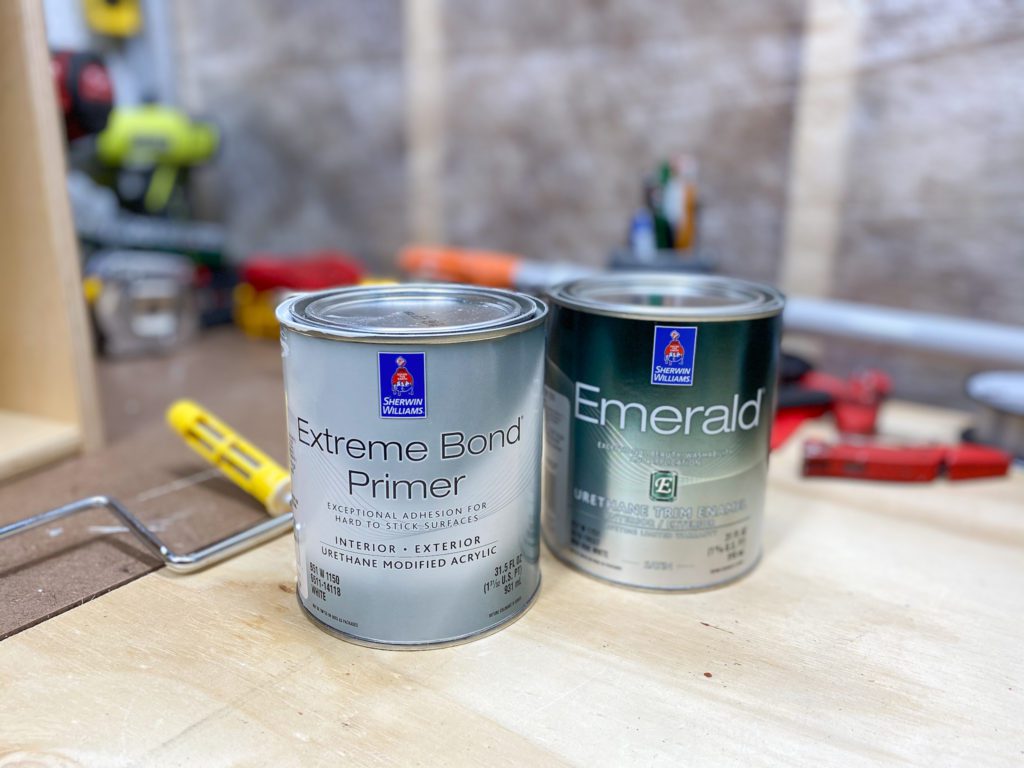
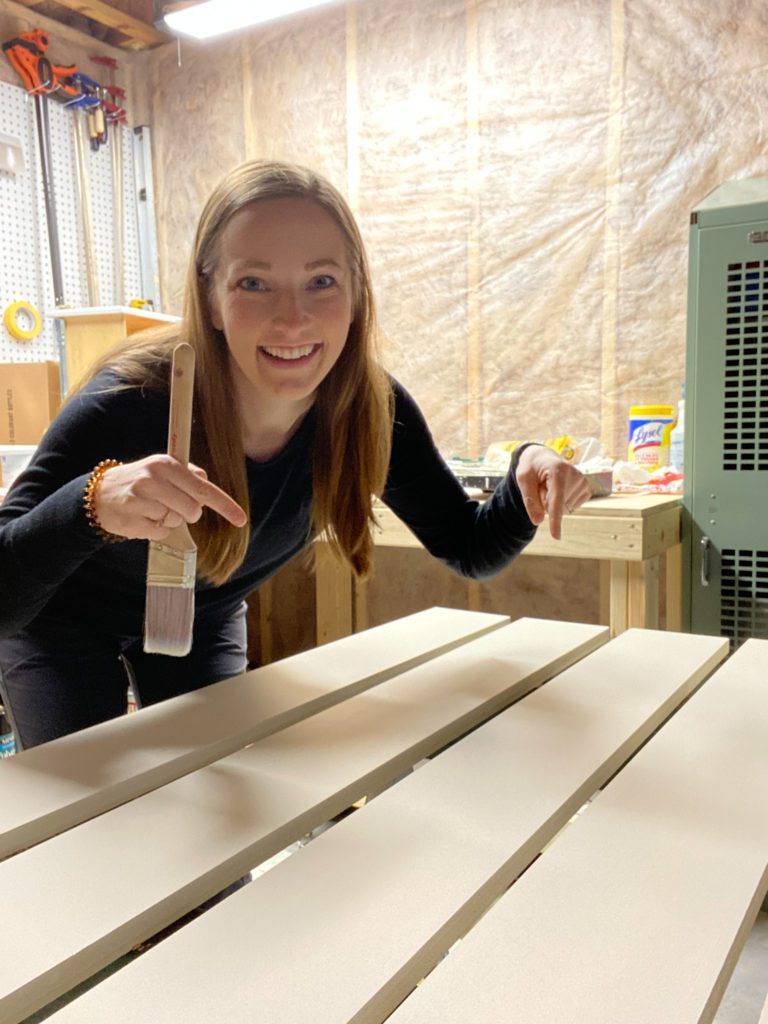
Step 3: Paint your boards
Apply Sherwin-Williams Emerald Urethane Trim Enamel using the same type of roller and brush.

It’s important to paint your boards before putting them up on the wall because it will be very difficult to paint between the boards once they are installed. I applied two coats of paint to them.
Step 4: Remove the Trim & Paint it
Remove the trim from the wall if you haven’t already. You will want your trim to go on the outside of your shiplap. Therefore, carefully remove your trim using a crowbar and putty knife.

Remove any nails and fill the holes with wood filler. Once the wood filler is dry, sand it down smooth, remove any dust with a tack cloth and paint the trim to match the color of the shiplap.
Step 5: Attach the Horizontal 1 x 4 to your Wall
Begin attaching boards to your wall by first attaching the horizontal 1 x 4. You will want to ensure that this board is perfectly level and that it allows for the right amount of space under it to fit your vertical boards.

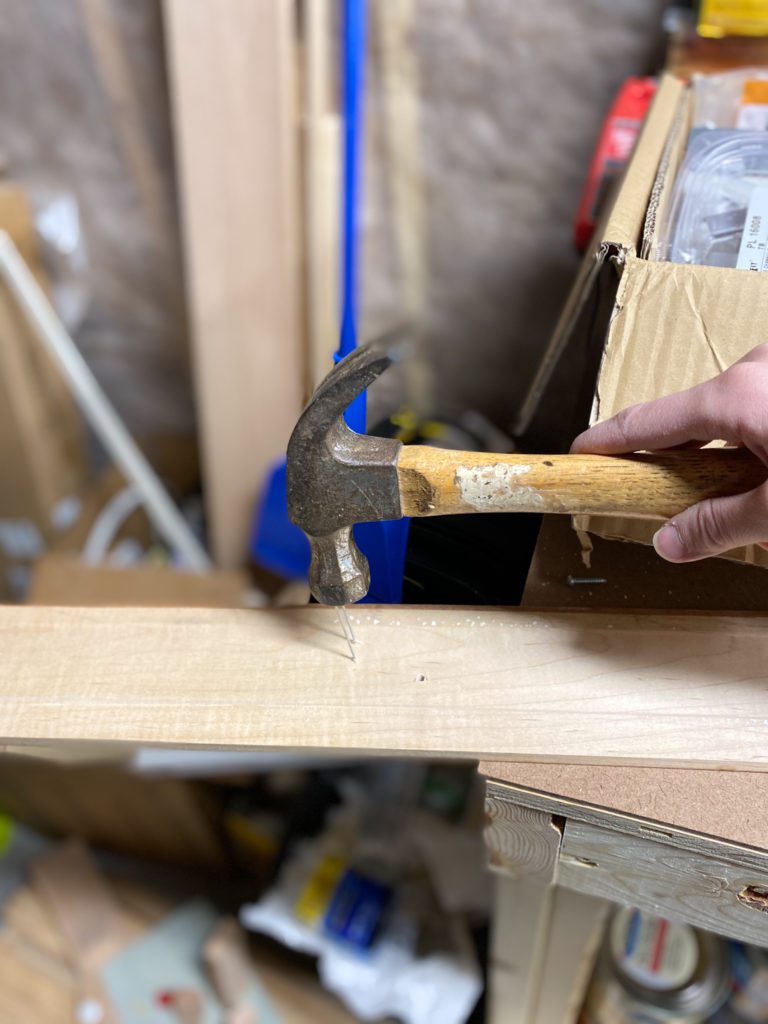
Make sure to find the studs and nail it into the studs with a nail gun.
Step 6: Attach the Vertical Shiplap Boards
Starting in the middle of the wall, attach the 1 x 6 boards to your wall. First place a board directly in the center. This will make sure that both your ends are even. We used construction adhesive and a nail gun since many of the boards wouldn’t be secured to studs.
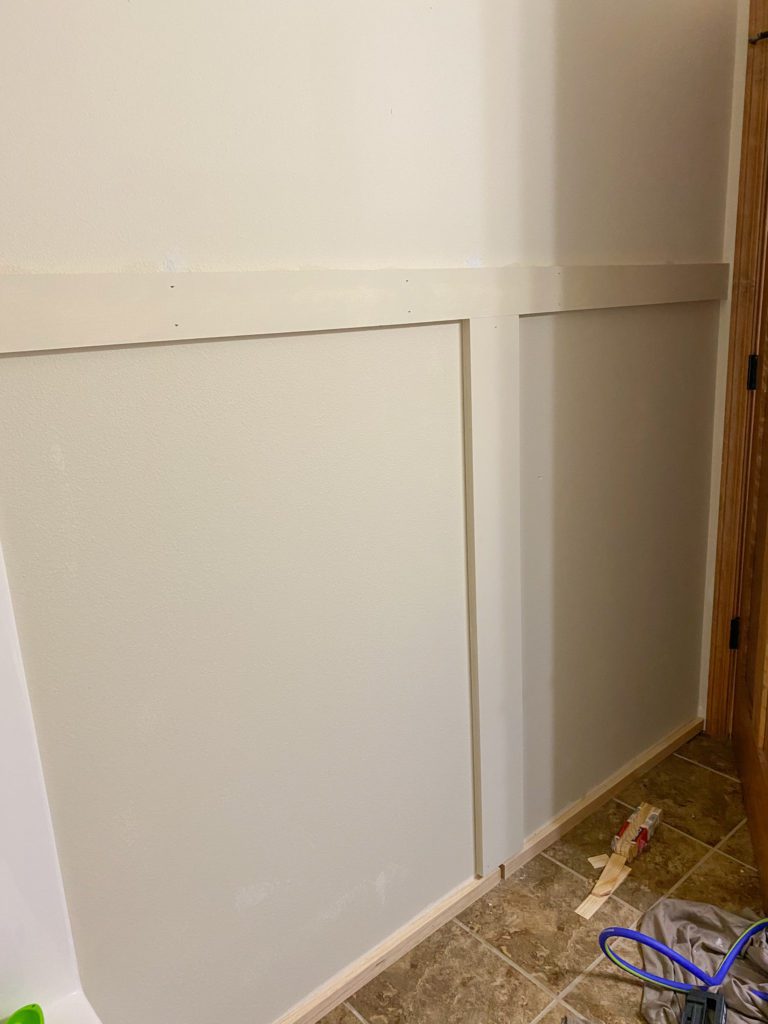
Since we had tile spacers handy, we used 1/8″ tile spacers to create the gap between the boards (since these are just standard boards, not real shiplap).
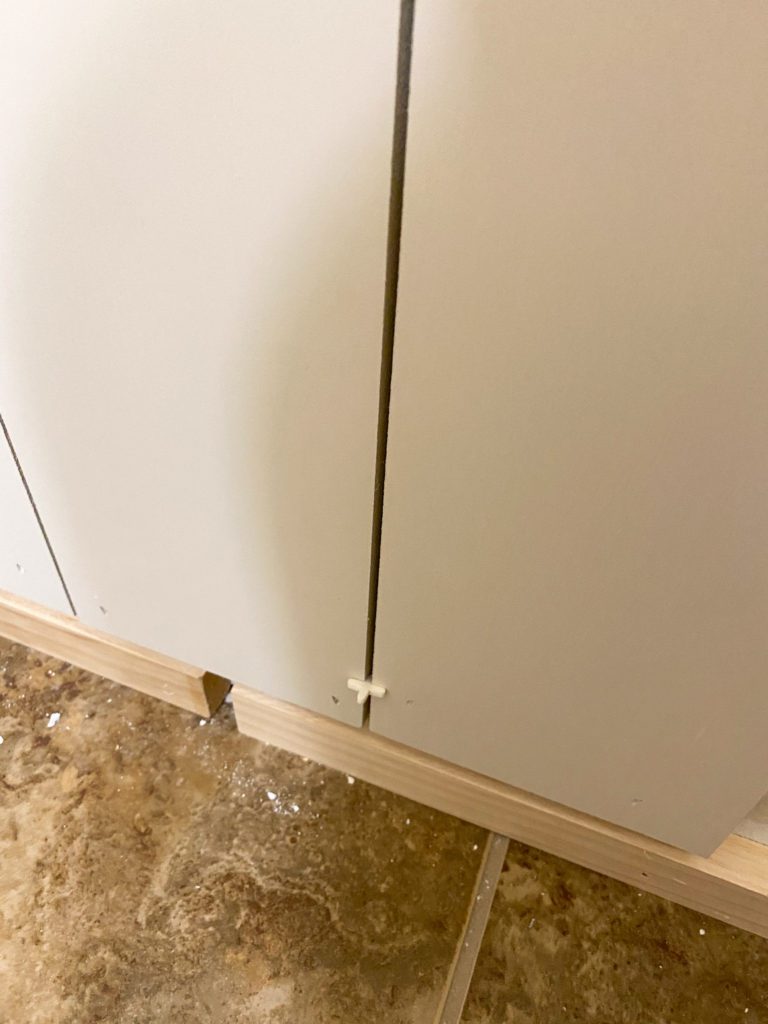
(We also added 1×2 wood boards to the bottom of ours simply to raise up the half wall a bit. This isn’t necessary. I just wanted it to be a bit taller.)
Step 7: Cut the Boards for the Ends as Needed
Chances are that you won’t get so lucky that your end boards will fit perfectly as is. If they don’t, you will want to cut them down with a table saw or jigsaw.
Mine fit almost perfectly. Therefore, I used a jigsaw since I only had to cut a little off and I needed to cut it at an angle (because walls are never exactly straight!).
Step 8: Attach the 1×2 Board to the Top of the Half Wall
Using a nail gun and construction adhesive, attach the 1×2 board above the 1×4 board to create a narrow shelf. This gives the half wall a nice finished look
Step 9: Caulk and Use Wood Filler on any Gaps or Nail Holes
My general rule is that I use wood filler on small holes or places I want to be able to sand down after it dries. I use caulk for long lines that I want perfectly smooth.
Therefore, I used wood filler to fill nail holes and gaps between boards in this shiplap wall.
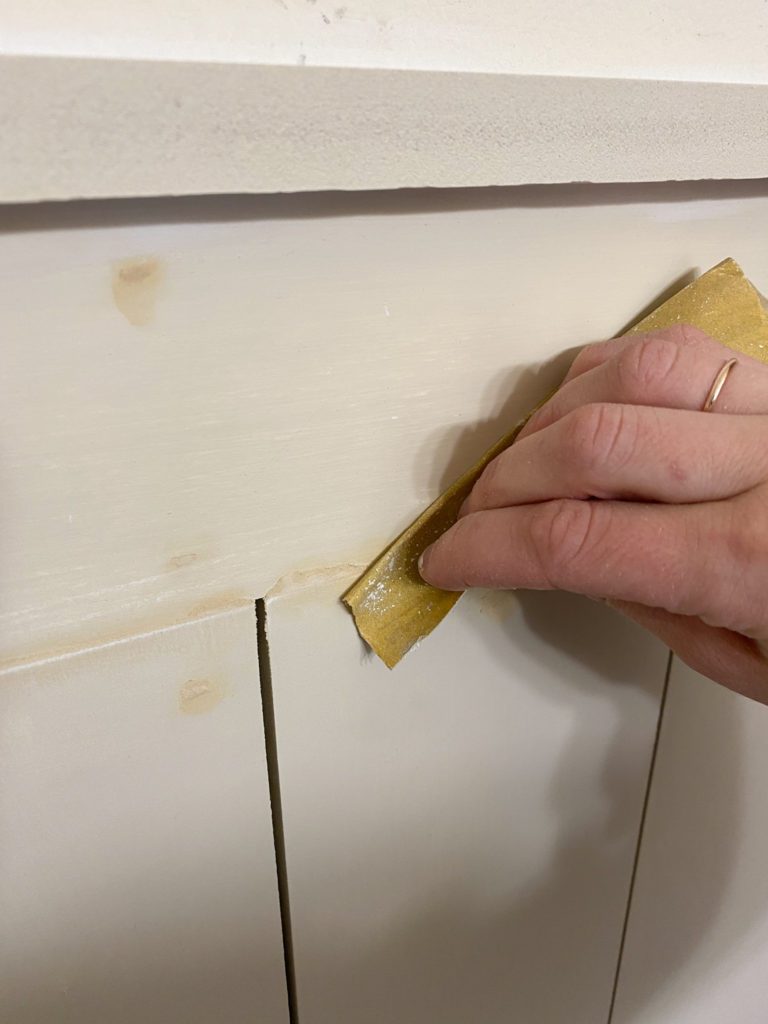
After the wood filler dries, sand it down smooth and remove any dust with tack cloths.
Apply caulk to seams like on the top of the 1×2.
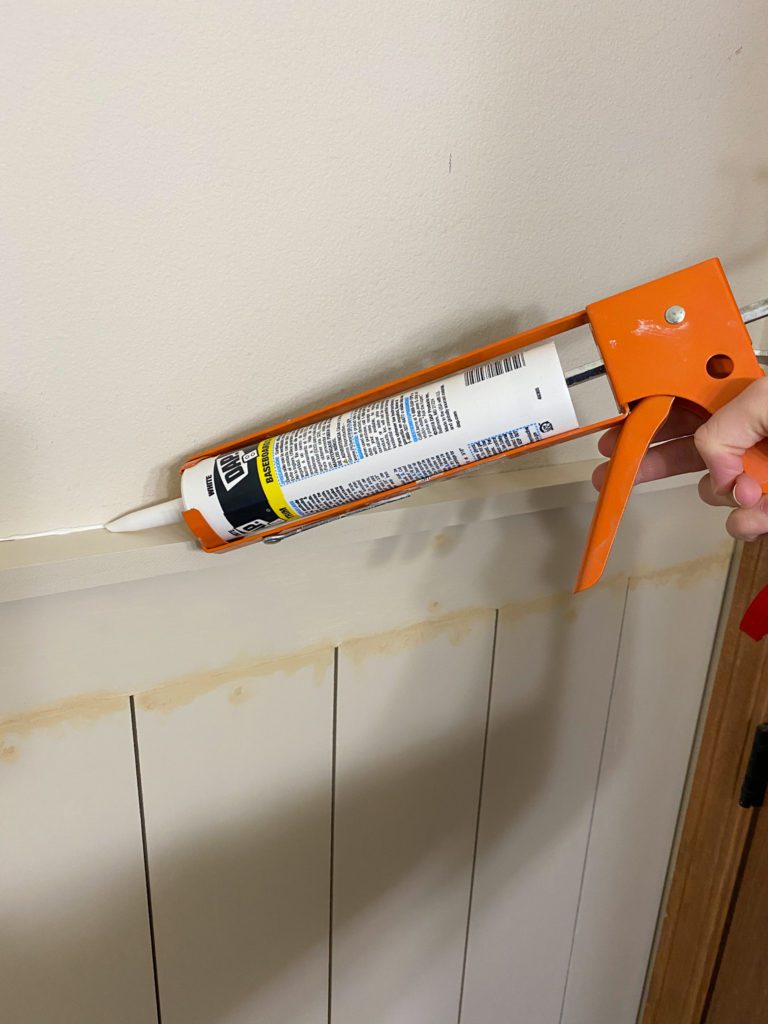
Use your finger to smooth out the caulk line so it’s nice and smooth.
Step 10: Apply Another Coat of Paint
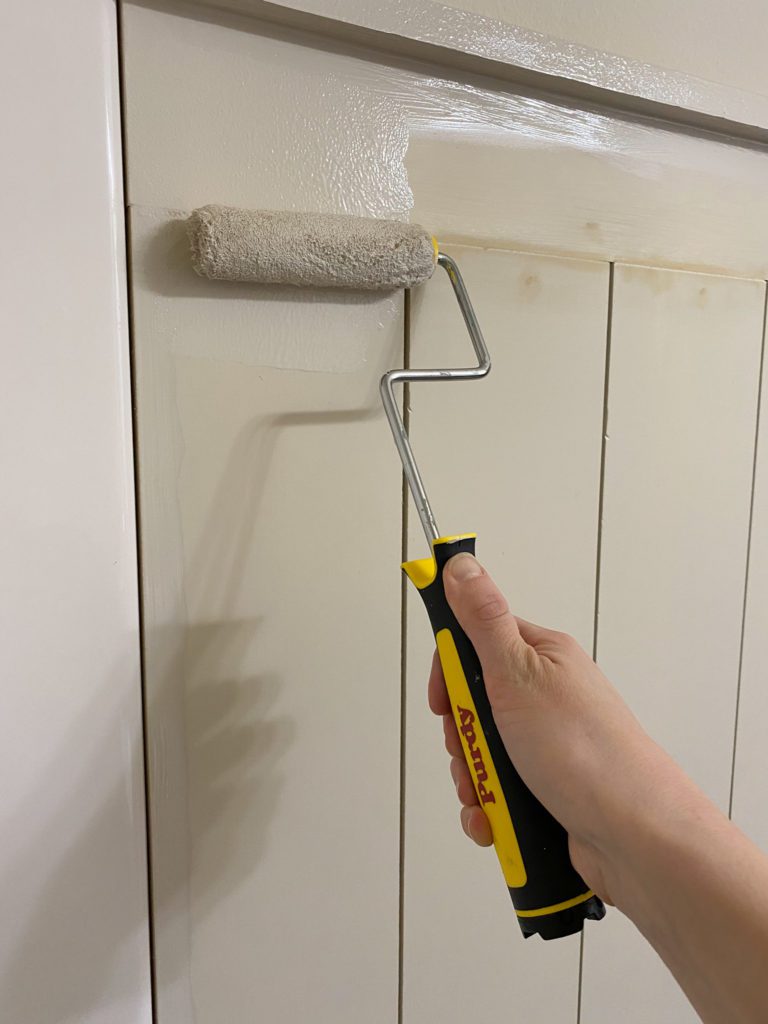
This coat will cover up the wood filler and caulk.
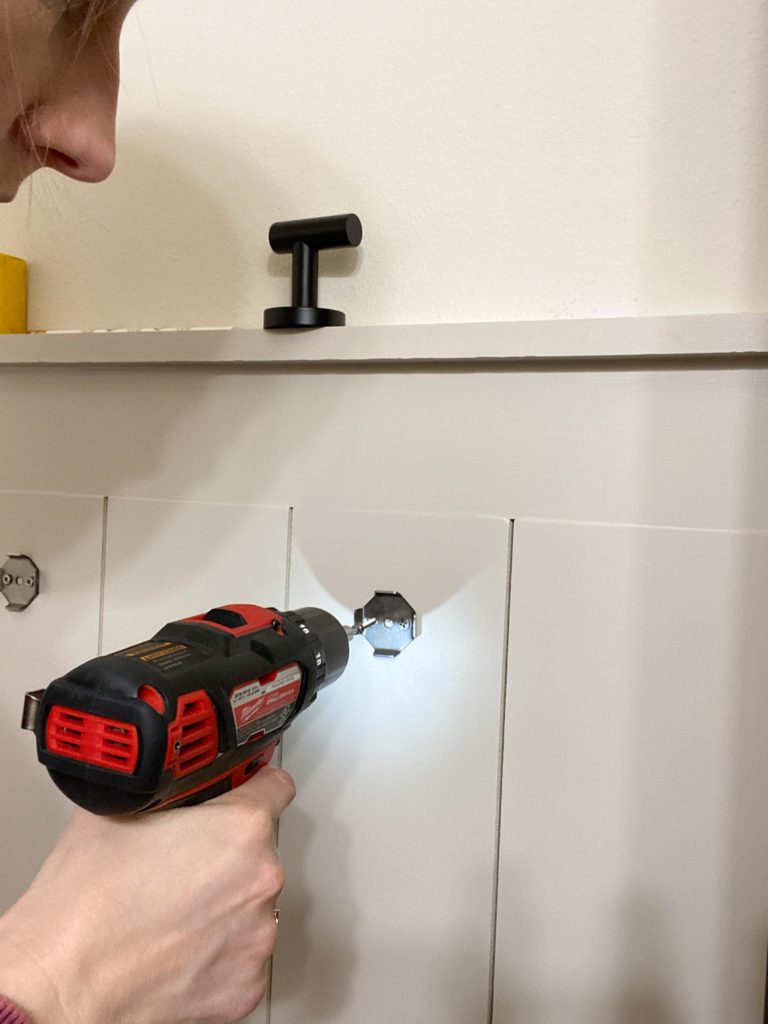
Step 11: Attach Trim & Towel Hooks
Don’t forget to add the trim back on, using a nail gun to attach it to the bottom of the boards.
This next step is optional but I chose to add towel hooks for my kids to put their towels on. This was simple. I just followed the instructions for how to install them, making sure they were level and centered on the boards.
Your Beautiful Vertical Shiplap Half Wall is Done!
What’s Coming Up in Week 4?!
Guess what arrived this week in a giant truck?? My tile! It’s gorgeous. Even better than I could have imagined. It makes me so happy. Here’s a little sneak peek for now.
I can’t wait to share with you next week all about our tiling adventure!
Please don’t forget to VOTE for me! You can vote DAILY. Thank you for your love and support!
Also, go check out what the other contestants are up to in their renovations!
Want More Home DIY Ideas?
Sign up for my emails here so that you always know about my new projects and DIY tips!
Want to check out an art deco color block wall? Head here to see that beauty!
Simple DIY bookends for kids’ rooms or gifts are here.
And who doesn’t love a $5 blanket ladder?!
Follow me on Instagram to stay in the know on this renovation and all my other home DIY projects!


4 Comments
Erin
Where did you get this shower curtain?? I love it so much!
admin
Thanks, Erin! I got it from Target. Here’s a link to it: https://rstyle.me/+vr4TtiK-4h0Ci7i1eKzASQ (affiliate). It’s gorgeous and has tons of great reviews too!
Pingback:
Pingback: