How to Update Ugly 70’s Spindles
You know when you walk into a house and this is what you see? 70’s SPINDLES!!!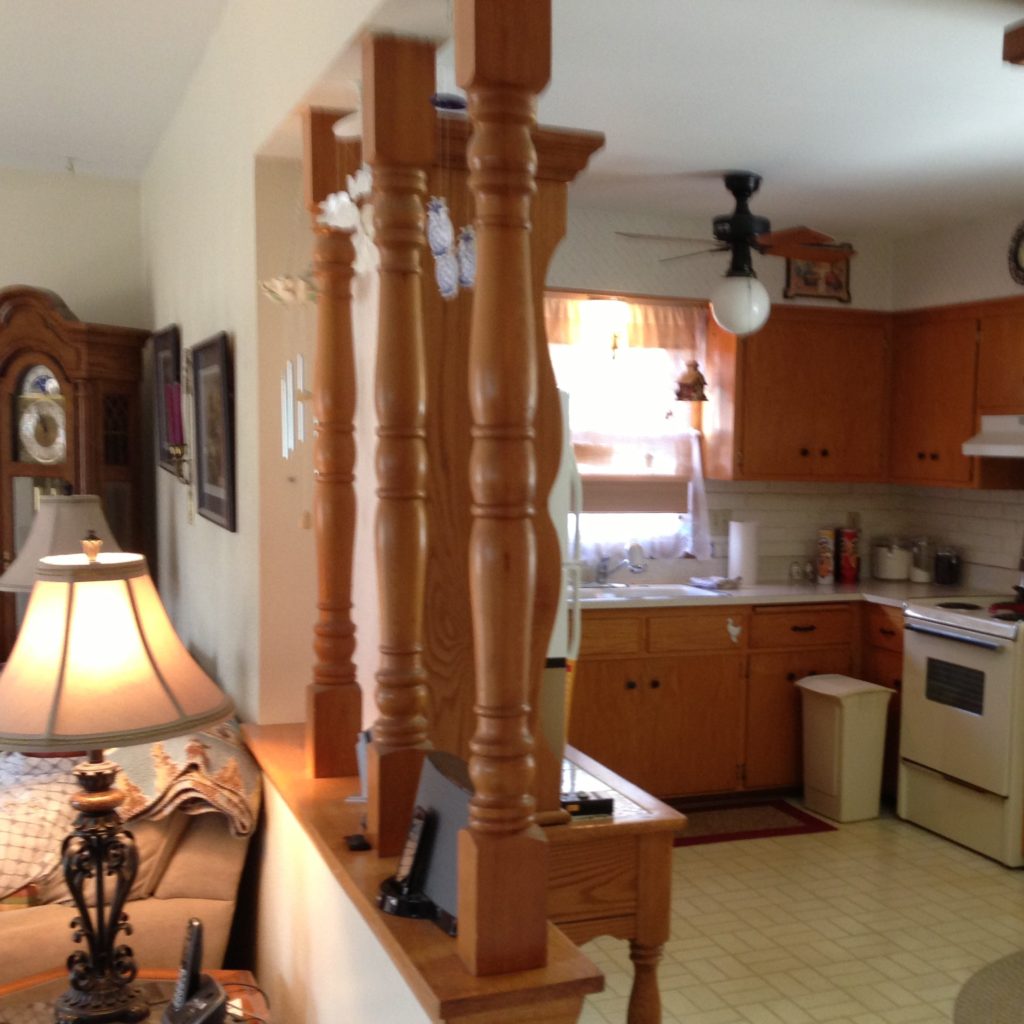
This was one of those things that I told my husband that we definitely needed to update because I just really dislike them. Turns out other remodeling projects took priority when we moved in and these drove me crazy for a few years (haha, yes, YEARS) until one day I randomly walked upstairs and my husband was ripping them out!! Hooray!! I think it was right in the middle of our huge kitchen renovation so I was surprised that we were taking on a new project but I couldn’t have been happier to see these ugly spindles go!
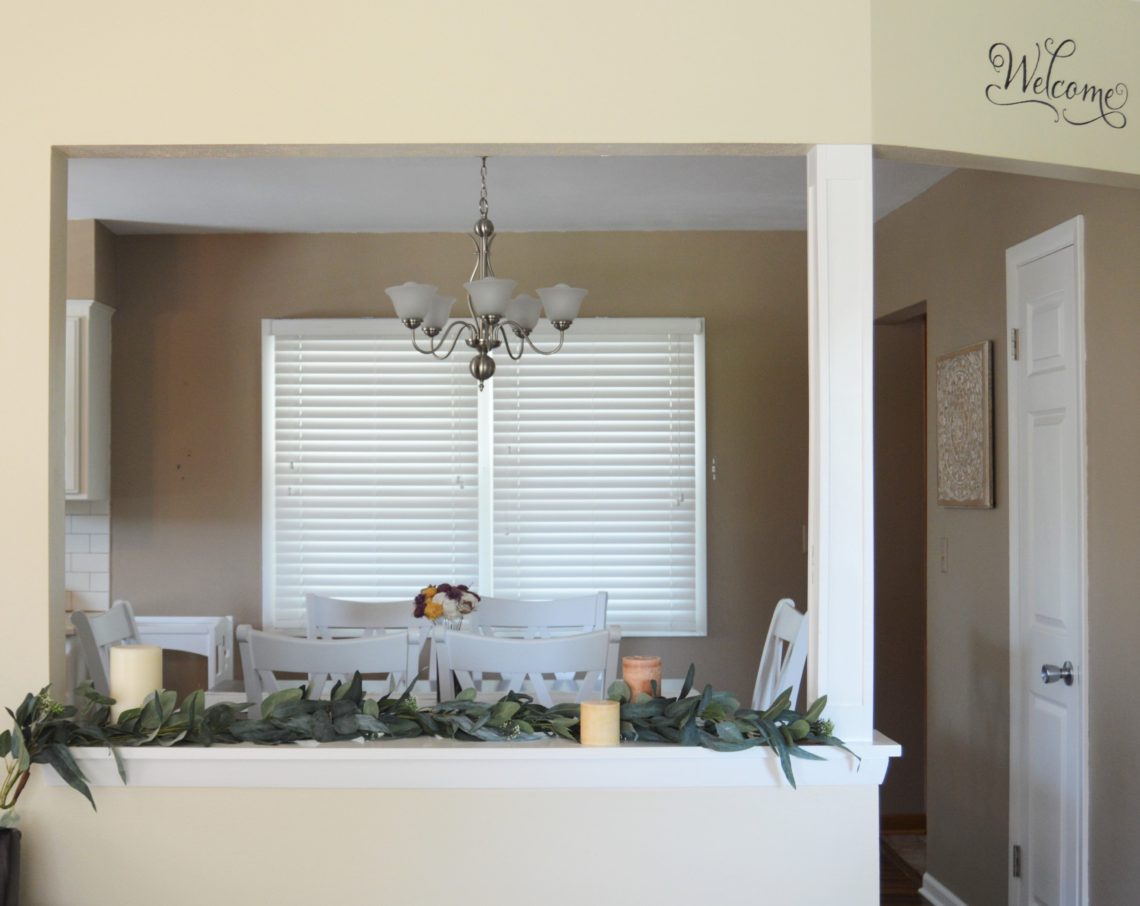
How we did it was surprisingly easy but we had a lot of discussion beforehand about exactly what to do with this awkward half-wall area. See below for the “after” shot – soooo much better! Open, clean, updated.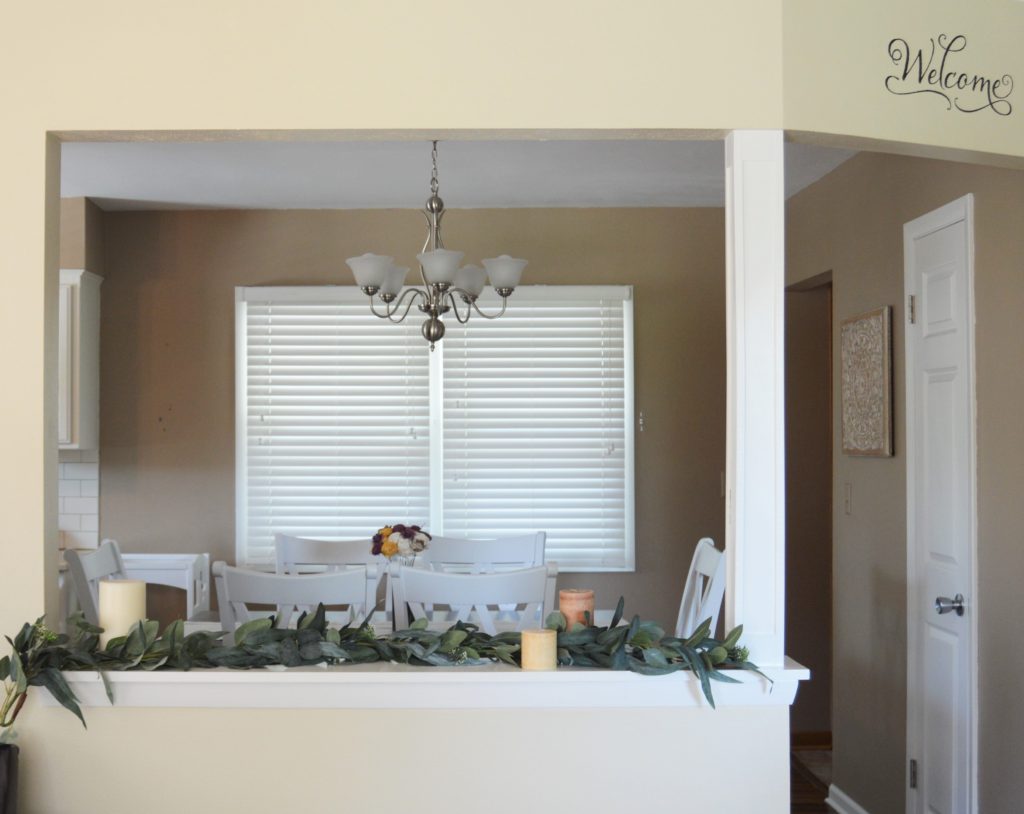
Easy (or fairly easy ?) steps below!
- Decide on your plan: My husband and I talked through numerous options for these 70’s spindles and half-wall. We considered 1) Completely taking out the half-wall 2) Replacing all the spindles with more updated square pillars 3) Leaving only the end pillar and updating it. Ultimately, we decided on #3 because even though I don’t love half-walls, it would have still looked awkward if we had removed it. It would have created a half open-concept/half not open-concept living room and kitchen/dining area. Also, leaving all the spindles in wasn’t an option in my mind since I think it just looks terrible that way – personal preference here. One other thing to consider is if your wall is load-bearing. This is important if you are deciding to tear down walls. Consult a professional if you don’t know because it’s not as simple as checking a few things and knowing for sure. Anyways, once you have a plan, and if it’s similar to mine ?, you can move on to action on it – #2 below!
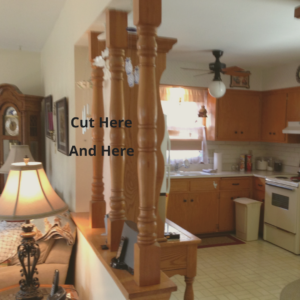
- Make two cuts in the middle of the spindles: This is important to do carefully so that you minimize any damage to the wall and ledge. Minimizing damage will make it easier for you in the end ? A Sawzall, otherwise known as a reciprocating saw, is the best tool to use for this job. Below is what it looks like in case you have no idea what I’m talking about.

 If you don’t have a reciprocating saw, you can also just use a hand saw. It will just take a little bit longer to do. Make two cuts towards the middle of the pillars. I forgot to take pictures of this part so I made a very low-tech visual below to help explain where to cut (ignore the low quality of this visual and just focus on where to cut – hah!).
 After you make these two cuts, the middle section will just come right out.
 - Fully remove the spindles: Now that you have the middles cut out, you can easily pull on the spindles to yank them out. Normally spindles are just toenailed in so you can pull them out with a little effort. Ours were pretty easy to get out.
- Use wood putty, drywall compound or spackle and a sanding block to smooth out all the surfaces: You’ll want to fill in any holes in the wood ledge with wood putty. Fill in any holes in the wall/top area with drywall compound or spackle. Drywall compound is best for large holes while spackle is better for small holes. Once these fillers are dry, sand over them with a sanding block to ensure a nice smooth finish.
- Create a new pillar around the one remaining end pillar: Now, you could fully remove this spindle and completely replace it OR you could do like we did and simply form a new, updated pillar around it. The way we did it was super inexpensive and still looks great! We cut 1/8 inch poplar plywood to create a square around the old spindle first. We nailed that in place. Then we bought pine trim to make the edges look nice. We cut the trim to size and glued it on the edges of the square pillar. Last step was to put in little squares of poplar plywood at the top of bottom of each side of the pillar. Once again, just to give it a nice, tailored look. We simply glued these in. See below for a close-up of those “squares” I’m talking about.
- Fill in any open “seams”: Sometimes all your poplar plywood and trim won’t fit together perfectly. That’s fine and normal. Fill in any seams/openings/gaps with wood putty. Sand as needed to smooth it out.
- Clean, prime & paint: This is your last step! Clean the surfaces with TSP to remove any dirt and grime. Then prime with Zinsser B-I-N Shellac Base Primer. This is a very thin primer but it’s great because it covers anything, not requiring you to sand surfaces. Consider putting on two coats if you don’t get good coverage the first time. Then choose your favorite semi-gloss white paint and paint it all to finish your project ? I used Behr paint and had them match the color of my windows and the trim in the rest of my kitchen. This makes it all tie together nicely.

 After you make these two cuts, the middle section will just come right out.
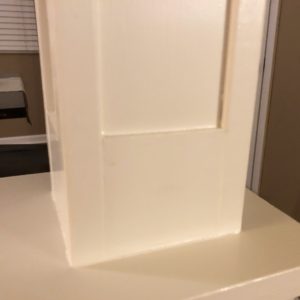
Feel free to reach out to me if you have any questions or want more details – but hopefully these steps will help you get rid of those ugly 70’s spindles without too much effort or money! Below is the Before/After final picture.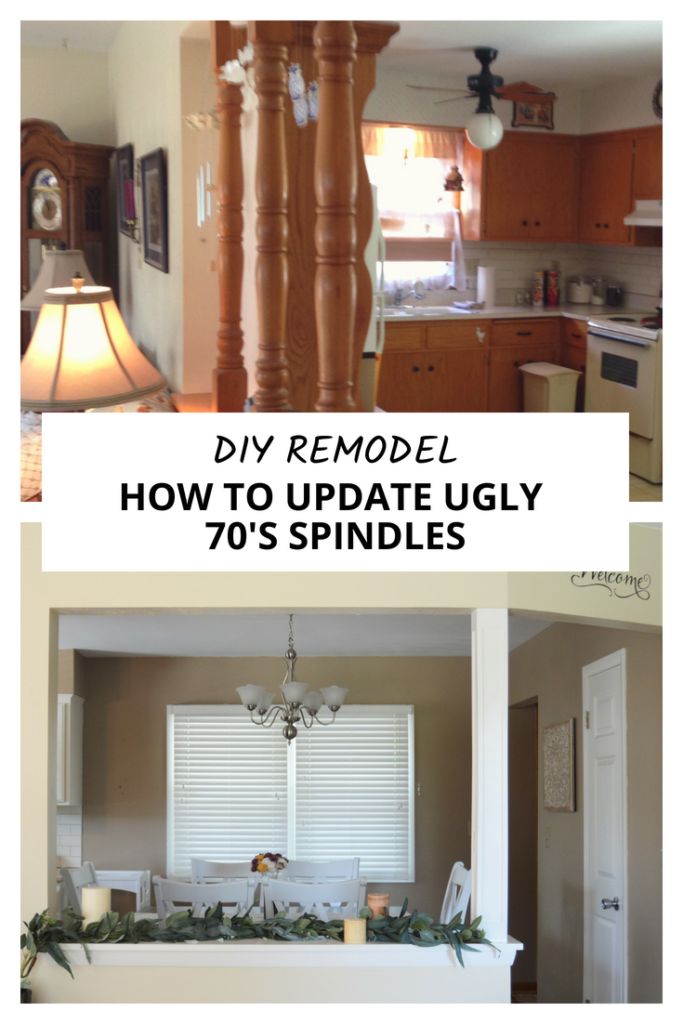
2 Comments
Cathy Duncan
I love it!! It is such an open welcoming look.what an improvement.
admin
Thanks! We definitely love the change too 🙂