How to paint nightstands AND get a super smooth finish with Purdy products!
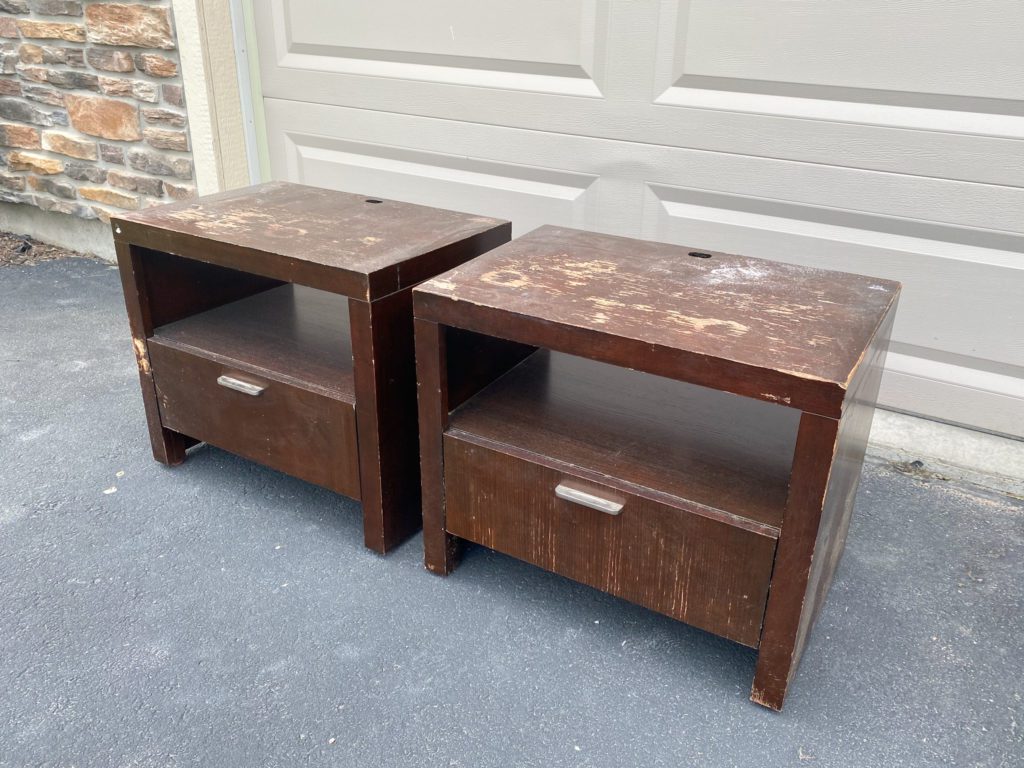
I found the nastiest nightstands. They were really damaged. And of course they had super sticky messes in the drawers – yikes! I knew I could save them from the dump though and turn them into something I’d love. In this tutorial I’ll show you how to paint nightstands, turning nasty dump-bound furniture into gorgeous additions to any bedroom.
Thanks to Purdy for sponsoring this post. I received compensation but all opinions stated here are my own. I’ve loved and owned Purdy products for a very long time!
Tools & Materials
- Purdy 2″ Angled Nylox Cub Paint Brush
- Purdy Revolution Jumbo Mini Roller Frame
- Purdy White Dove 1/4″ Nap Mini Roller Cover
- Purdy Paint Pail
- Purdy Premium Folding Multi-Tool
- Sherwin-Williams ProClassic Interior Acrylic Latex
- Sherwin-Williams Extreme Bond Primer
- Minwax Stainable Wood Filler
- Krylon Fusion All-in-One Spray Paint in Matte Black
- Tack cloths
- TSP substitute cleaner, water, & rag
- Random orbital sander with 220 grit sandpaper
- Bamboo floor mat
- Wood scissors
- Drill or screwdriver
Looking to purchase Purdy paint brushes, rollers, and other products for an upcoming project? Head HERE to see what retailers near you carry Purdy products.
Time to Complete
This project took me about 4 days to complete, given dry times and working on other projects at the same time. Active work time was about 5 hours.
How to Paint Nightstands
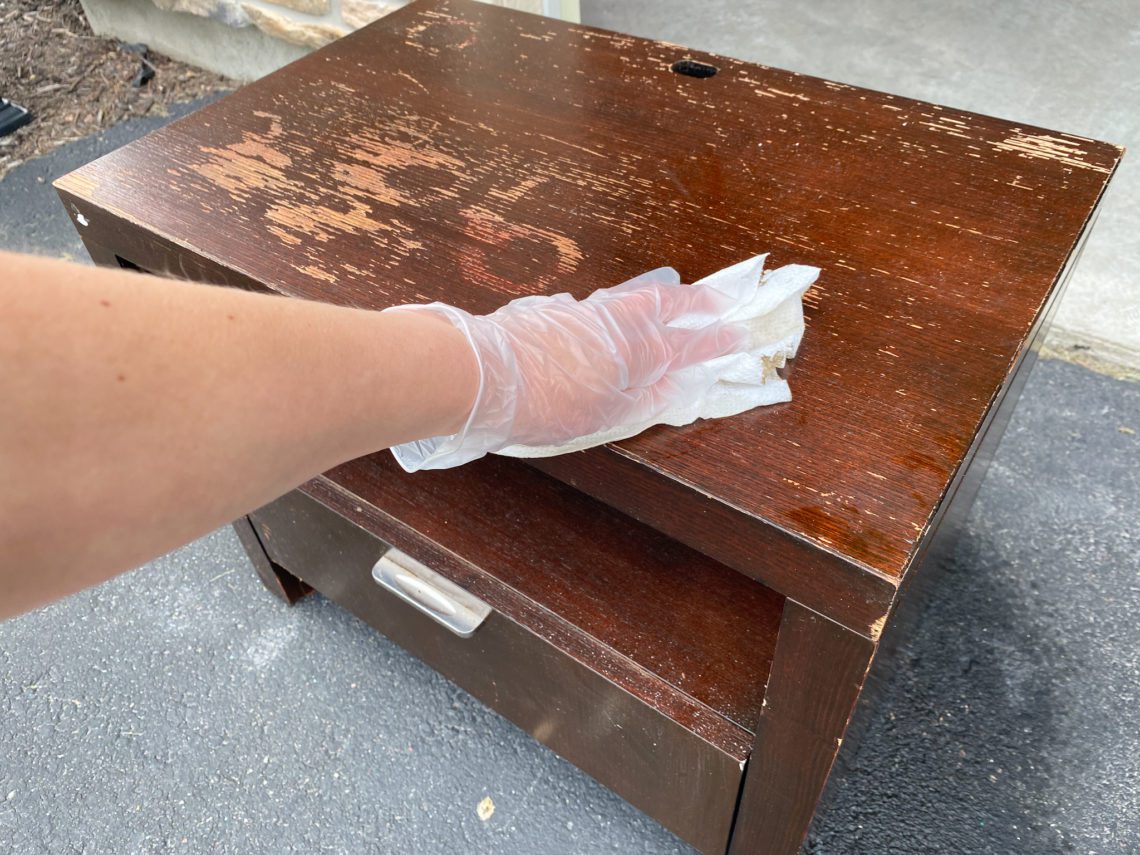
I found these nightstands at a rummage sale for only $10! When I first looked at them, I assumed they were cheaply made but once I picked them up to haul them to my car, I discovered that they are very heavy and well-made. They just needed a lot of cleaning and refinishing!
STEP 1: Clean nightstands with TSP substitute cleaner.
TSP substitute cleaner is great for cleaning furniture and walls before painting them. It removes all the dirt and grime from the surface. Clean the nightstands well and then allow them to fully dry.

STEP 2: Remove hardware and sand with a random orbital sander.
Removing hardware is normally really easy. The drawer pulls are often held in with screws on the inside of the drawer. Remove the screws with a drill or screwdriver. Place all hardware in a plastic bag so you don’t lose it.
Next, sand down the entire piece with a random orbital sander. Since you’re painting the nightstands and not staining them, you don’t have to remove all the finish. You just need to scuff sand it so that it is smooth and the paint has something to stick to. I recommend using 220 grit sandpaper unless the surface is very rough – then consider using 120 grit first and then 220 grit to finish the piece.
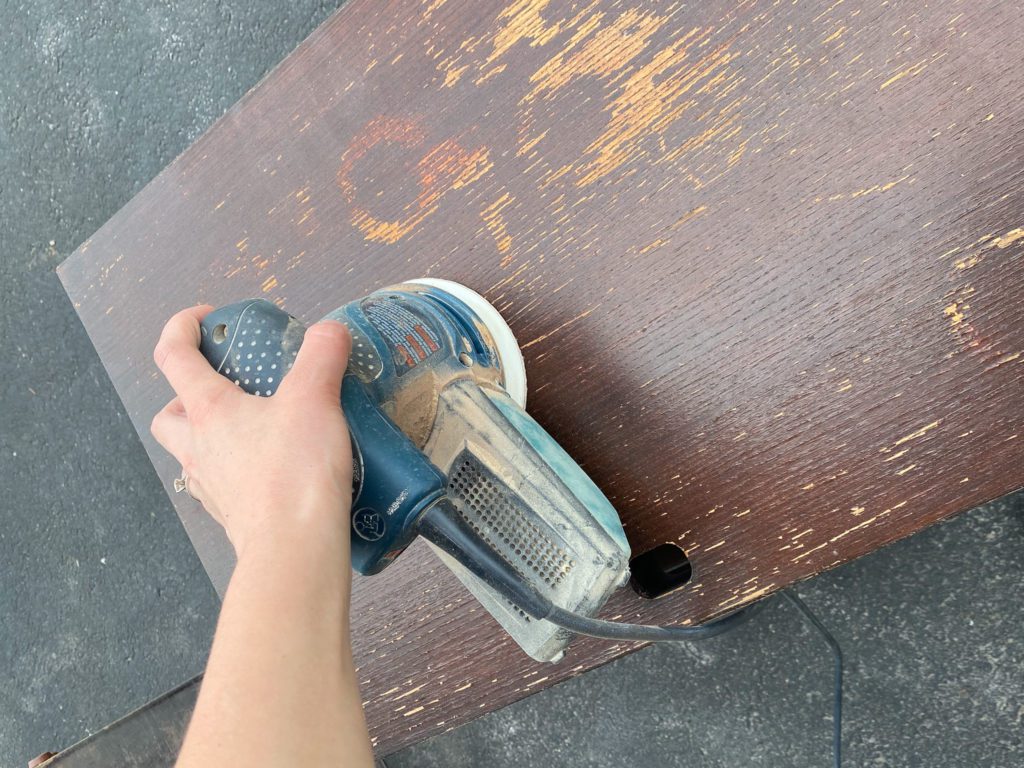
Clean off the sanding dust with a tack cloth.
STEP 3: Cut and glue bamboo mat pieces to the front of the drawers.
One of the best ways to add interest to furniture is by adding texture to the front of the drawers. For these nightstands I decided to try a fluted look using a bamboo floor mat. In the past I’ve created a fluted look using pole wrap, but pole wrap is quite expensive so I decided to try this bamboo mat for a more budget-friendly option.
First, cut the bamboo mat to size using a wood scissors.
Then apply it to the front of the drawers using wood glue. Place clamps and heavy objects on it to keep it tight to the drawer fronts while it dries.
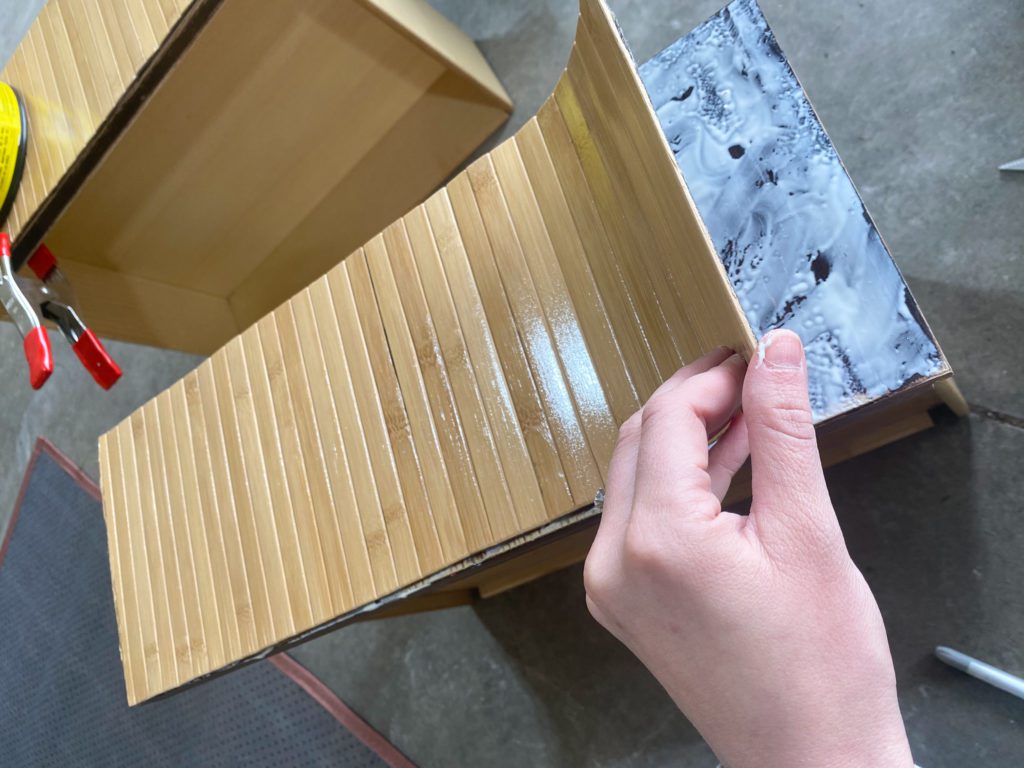
Allow glue to fully dry.
STEP 4: Apply wood filler to holes and scratches.
Most old furniture has some scratches and nicks in it. Wood filler is an easy way to fill them in and get a smooth surface to apply paint to.
I used Minwax Stainable Wood Filler and applied it using a Purdy Premium Folding Multi-Tool. This multi-tool is great for pushing wood filler into holes and smoothing out the wood filler.
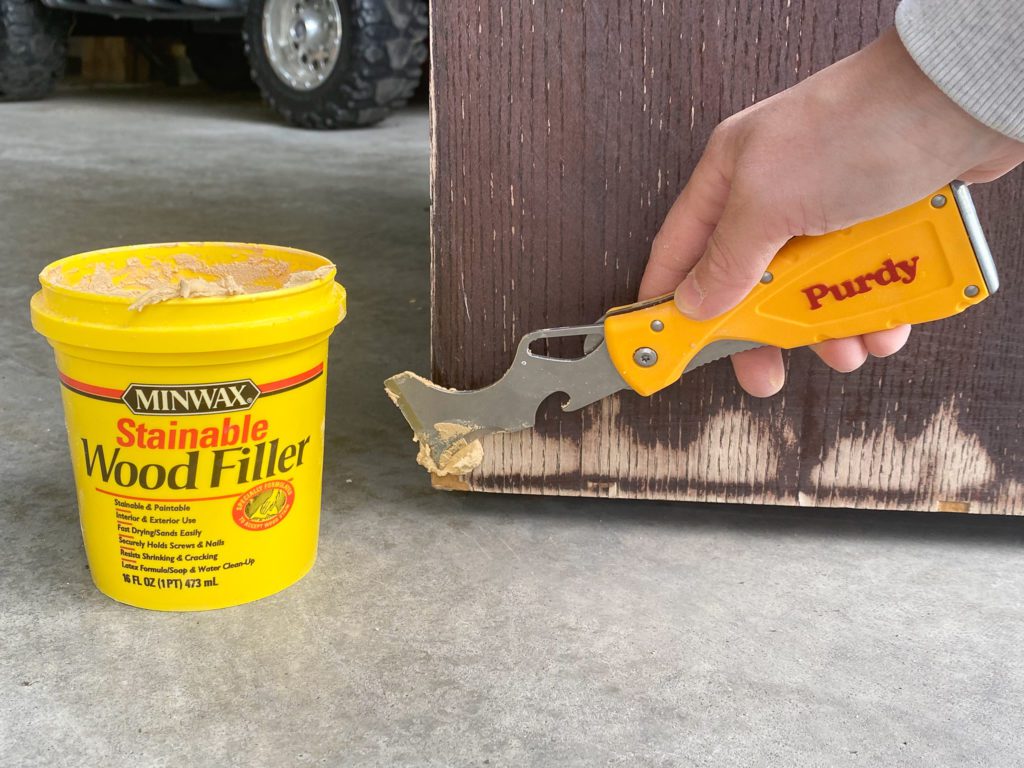
Give the wood filler time to dry. Then sand it down with your random orbital sander until the surface is perfectly smooth. Remove sanding dust with a tack cloth.
STEP 5: Apply primer.
Next comes the best part: painting! I love the painting steps because this is when I really start to see the piece transform.
First I applied a primer, Sherwin-Williams Extreme Bond Primer, which has great bonding capabilities so it adheres well to nearly any surface.
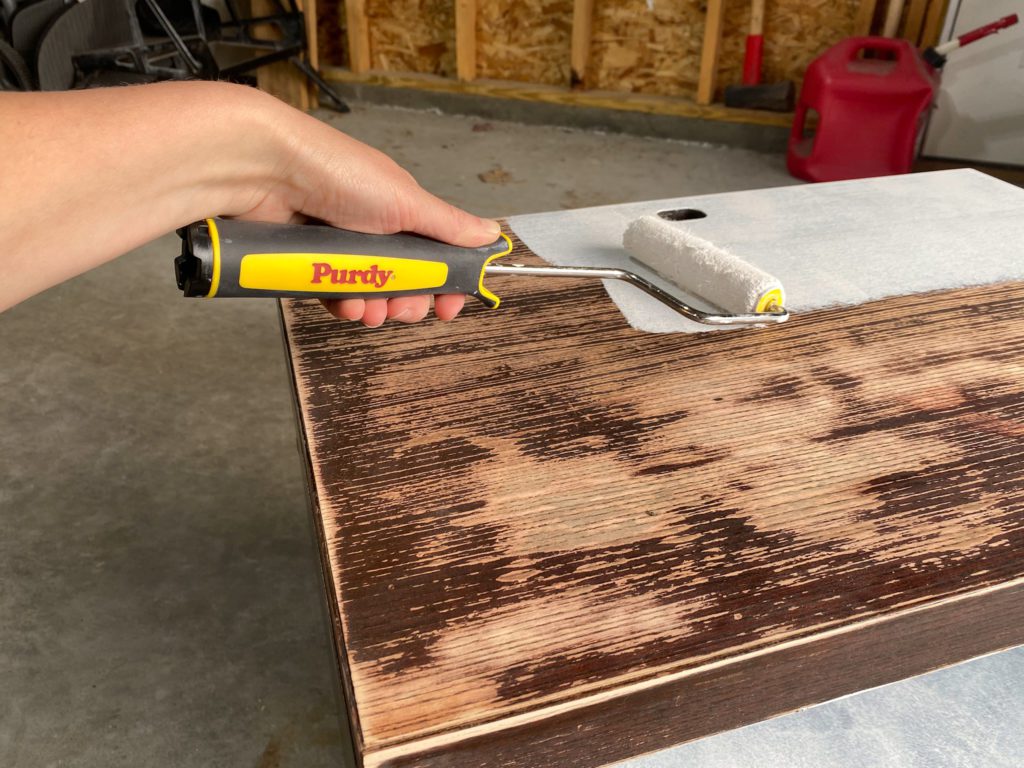
It’s important to use the right tools when applying the primer. You want to get a smooth finish on the first coat and every coat thereafter.
My go-to paint application products for furniture are:
- Purdy 2″ Angled Nylox Cub Paint Brush: This paint brush has super soft bristles so it doesn’t leave brush stroke marks in your paint. Rather, it leaves a super smooth finish. I have about 5 variations of this Nylox brush and love them all! The cub brush with a short handle is really useful for getting into small spaces.
- Purdy Revolution Jumbo Mini Roller Frame and Purdy White Dove 1/4″ Nap Mini Roller Cover: This mini roller is the perfect size for painting furniture. This roller cover has a short nap (1/4″) which is great for leaving a smooth finish. The shorter the nap, the smoother the finish you get.
- Purdy Paint Pail: This pail is SO handy! It has a magnet that holds your brush and it has a hook for your roller. Also, it has various ways you can easily hold it.
You only need one coat of primer. Don’t worry if it doesn’t cover well – that’s not the purpose of a primer.
Let the primer dry fully before moving onto the next step.
STEP 6: Apply paint
When painting furniture, it’s important to choose a paint that is durable and self-leveling. One great paint option is Sherwin-Williams ProClassic Interior Acrylic Latex. I got it tinted to a beautiful custom green color.
I used the same paint application products for the paint as I did for the primer: a Purdy 2″ Angled Nylox Cub Paint Brush, a Purdy Revolution Jumbo Mini Roller Frame, a Purdy White Dove 1/4″ Nap Mini Roller Cover, and a Purdy Paint Pail. The paint pail has removable liners to make it really easy to switch between paint color or between your primer and paint coats.
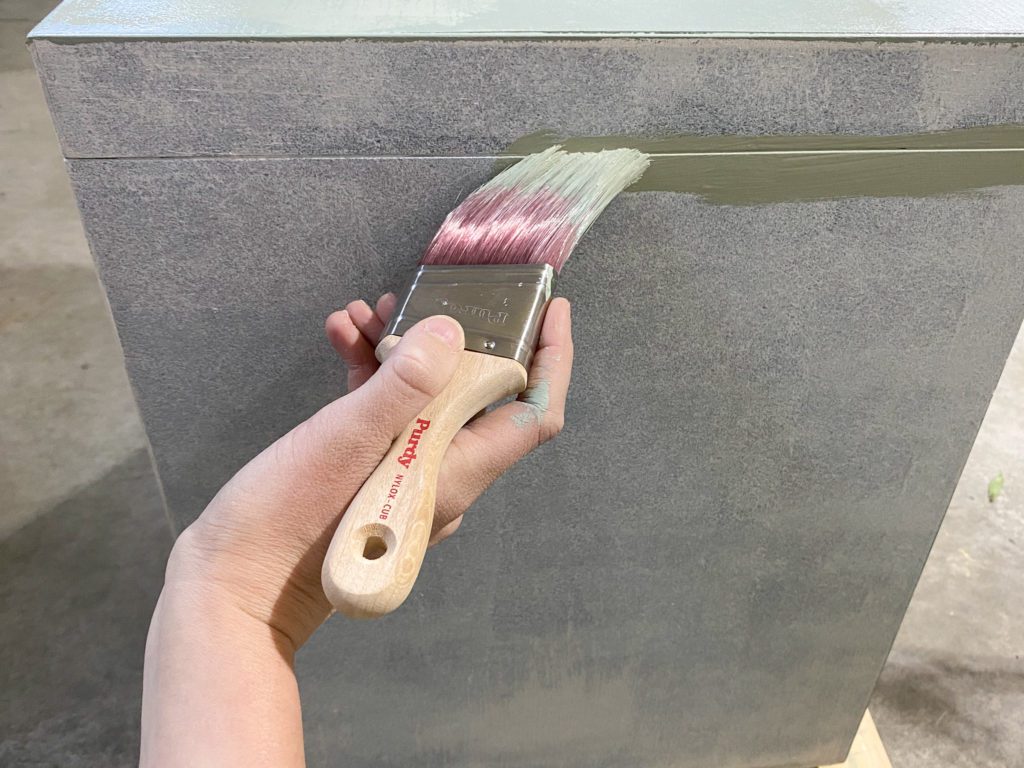
The brush gets into all the crevices while the roller speeds up the process for the larger surface areas.
Allow the paint to fully dry. Then apply a second coat. No topcoat is needed for this type of paint.
STEP 7: Spray paint hardware
Hardware, like drawer pulls, are very easy to update with just spray paint. I had these gold drawer pulls that I decided to spray paint matte black for these nightstands.
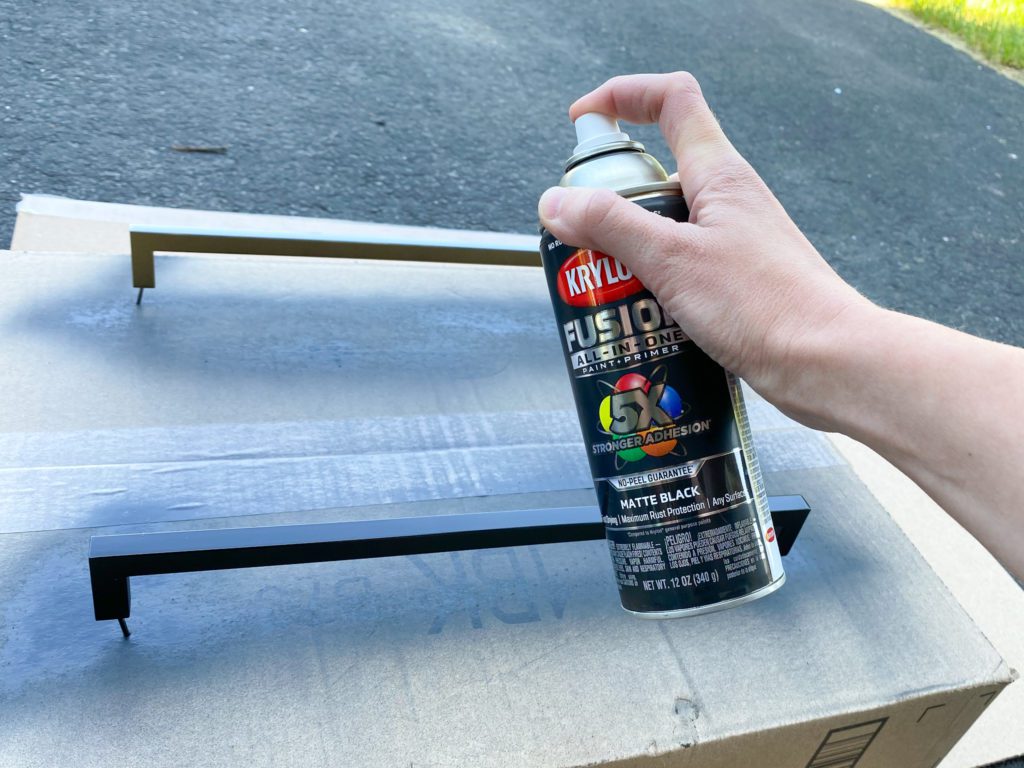
I used Krylon Fusion All-in-One Spray Paint in Matte Black. It’s great because it’s a paint and primer all in one. Also, you only have to wait one minute between coats, which makes for a quick paint job.
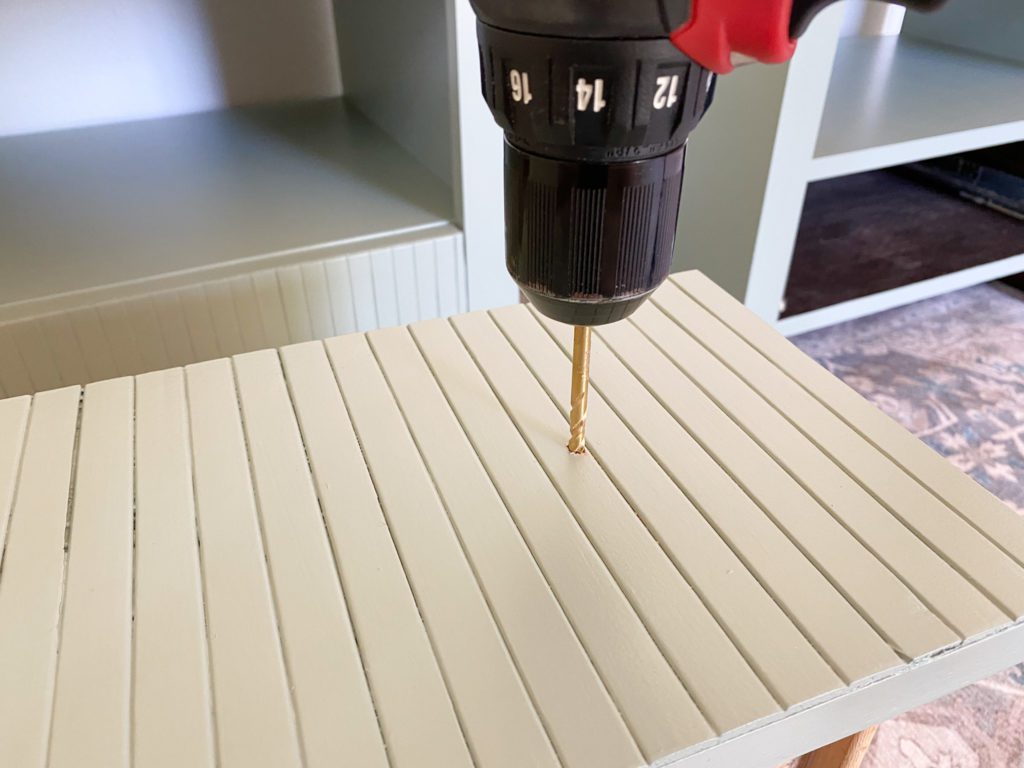
Allow them to fully dry and then install them onto the drawers, drilling new holes for them and securing them with screws from inside the drawer.
Then you’re done! Put the drawers back in and set them up in the bedroom of your choice. Enjoy!
The finished nightstands!
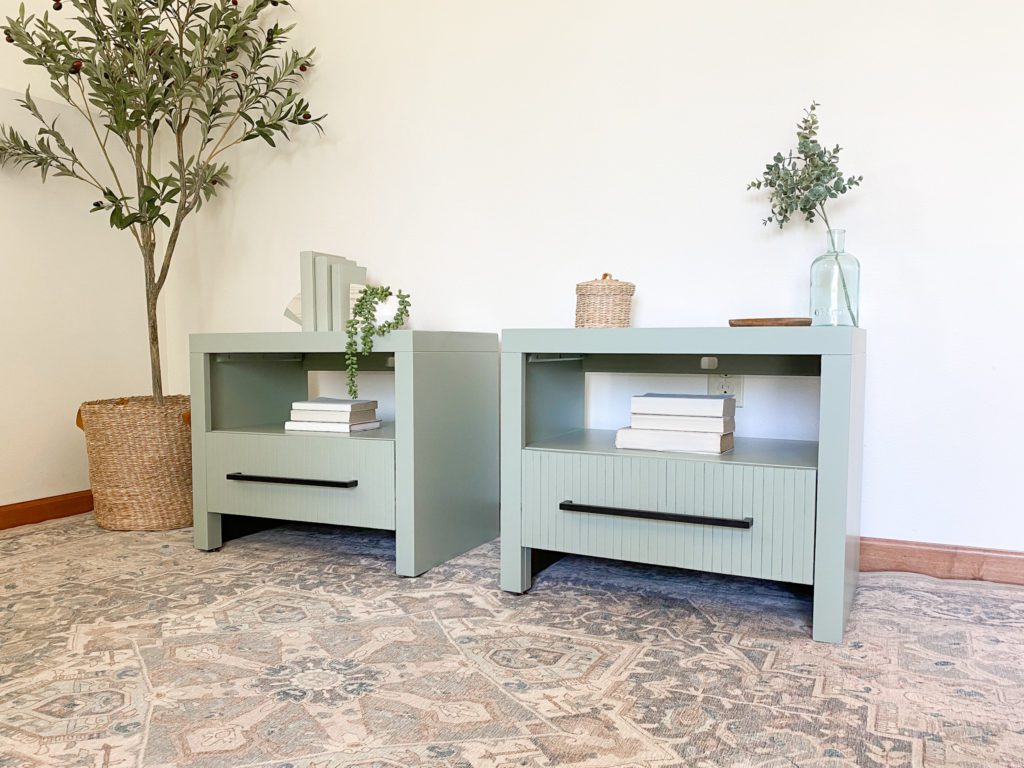
I love how they turned out. They definitely look 100% different than they did when I first purchased them at the rummage sale.
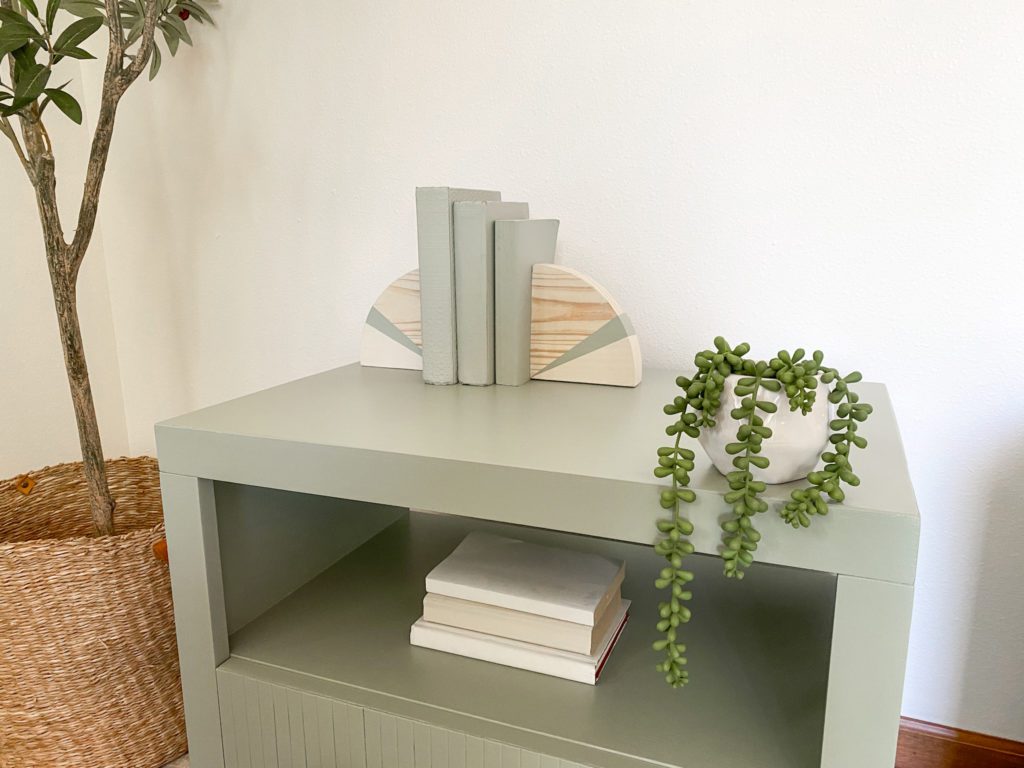
And check out that super smooth finish! If you do the proper prep work and use the right paint application products, you can easily achieve this smooth finish too.

Want to see more amazing furniture flips?
Check out one of my mid-century modern dresser flips HERE.
Head here to see an Ikea dresser turn into a GORGEOUS fluted dresser! (and bonus: learn how to clean paint brushes!)
Ready to purchase Purdy products for your next furniture refinishing project? Head HERE to see what retailers near you carry Purdy products.