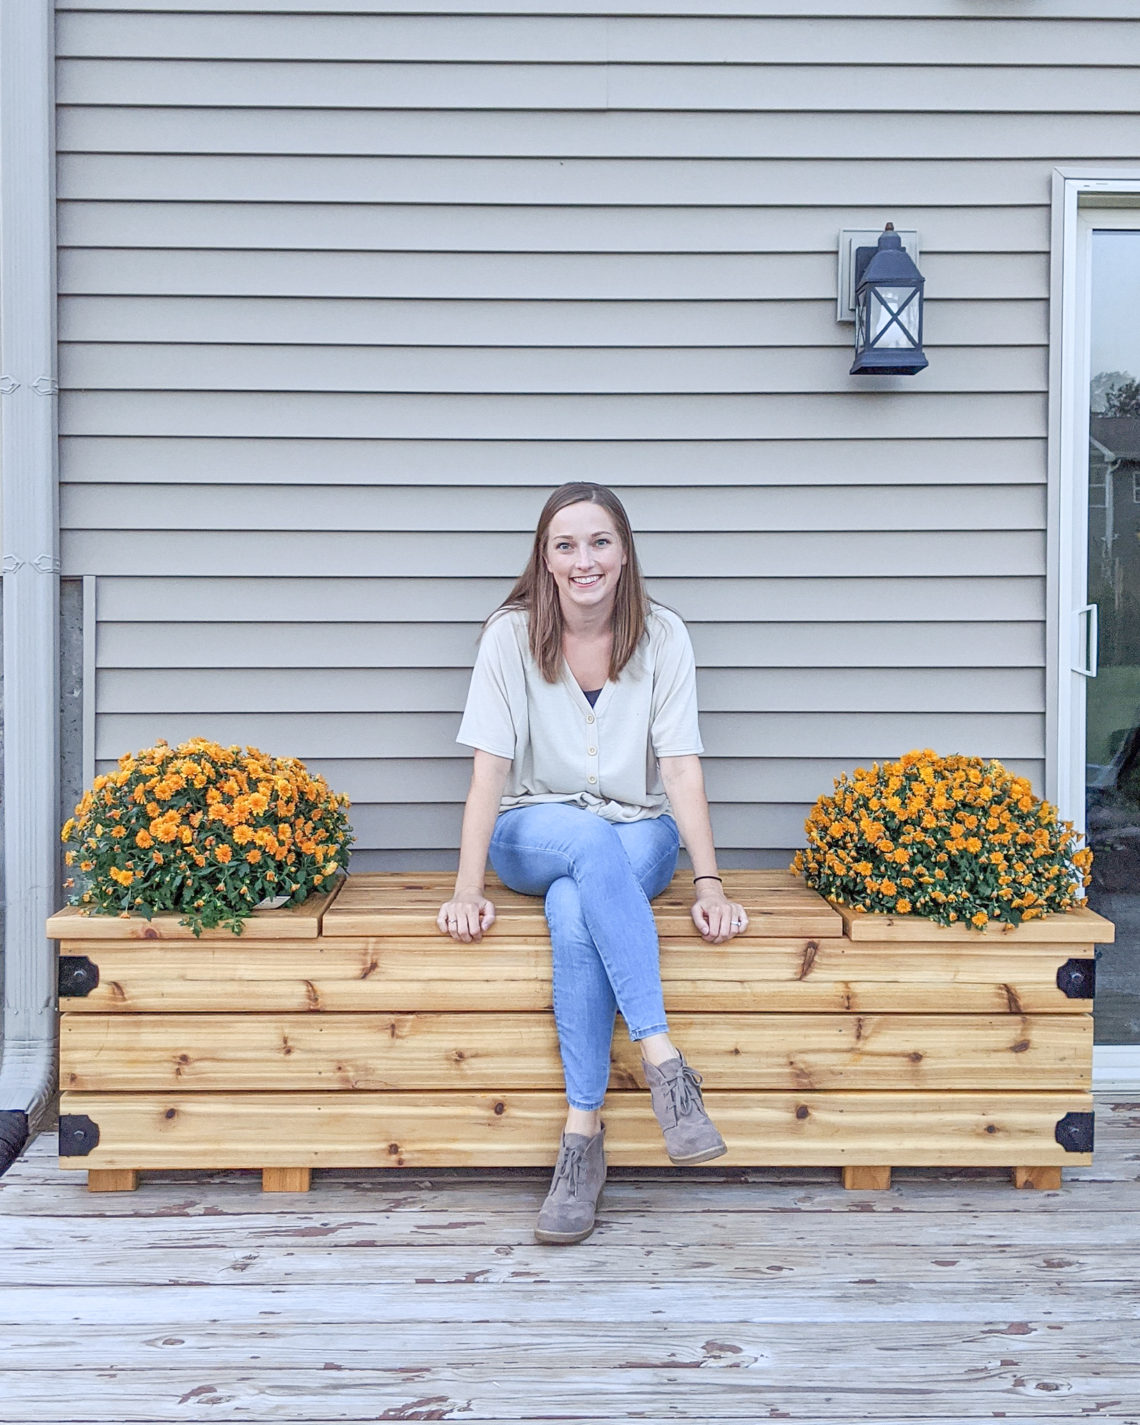
How to Build a Simple and Beautiful Outdoor Storage Bench
If you’re anything like me, your outdoor spaces aren’t exactly beautiful yet. Kid’s toys littered my lawn and deck. I decided to solve the problem by building a functional yet beautiful outdoor storage bench. It also doubles as a planter! It solves the problem of toys being everywhere while also adding to the beauty of the space. Here’s how I did it in an easy step-by-step tutorial.
Thanks to National Hardware for sponsoring this post. I received compensation and free product from Spectrum Brands but all opinions stated here are my own. This post contains affiliate links which means I may get a small commission off any purchases made from my links. It’s no extra cost to you.
What type of wood should I use for outdoor furniture?
Whenever you are making something that will sit outside, you will want to make sure that you are using the right materials for outdoor conditions.
For outdoor projects, I typically choose either pressure treated lumber or cedar. There are more expensive options available but I have not had a need to use those yet.
Between pressure treated and cedar, pressure treated lumber is less expensive. However, it does not look as nice as cedar and you need to wait months (sometimes up to a year) for the wood to dry before you can stain or paint it. Cedar is more expensive but it looks beautiful and can be painted or stained right away.
I chose cedar for my project since I wanted to stain it right away and I wanted it to be a piece of furniture that I keep for a long time. You could use cedar or pressure treated lumber for my plans.
What about screws? Make sure they are screws specifically made for exterior use. Basically anything you put outside needs to be specially treated for outdoor wear or it will rust, corrode, warp or fade.
Sign up here for my emails so that you are always alerted when I post new projects!
Materials & Tools
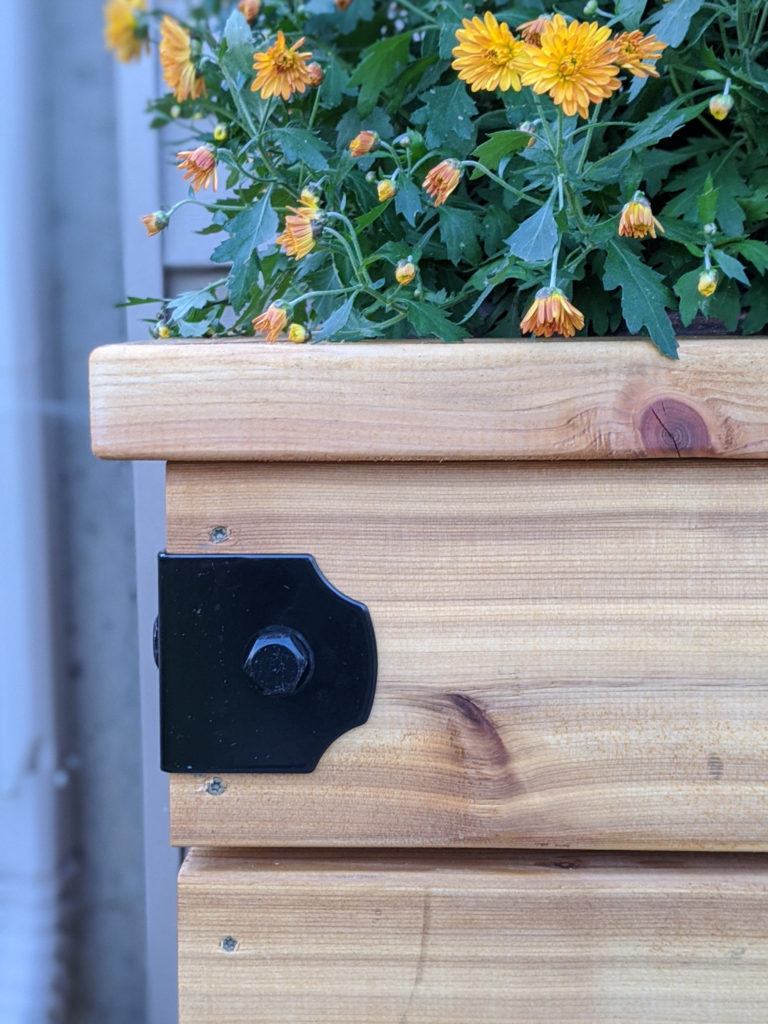
- 8 National Hardware Decorative Angles – Hartley Collection
- 16 Galvanized & Black Powder Coated Lag Screws
- 8 2″x6″ 8′ Cedar Boards
- 8 2″x4″ 8′ Cedar Boards
- 1 1″x4″ 4′ Cedar Board
- Miter Saw
- Measuring Tape
- Pencil
- 2 1/2″ Exterior Screws (approximately 120 screws)
- 2″ Exterior Screws (approximately 15 screws)
- Gorilla Wood Glue
- Drill
- 9mm Ratcheting Wrench
- Cabot Australian Timber Oil: Natural
- Purdy White Bristle Extra Oregon Brush
- Mineral Spirits
Time to Complete
It took me about 7 days to complete it but you could do it in 2-3 days since you must allow 24-48 hours for the timber oil to dry.
Instructions
STEP 1: Cut boards to proper length using a miter saw
| Label | # | Cut from | Length | Placement |
| A | 6 | 2″ x 6″ | 76″ | Front and Back of Base |
| B | 12 | 2″ x 6″ | 15″ | Sides and Braces for Base |
| C | 8 | 2″ x 4″ | 18 3/4″ | Legs |
| D | 4 | 2″ x 4″ | 12″ | Leg Braces |
| E | 4 | 2″ x 4″ | 15 1/2″ | Shelves for Pots |
| F | 5 | 2″ x 4″ | 38 1/4″ | Lid |
| G | 2 | 2″ x 4″ | 14″ | Lid Brace |
| H | 4 | 2″ x 4″ | 19 1/4″ 45 degrees | Top of Planter: Front/Back |
| I | 4 | 2″ x 4″ | 18 1/2″ 45 degrees | Top of Planter: Sides |
Make sure to cut off the ends of the boards before you start. This is necessary because the ends are not always cut straight at the lumber yard.
STEP 2: Apply Cabot Australian Timber Oil – Natural to all six sides of each board.
You will want to make sure that you are using the proper brush for application of this product. I recommend using a Purdy White Bristle Extra Oregon brush that is made specifically for oil-based paints, stains and oils.
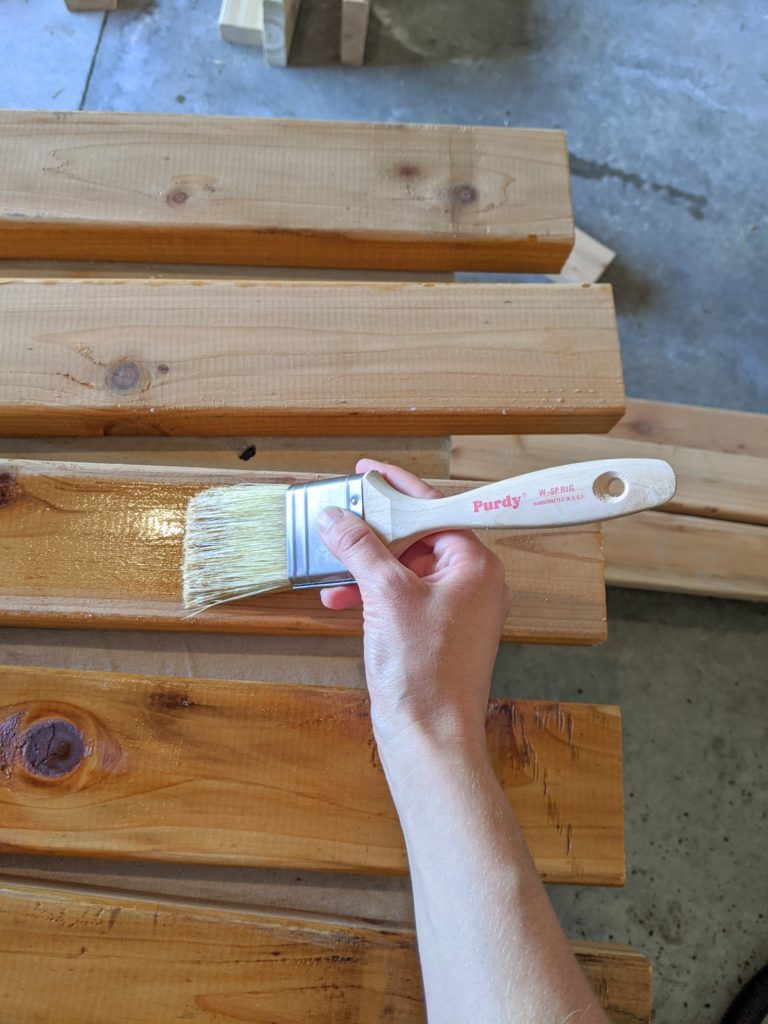
Make sure to not apply this protective oil too thick. If you do, it will leave a glossy finish. Brush it on for full coverage but not so thick that it could be dripping off the boards.
Let it dry for 24-48 hours depending on the current temperature and humidity.
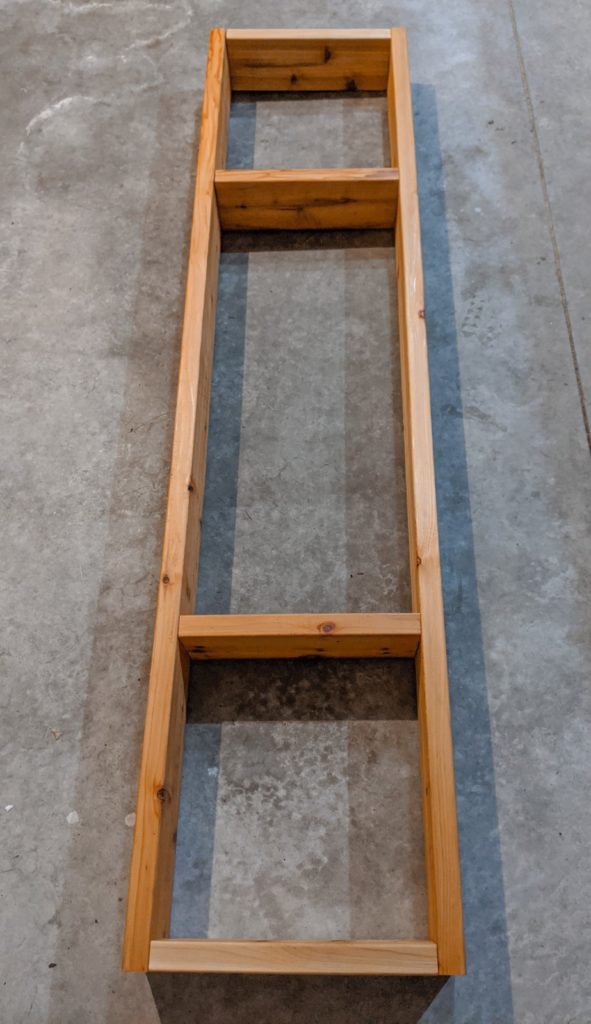
STEP 3: Assemble 3 rectangular frames that will serve as the base for your bench.
Using boards A and B, create 3 rectangular frames as shown below. Screw them together using a drill and 2 1/2″ exterior screws.
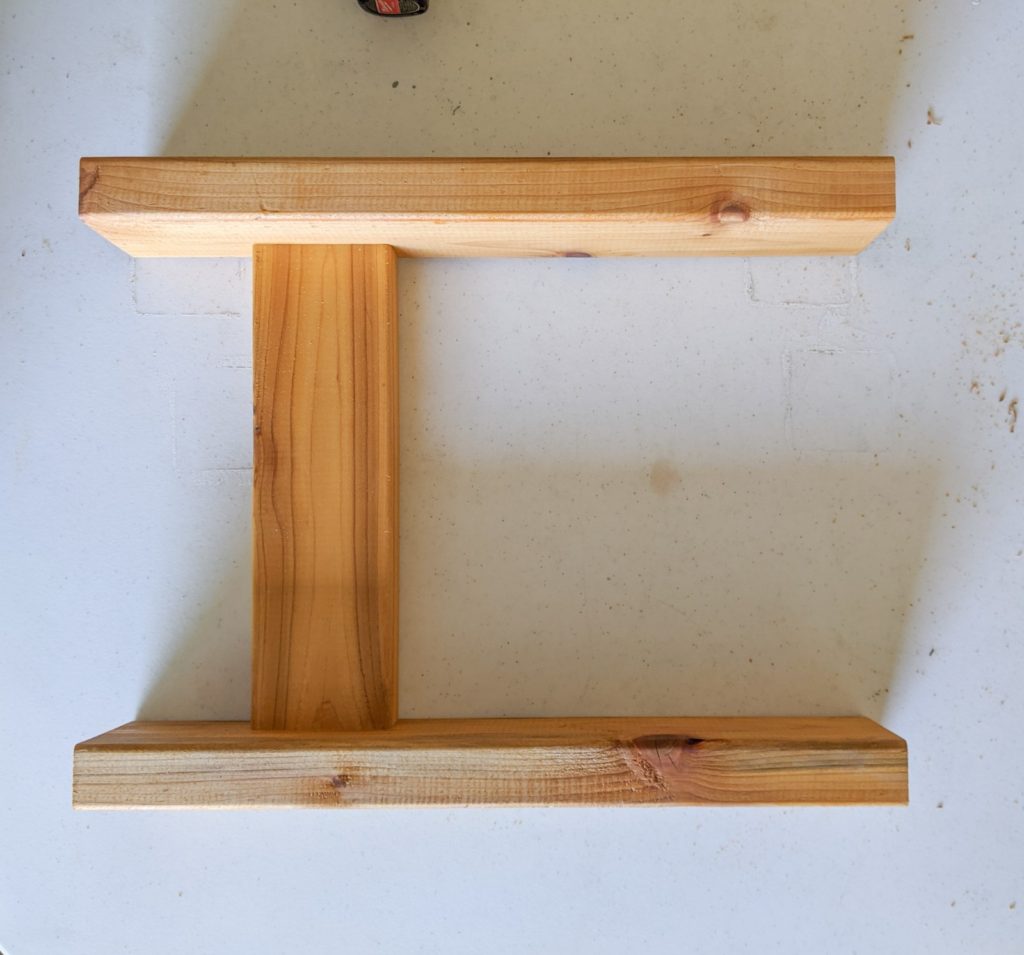
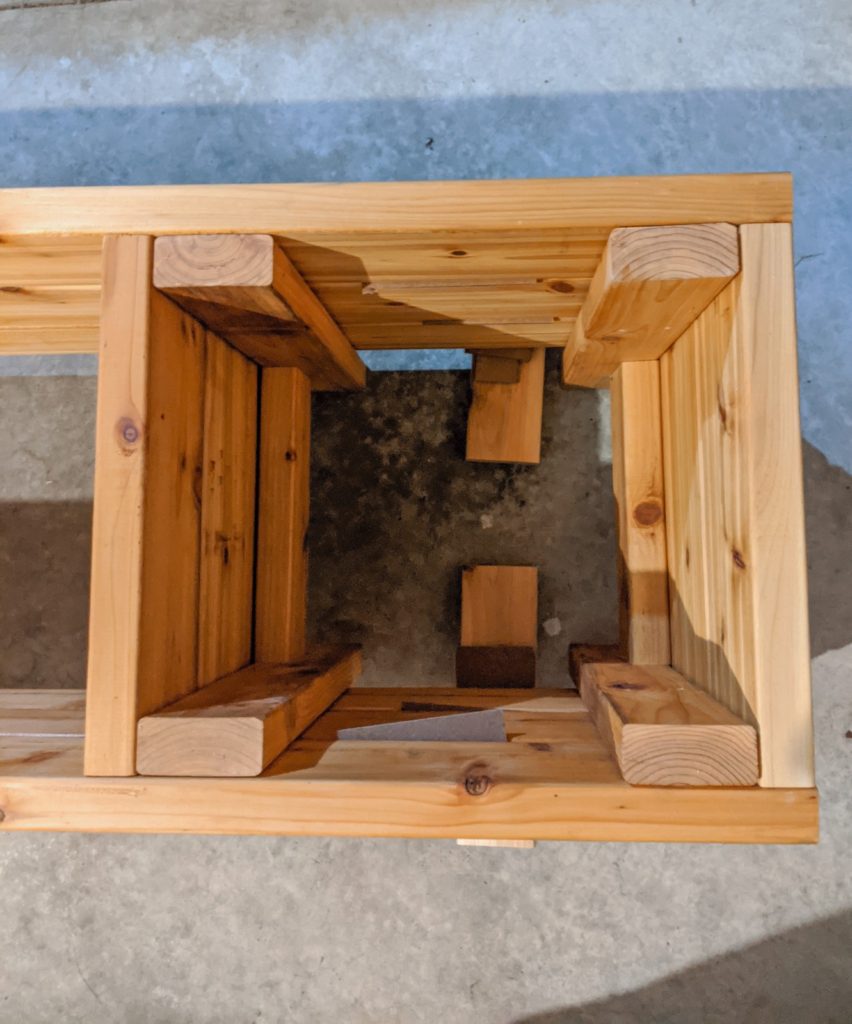
STEP 4: Assemble the legs.
Using boards C and D, create the inner legs of the bench as shown below. Board D is the cross board. I placed it 12″ from the top of the other boards. You can vary this depending on how deep you want your pot to sit in your planters on the ends of your bench.
STEP 5: Add spacers between the 3 rectangular bases to keep them evenly spaced as you add the legs in the next step.
For spacers, I used scraps that I had sitting around. The spacing ended up being as follows: The bottom board is 1 3/16″ from the ground. The other boards are spaced 3/8″ apart from one another. This is important because it creates space for the boards to expand in different weather conditions.
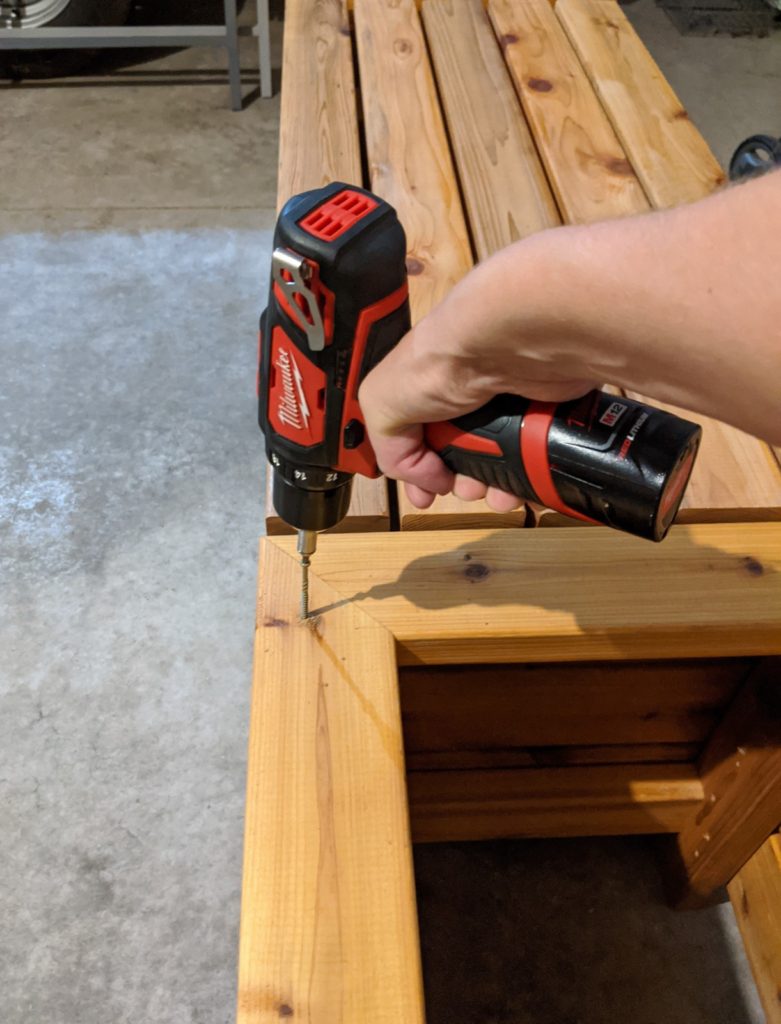
STEP 6: Insert the legs and screw them in using 2 1/2″ exterior screws.
The legs should slide in tightly on either end of each planter. Use clamps as needed to keep the boards together as you screw.
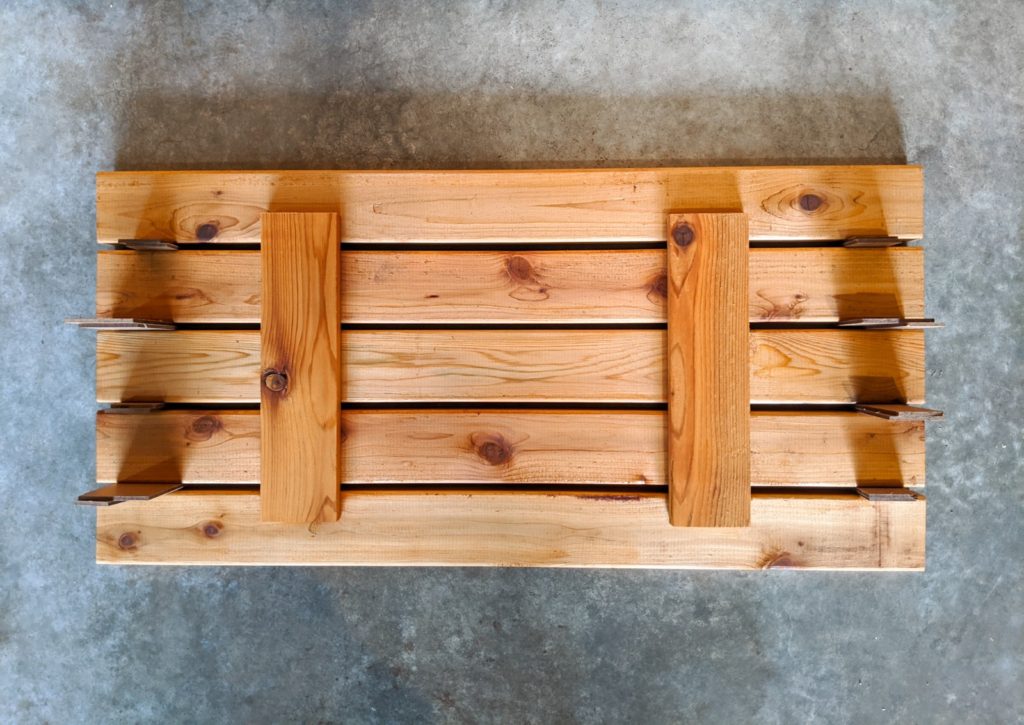
STEP 7: Create the lid using boards G to hold together boards F.
First lay boards F down on the floor and space them out, once again to allow for wood expansion in certain weather conditions. I used scraps for spacing. The final spacing was 3/8″.
Then lay boards G across the boards and screw them in using 2″ exterior screws.
STEP 8: Create the decorative tops for the planters.
Using boards H and I, assemble the decorative tops of the planters.
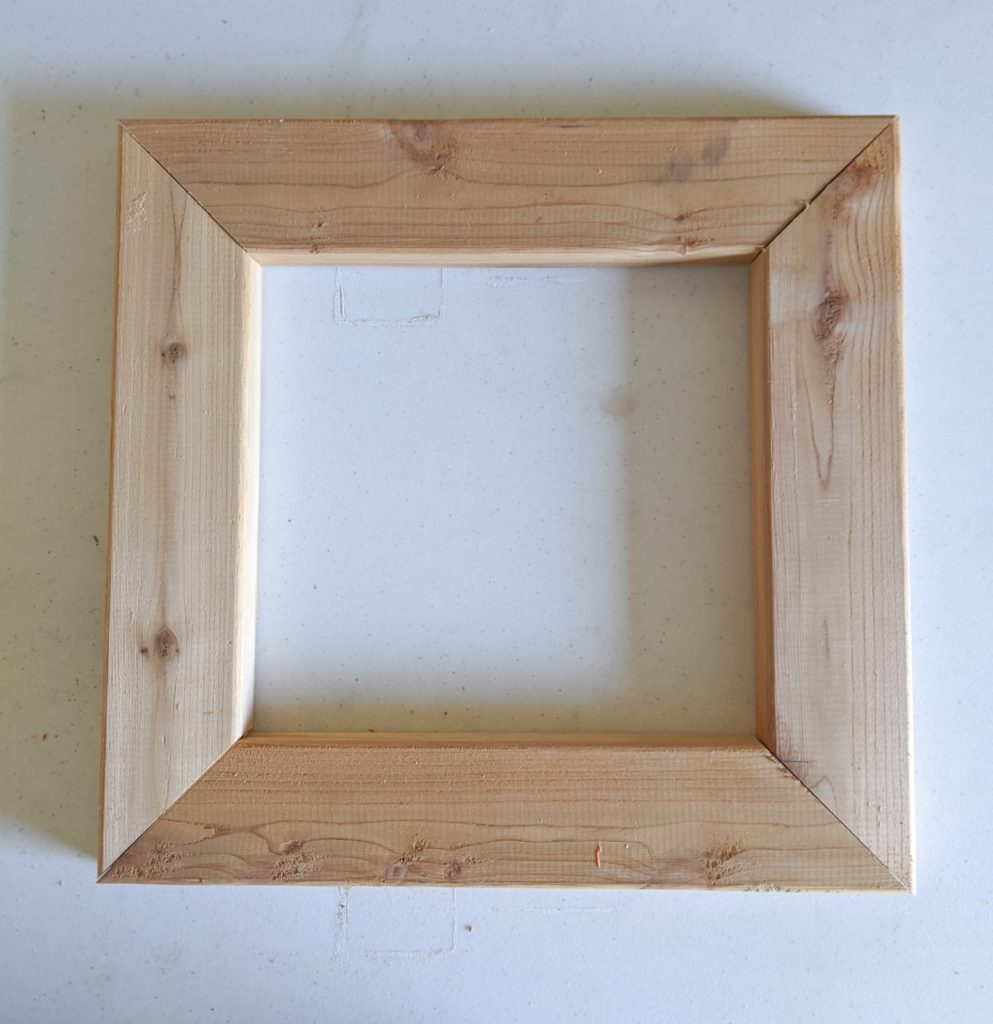
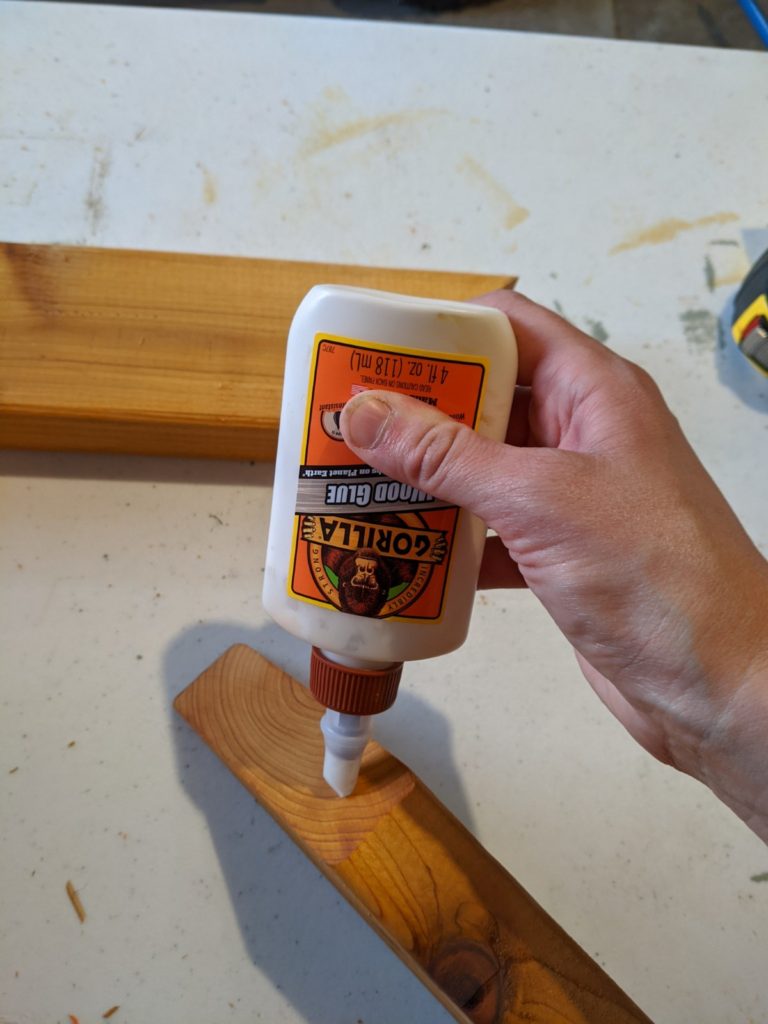
Attach them using both glue and 2 1/2″ exterior screws. Make sure that your glue is made for use outdoors. I recommend using Gorilla Wood Glue.
STEP 9: Attach the planters tops to the planters.
Using the same 2 1/2″ exterior screws, attach the tops of the planters to the planters. I lined them up in the back and let them hang over the front and the sides a bit for a more polished look. The exact placement is up to your personal preference.
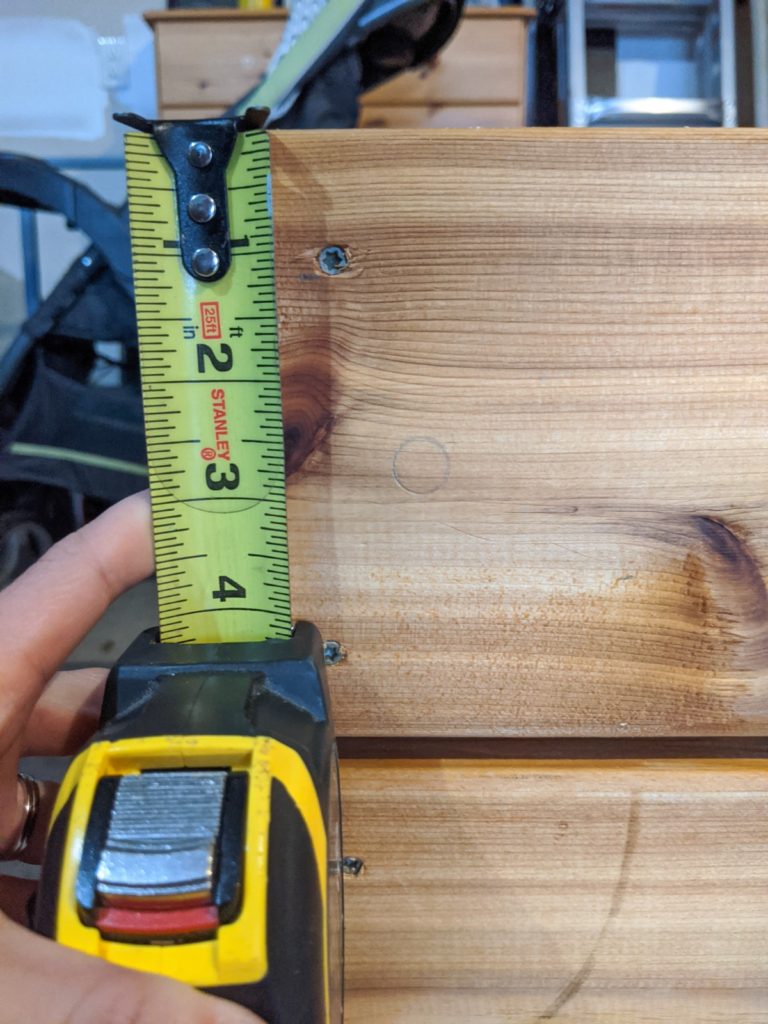
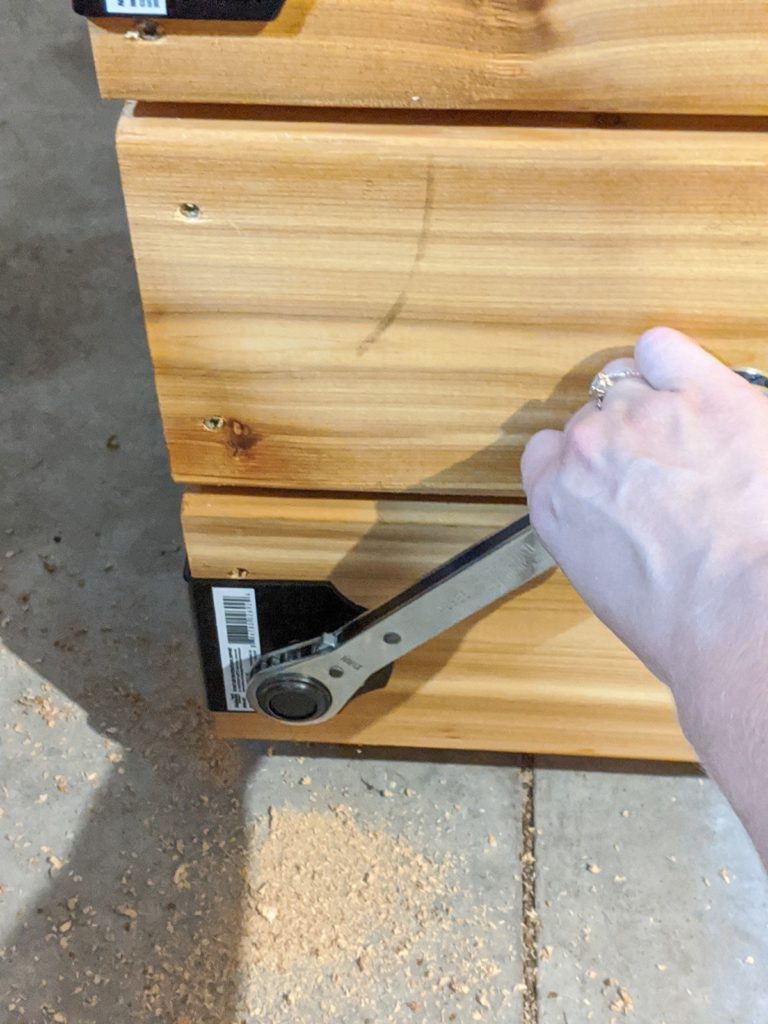
STEP 10: Measure and mark the placement for your decorative hardware.
You will want to make sure that your decorative hardware is placed exactly in the center of each board. To do so, measure and then mark the hole with a pencil.
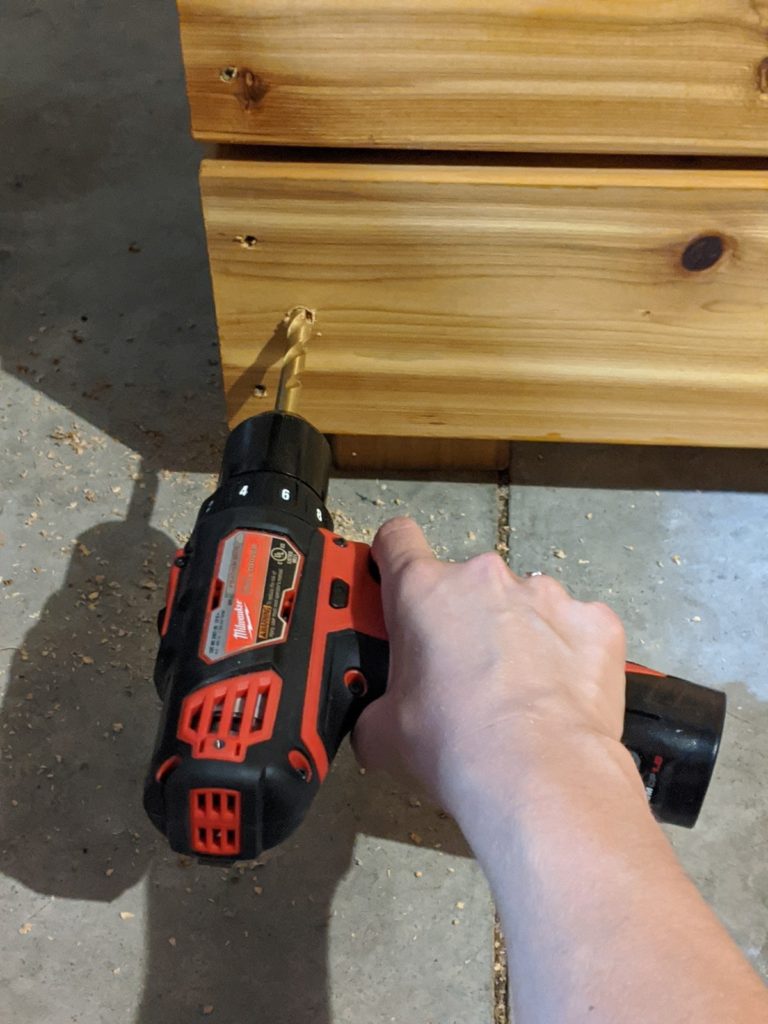
STEP 11: Drill a hole for your lag screw.
To prevent splitting of wood, first predrill the hole for your lag screw.
STEP 12: Using a ratcheting wrench, screw in your lag screw.
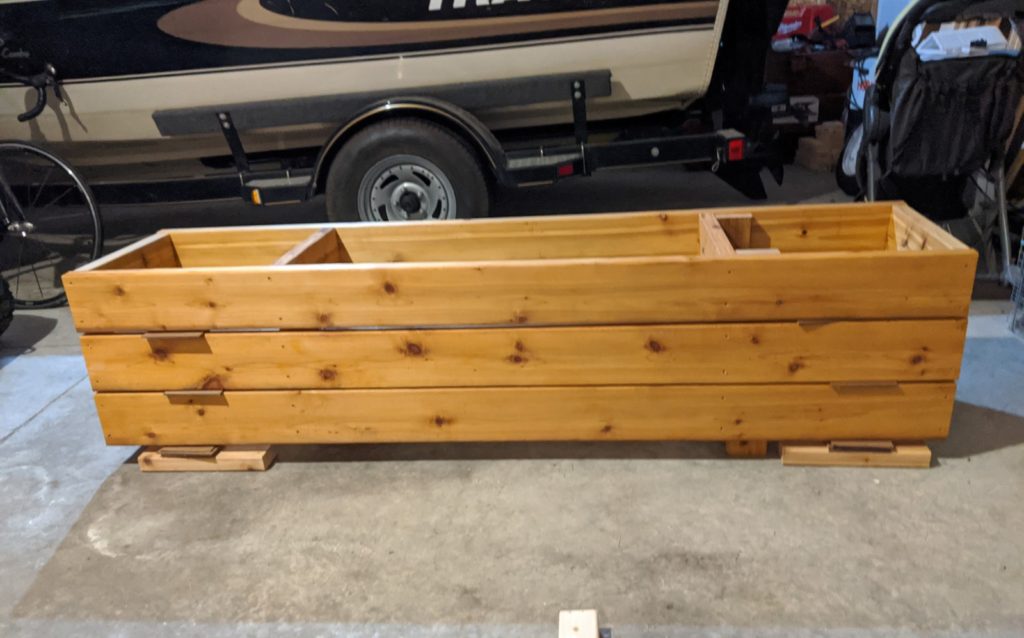
The Finished Bench (and Planter and Storage Container!)
Place your bench on your deck, your lawn or by your front door. Now you’ll have a beautiful and functional bench! You can switch up the flowers seasonally or keep perennials in it depending on your preference. Plus, you’ll have storage for all the random objects that normally litter your backyard.

A year ago I barely knew how to use a drill. Miter saws scared me. I wished that I could build things but I didn’t think it was something I could be good at. Fast forward to today and I actually made this! I’m 100% comfortable using a wide range of power tools and I’m comfortable designing my own woodworking projects. Why do I tell you this? Because I’m confident that you can do it too. I’m confident that you can do hard things. I’m confident that you can learn things that don’t come naturally to you. I’m confident that you can chase your dreams and make them happen. Therefore, I encourage you to pick up power tools and build something!
Want more ideas for home DIY projects?
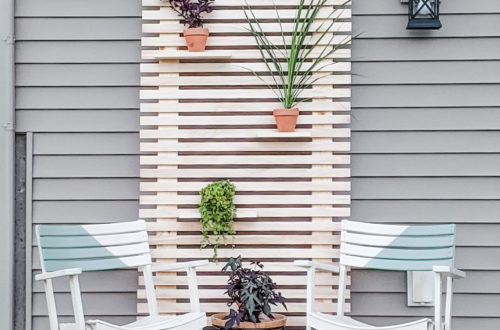
Click here for another great outdoor project: A DIY slat plant wall and outdoor painted furniture!
Or head here to learn how to make a blanket ladder for only $5!
Interested in learning how to refinish furniture, especially how to create a beautiful whitewashed look? Head here to see how I refinished an old, outdated coffee table.
Stay up to date on all my new projects!
Sign up here for my emails so that you are always alerted when I post new projects!
11 Comments
Kim | Shiplap and Shells
I really need some storage for my deck furniture cushions! Thank You so much for sharing. Pinned!
admin
I was planning to use this for that exact purpose! Thanks so much, Kim. So glad you find it helpful!
Paula
Love this project. It’s beautiful and practical. Thank you for such detailed instruction.
admin
Thanks so much, Paula! So glad that you like it.
Jane
A very good idea. we love it.
admin
Thanks so much, Jane!
OC Vegan Lady
This is really beautiful. And you explained the process as you might explain a recipe, with “ingredients” (materials) and “equipment” (tools) needed to create the finished “recipe.” That was really helpful and made this feel more possible. A couple of suggestions I would add to “enhance the recipe” would be to include drainage holes beneath the planter section so you can water the plants and not have any drainage issues. The other idea would be to use clear silicon caulk between the slats of the bench seat top and on the inside of the storage section so things you put inside are somewhat protected from the elements. I think it would have also been handy if the bench top was hinged at the back, and as the kids get older, then can put their toys inside. Keep your creativity flowing! I look forward to seeing more of your projects. Have you tackled “raised planter beds” yet?
admin
Thank you so much! I’m so glad that the way I set up the tutorial was helpful for you. I love your additional ideas!! So smart. I’ll definitely be adding a hinge – that would be incredibly handy. I haven’t tackled raised planter beds yet but I plan to next summer 🙂 Have a wonderful day and thank you for stopping by and reading my tutorial!
Denise D
There’s no bottom in it? So what would you store there that you won’t see on the ground underneath?
admin
I currently have patio furniture cushions in a plastic tote in it. Since the bench is so close to the ground, I can’t see them (I’d have to lay on the ground and look to see them). I’m considering adding a bottom to it but so far haven’t needed one.
Kelly
Only a year?! Took me a lifetime to feel really comfortable. This is awesome! I like the idea of Tupperware bins/heavy duty storage instead of just putting cushions directly in, bottom or no bottom. You saved more money having no bottom that would probably collect debris. Stuff collects in them anyway and we all know how expensive cushions can be. I love the detail you put into to it with slight overhang in front and the hardware, just perfect. Excellent choice using Cedar. I’d skip hinges to save money for your next project and besides, hinges hinder the opening. Happy building. Great job!