
How to Plan for a Bathroom Renovation in 5 Simple Steps!
Bathroom renovations can be time-consuming and costly! I’d love to share with you how to renovate your bathroom on a budget and how to plan for a bathroom renovation. I love home DIY so I’ll definitely be including DIY tips and tricks along the way!
First, Why am I Taking on a Bathroom Renovation?
I was seriously shocked and thrilled when Jeffrey Court reached out to me, letting me know that I had been chosen as a designer in their upcoming Renovation Challenge! Whah?!?! ME?!? A designer?! In a renovation challenge?! Okay, bring it on!
The Jeffrey Court Renovation Challenge is sponsored by Jeffrey Court, FrogTape and Sinkology. I have 6 weeks to completely renovate my bathroom. During these 6 weeks, I will be competing against other Home DIYers for a grand prize of $5,000. How is the winner chosen? Based on votes from people like you! You can vote once a day starting April 14 so I’d love for you to vote and support me if you like my work. Thank you SO much for your support and encouragement.
The Current Bathroom
I am renovating our main bathroom. It’s fine as is but it’s not my style so I’m excited to make it match my style.

Also, it has this yellowish tinge to it from the light fixture and wall paint color so…..that yellow glow definitely needs to go!
So, what’s the first step in taking on this renovation?
1) Find Inspiration
Before I start any work on a space, I first find inspiration. Pinterest is one of the very best places to find inspiration. Below is a mood board that I created after searching Pinterest and then also searching for products that fit with my aesthetic.
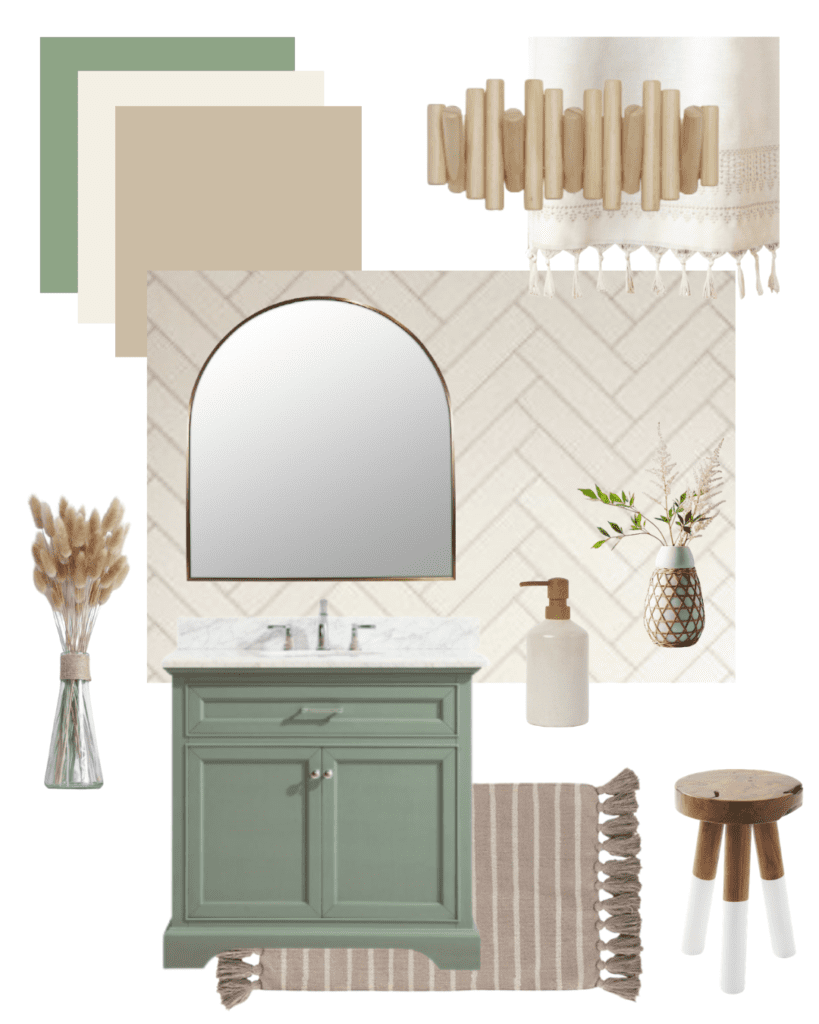
My style is light, bright and earthy. I love neutral colors. I often use white as my base color, adding in beige, sage green and occasionally a bit of blush. Elements like tassels, floral and greenery add some texture and dimension to my spaces.
I want my spaces to make me feel calm and cozy. Life is crazy. Calm and cozy is what I want to feel at home. You too? Oh good!
2) Make a List of Your Projects and Determine what you can DIY
Before you can lay out a timeline, buy products or start working, you need to make a list of the projects you plan to tackle.
First I make a list and then I determine what I can DIY and what I can’t.
Here are some of the items on my list for this bathroom renovation:
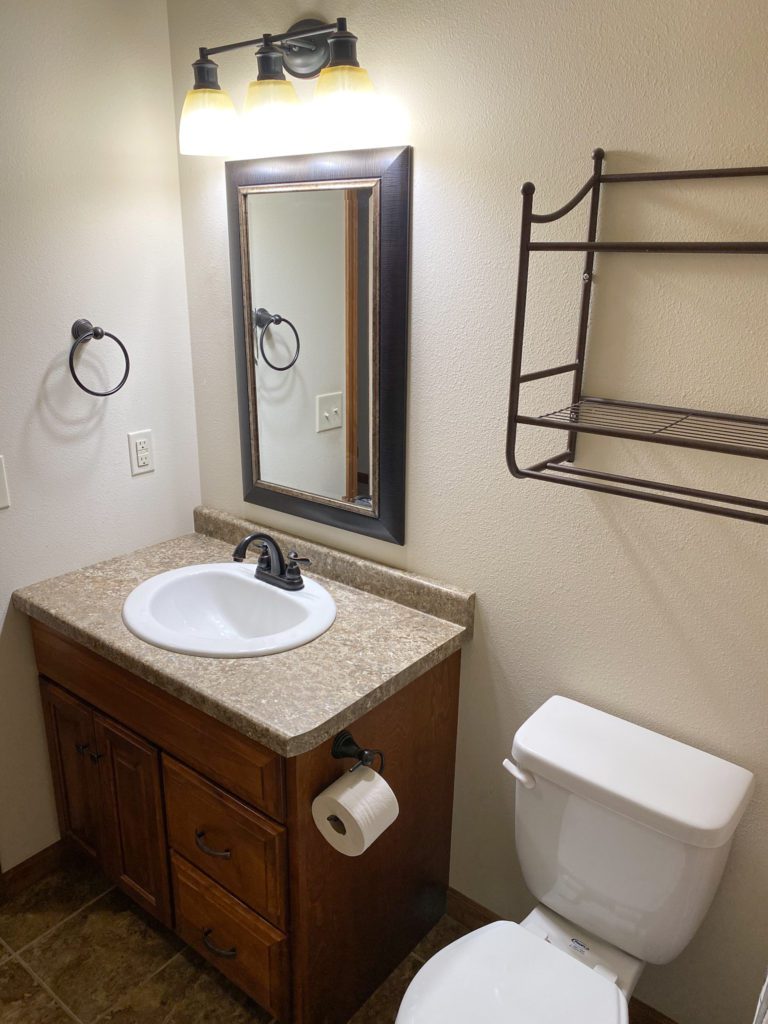
For this side of my bathroom, I plan to:
- Update the vanity: Paint it!
- New counter top & faucet
- Tile a herringbone design onto the back wall using beautiful 3 x 12 tile
- Update towel and toilet paper holder by spray painting
- New mirror and light fixture
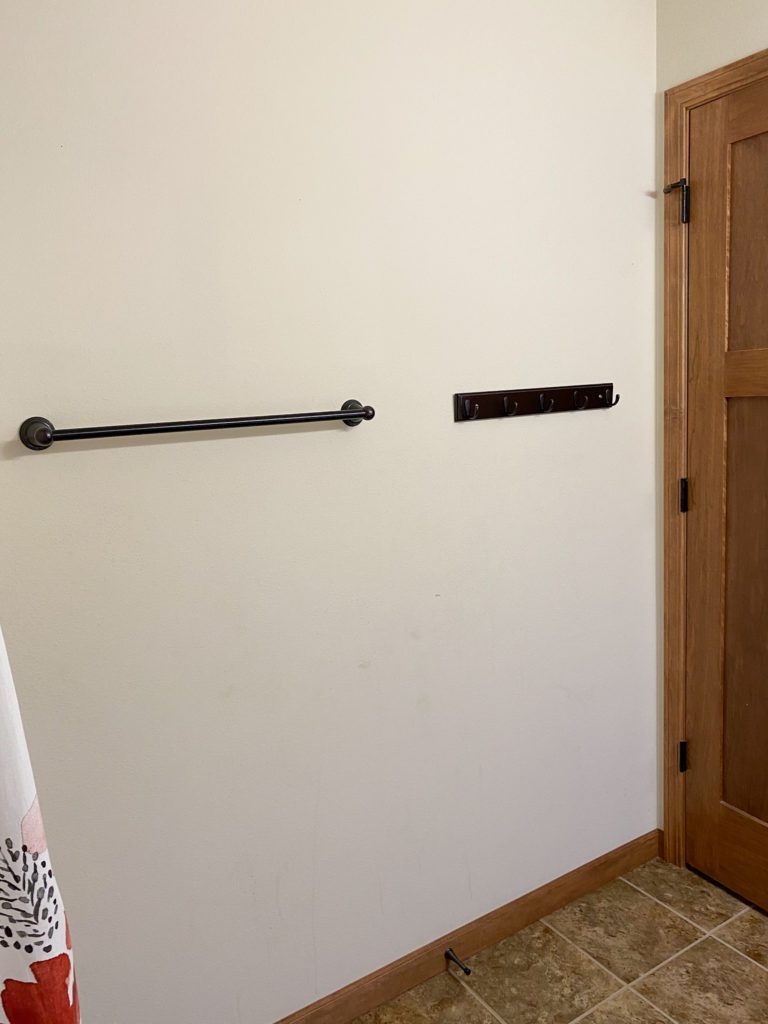
For the opposite side of my bathroom, I have this plain wall to work with. My project plans are:
- Create a vertical shiplap half-wall with a ledge on the top
- Add modern black hooks for towels
- Consider DIY decor options above the half-wall (so many options!)
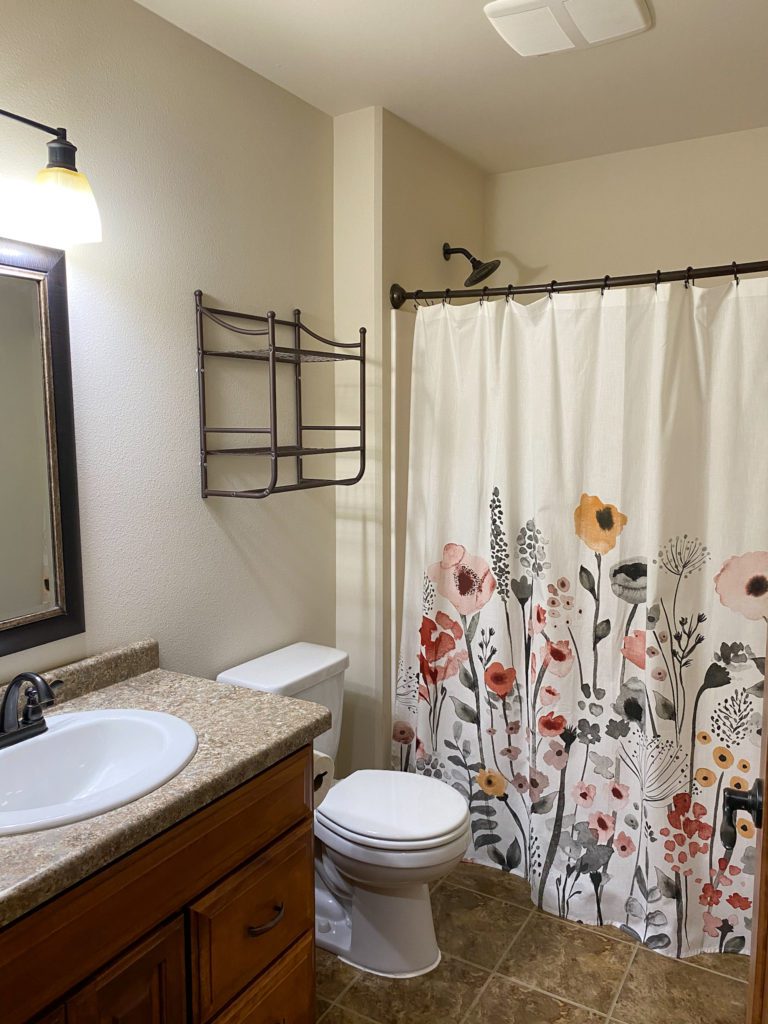
In case you’re wondering, this bathroom does have a shower in it. However, I’m not touching the shower. It works well for us as is! However, I will probably update the shower curtain.
3) Determine Your Budget
I know some people first determine their budget but I actually like to seek inspiration and list potential projects before I even consider money. This helps me feel like anything is possible and often leads to me getting creative to make my project ideas fit my budget.
No budget is wrong and no budget is too small (well, a $1 budget would be tough but might be possible!). Paint alone can totally transform a space! I’ve seen people paint walls, floor tiles and counter tops. I’ve seen people spray paint the edges of mirrors, the metal on light fixtures, the hardware on vanities and SO much more! If you have some paint and spray paint sitting around, you can completely change up a bathroom’s look!
4) Make a List of the Products You Need to Buy (and set a timeline if you want to!)
I am terrible at listing out all the products I need at the start of a project. I typically just keep running to the store over and over again to get more items. Don’t be like me.
It’s so much more efficient to make a long list at the start and go get (or order) them all. This helps you be more efficient and also helps you stay on budget.
5) Start Renovating
This is my very favorite part! It’s probably why I rarely take as much time as I should planning – because I’m so excited to get started!
Here’s what I’ve been up to this week so far:
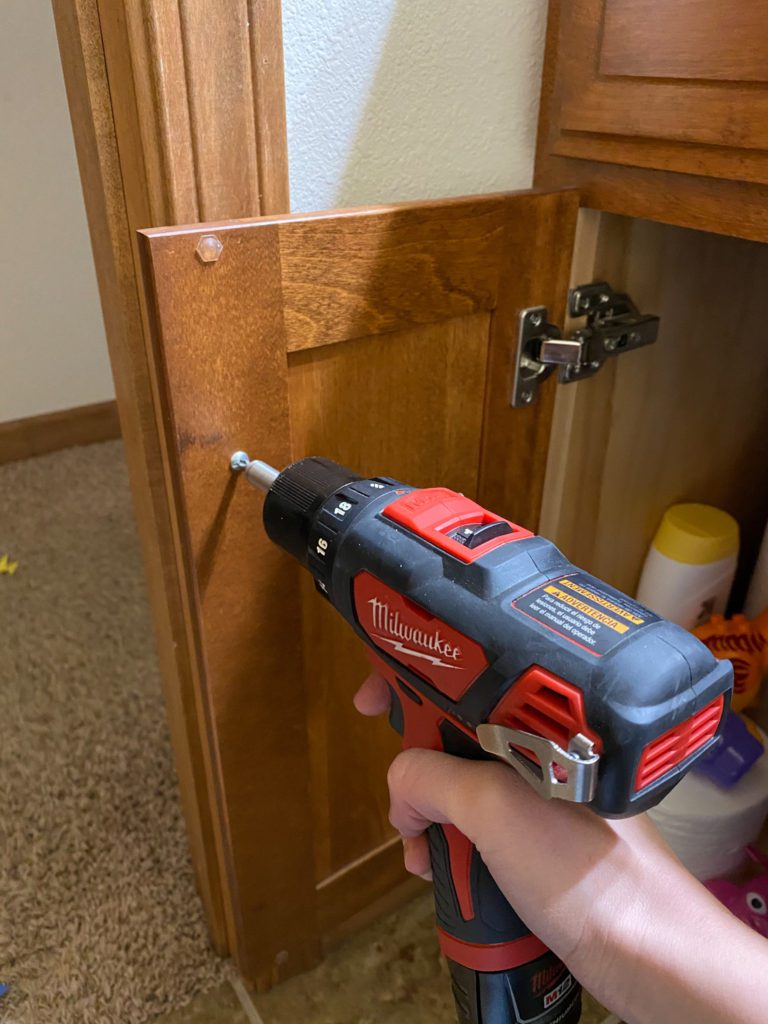
First I took down as much stuff as I could. I removed towel bars, the rack above the toilet, the hardware on the vanity and the trim on one wall.
I need my bathroom to remain functional for my kids and guests throughout this renovation so I’m taking a more gradual approach to taking things apart.
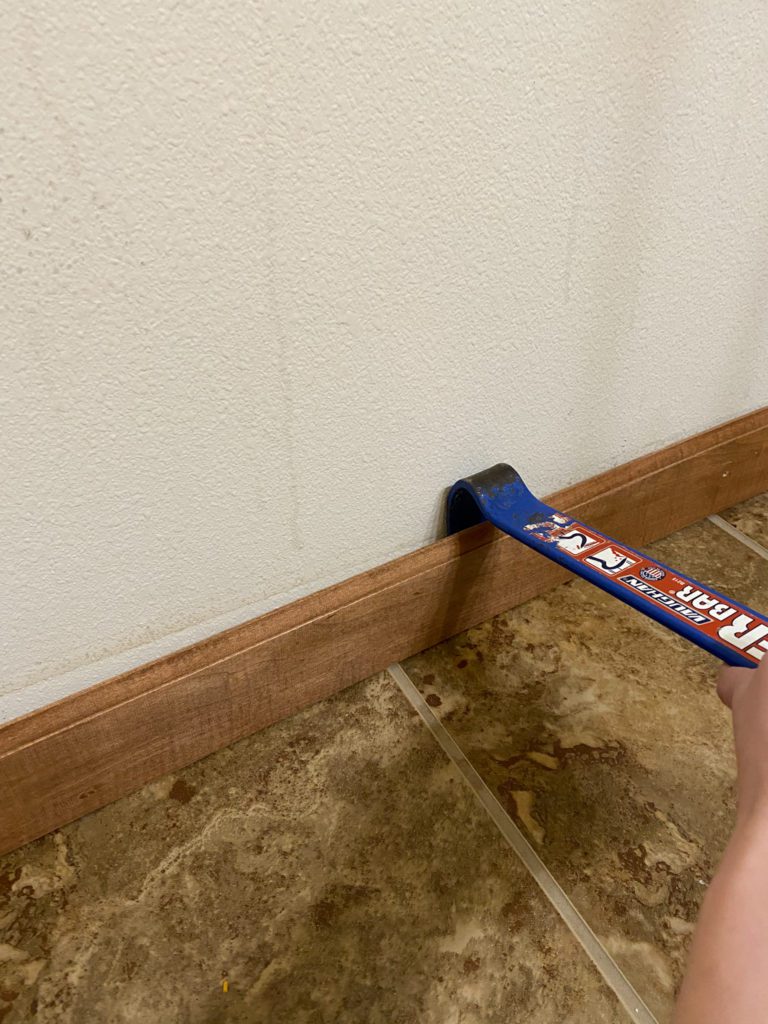
To remove the trim, I first slid a putty knife behind one end of the trim and pried it off a bit. My trim had really long nails holding it on so once I loosened it with a putty knife, I switched to a crow bar and carefully pried it off, moving my way slowly down the trim board. I want to reuse this trim so I made sure not to break it while taking it off.
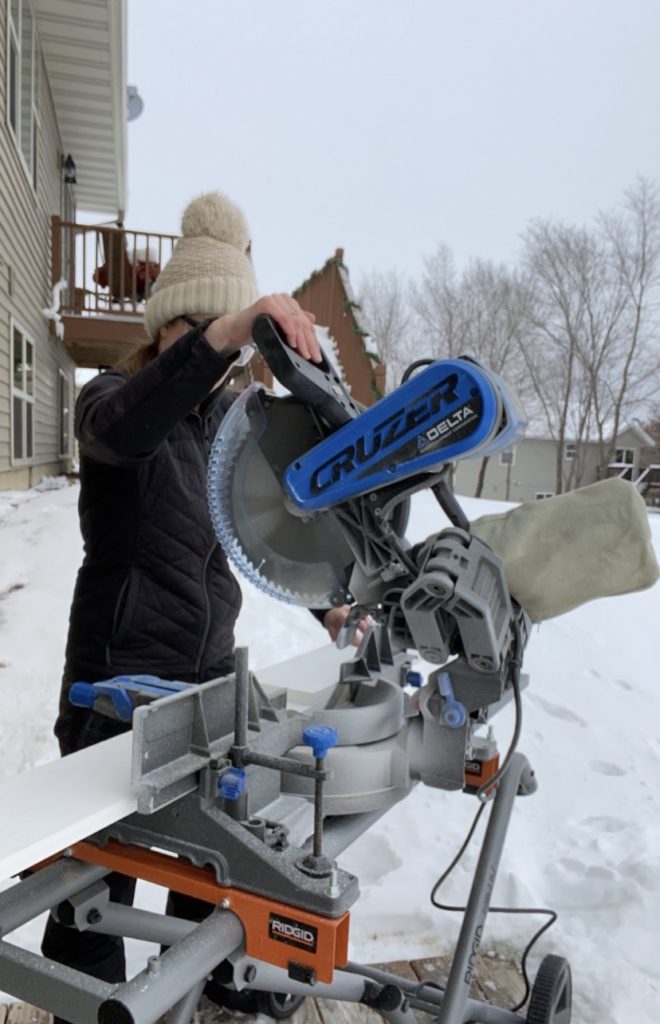
I also started cutting my PVC boards that I’ll be using for my shiplap half-wall. It was -7 outside when I cut these – AH!
Are you wondering why I’m using PVC boards? Well, stay tuned for a whole post on this vertical shiplap wall!

I also started painting them this week. I chose a beautiful beige color to help me create that earthy, calm vibe I’m going for.
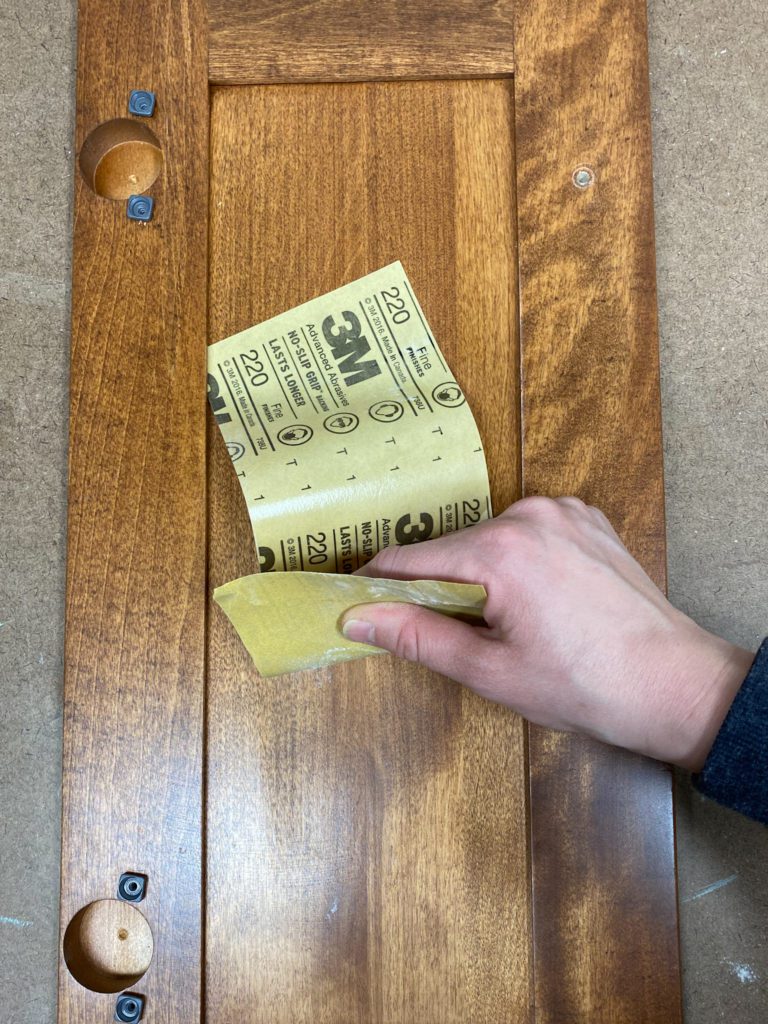
I also started prepping my vanity for paint! I removed the doors and drawers, sanded them and removed any sawdust with a tack cloth. I also got started priming them but you’ll have to wait for my upcoming posts to see the color I chose and all the steps in the process!
What are the Other Contestants up to?
Head over to the Jeffrey Court Renovation Challenge website to see what the other Home DIYers are up to this season!
If you love what I’m up to, please don’t forget to vote for me daily starting April 14!
Interested in Other Room Renovations I’ve Done?
Head here to see my Living Room Renovation featuring a giant shelving feature wall!
Head here to see another bathroom renovation I did a long time ago – when my style was more farmhouse.
Sign up for emails from me here so that you never miss my new home DIY projects!

One Comment
Pingback: