How to Upcycle Furniture in your Home: Black Sideboard Cabinet Makeover
New furniture can be so expensive! Instead of buying new furniture, why not take a piece of furniture that is in your home or from a thrift store and give it a whole new look? Some might respond with “I could never do that! I have no idea how to and I’m not very creative.” Guess what? You don’t have to be creative to do it! You also can learn how to through this tutorial and a little trial and error.
So let’s get started! I hope this sideboard cabinet makeover tutorial inspires you to transform a piece of furniture in your home too.
Thanks to Minwax for sponsoring this post. I received compensation from Minwax but all opinions stated here are my own. I’ve used and loved Minwax products for years!
Let’s dive into the tutorial!
Time to Complete
4 days, with about 8 hours of work across the days
Tools & Materials
- Minwax Pre-Stain Wood Conditioner for Oil-Based Stains
- Minwax Wood Finish Penetrating Stain in Special Walnut
- Minwax Polycrylic Protective Finish in Ultra Flat Finish
- Minwax Stainable Wood Filler
- Purdy 2” XL Paint Brush
- Purdy 2″ Angled Nylox Paint Brush
- Purdy Revolution Jumbo Mini Roller Frame
- Purdy White Dove 1/4″ Nap Mini Roller Cover
- Purdy Paint Pail
- Purdy Premium Folding Multi-Tool
- Sherwin-Williams ProClassic Interior Acrylic Latex
- Sherwin-Williams Extreme Bond Primer
- Krylon Fusion All-in-One Spray Paint in Metallic Gold
- TSP substitute cleaner, water, & rag
- Drill or screwdriver
- 220 Grit Sandpaper
- Tack Cloth
- Rags
- Random Orbital Sander with the following grit sandpaper: 80, 120, 180, 220
Click HERE to find a local retailer for Minwax products!
How to Upcycle Furniture in your Home
Here’s a picture of what the sideboard cabinet looked like before I started refinishing it. I love it’s clean lines and beautiful legs, but it was very damaged.

STEP 1: Clean the furniture with TSP cleaner
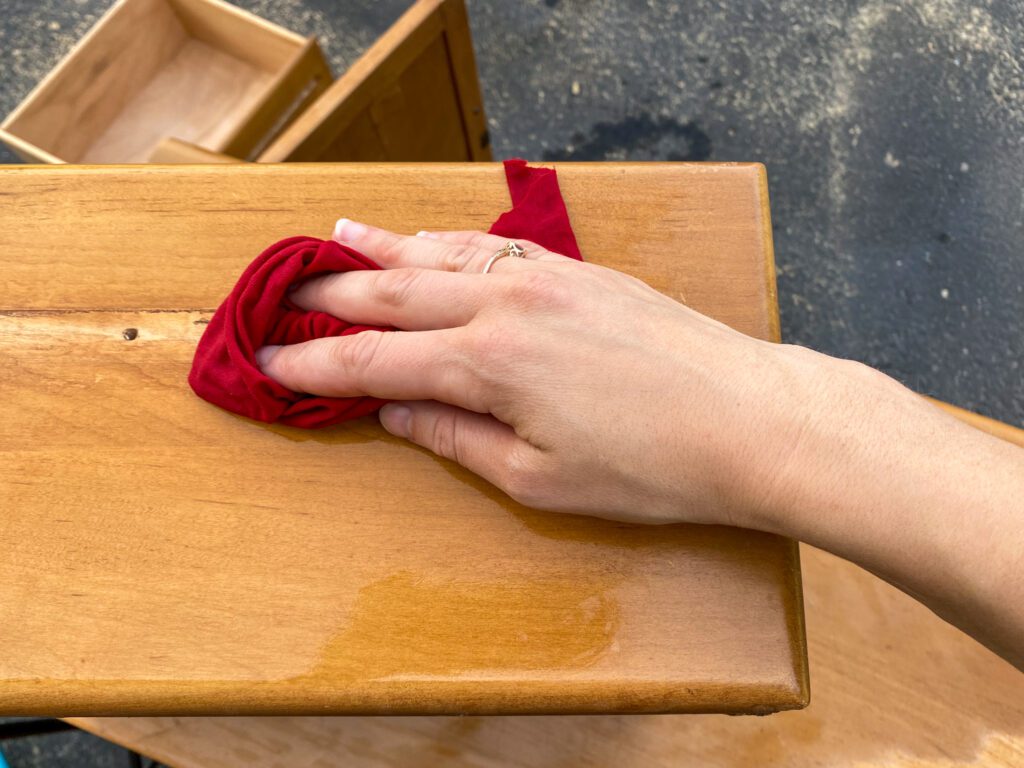
Even if furniture doesn’t look dirty, it is! Clean it using warm water, TSP, and a rag. Rinse it with water and give it time to fully dry.
STEP 2: Sand the furniture with a random orbital sander
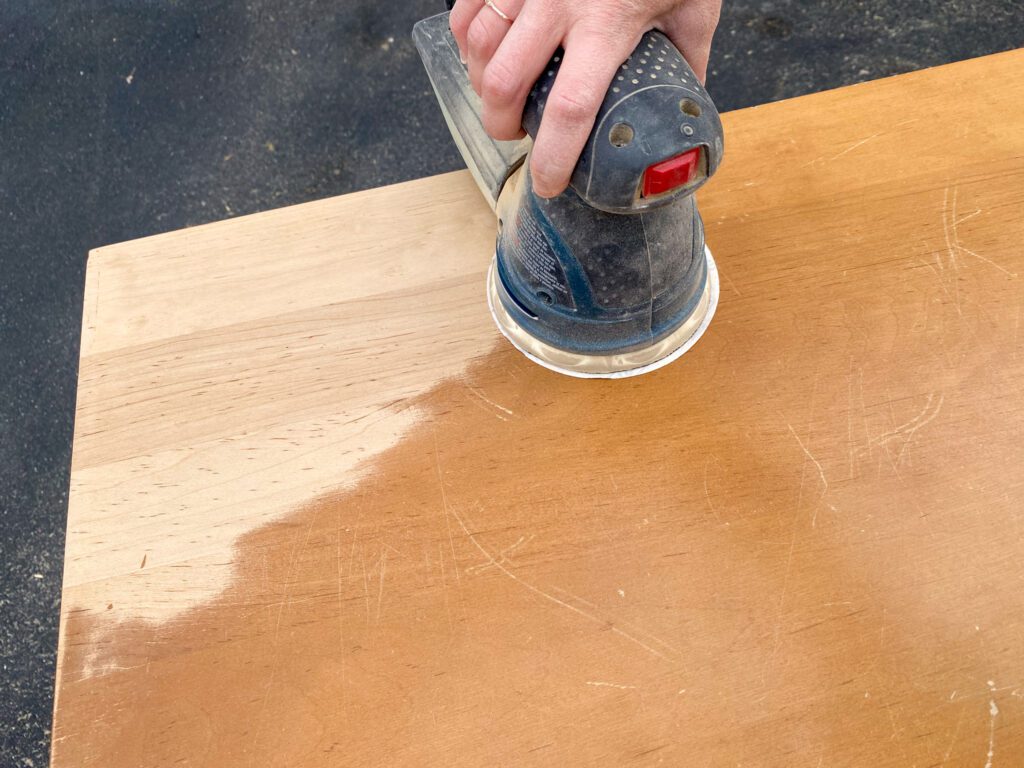
For the parts of the furniture that you plan to stain, start with 80 grit sandpaper. Then move to 120 grit, then 180, and then 220. This will make sure that you end up with a super smooth sanded surface.
For the parts of the furniture that you plan to paint, you can just sand it with 220 grit sandpaper. Then you are set to go! The purpose of this sanding is simply to rough up the surface to give the paint something to stick to.
Then remove the sanding dust using a tack cloth.
STEP 3: Fill in any crevices, holes, or nicks with Minwax Stainable Wood Filler.
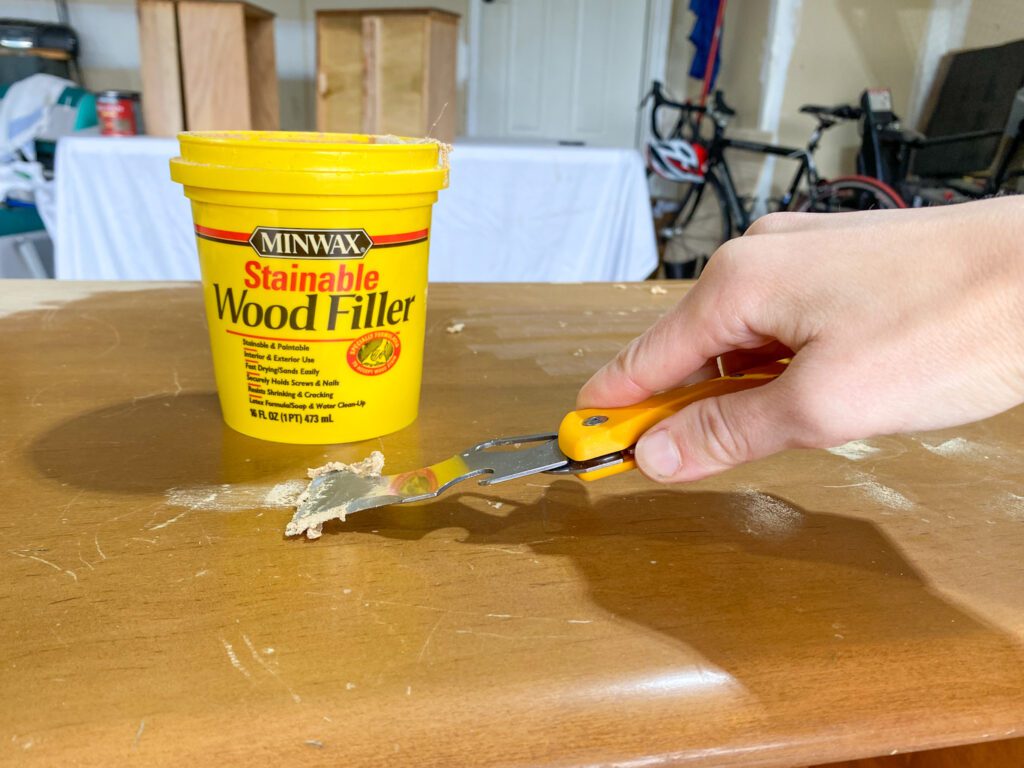
To make sure that your final finish is smooth, take the time to apply wood filler using a Purdy Premium Folding Tool. Apply it to any areas that look like nicks or scratches. Overfill a bit and allow time to dry. Then sand down these areas with 220 grit sandpaper until they are smooth.
Pro tip: Make sure to get STAINABLE wood filler!
STEP 4: Apply Minwax Pre-Stain Wood Conditioner for Oil-Based Stains.
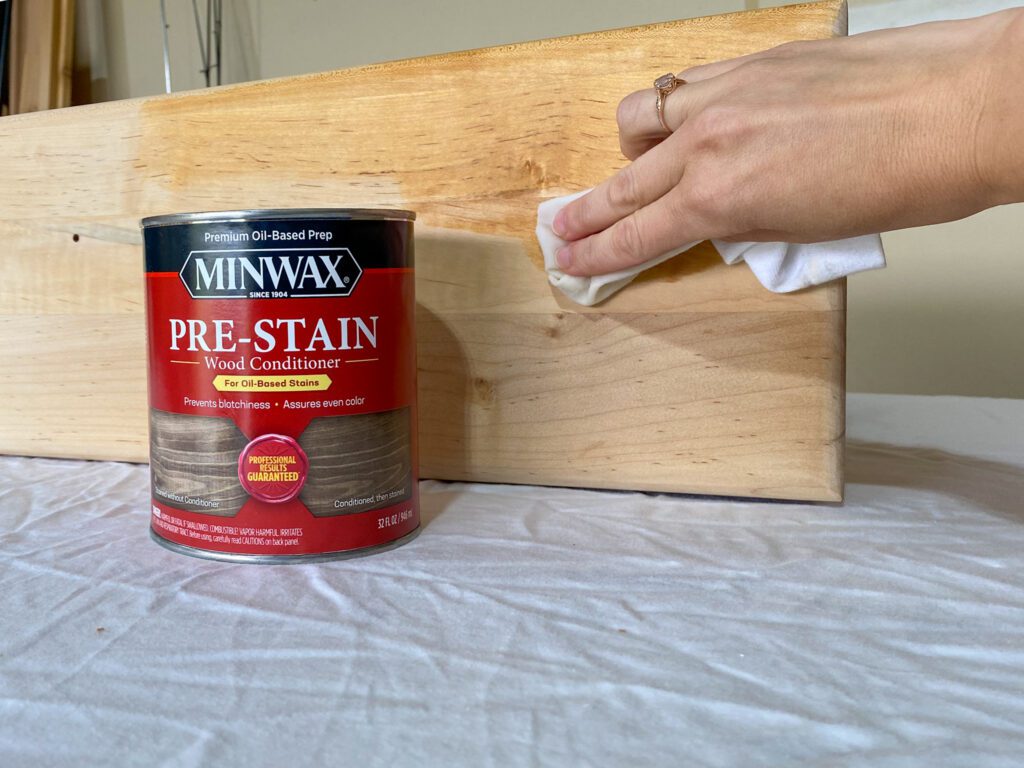
For the sections you plan to stain, always use the Minwax 3-step staining process: Pre-stain wood conditioner, stain, and then a protective topcoat.
Start with a pre-stain wood conditioner like Minwax Pre-Stain Wood Conditioner for Oil-Based Stains. This is important because it preps your wood for stain. It helps the wood absorb your stain evenly. Make sure to use an oil-based wood conditioner if you plan to use an oil-based stain (like I did!).
Apply it with a rag. After 5-15 minutes, wipe off any excess with a clean rag.
STEP 5: Within 2 hours, apply stain.
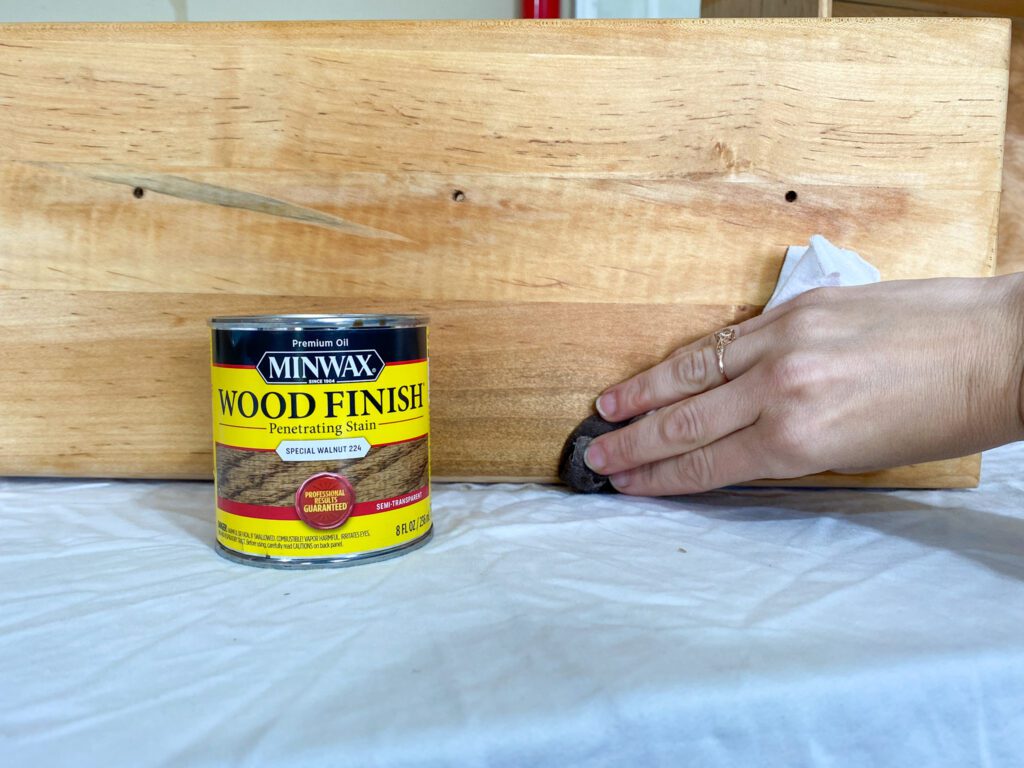
Minwax has a large variety of stains to choose from. For this project, I wanted a more natural wood color so I chose to use Minwax Wood Finish Penetrating Stain in Special Walnut. This stain color is all around my home – on the trim, kitchen cabinets, etc. I love it!
Apply it with a rag. Allow it to penetrate the wood for 5-15 minutes. I left mine for about 10 minutes. The longer you leave it, the darker the stain color will be. After that time, wipe off any excess with a clean rag.
I decided to apply two coats to darken the stain color a bit more.
STEP 6: Apply a protective topcoat.

The third step in the staining process is applying a protective topcoat to protect the stained wood.
My go-to topcoat is Minwax Polycrylic Protective Finish in Ultra Flat Finish. Since I used an oil-based stain, I waited 24 hours for it to dry before applying this water-based topcoat.
I applied it using a Purdy 2” XL Paint Brush. It looks milky white when it’s applied but it dries clear.
I gave it time to dry, sanded it lightly with 220 grit sandpaper, removed sanding dust, and then applied one more coat for increased protection.
STEP 7: Paint remaining areas of the furniture piece.
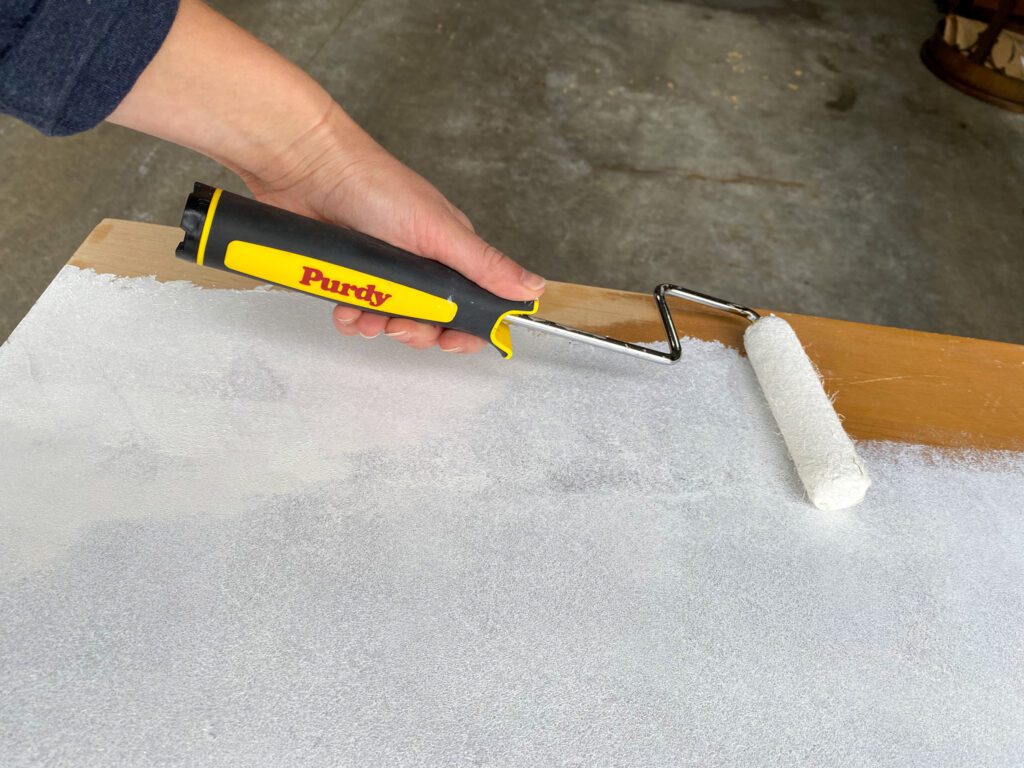
I chose to create a two-toned furniture piece. You could choose to stain the entire piece if you wanted to!
To create the two-toned look, I then painted the remaining parts of the sideboard cabinet.
I first applied one coat of Sherwin-Williams Extreme Bond Primer and then two coats of Sherwin-Williams ProClassic Interior Acrylic Latex in Tricorn Black.
For both paint applications, I used the following Purdy paint products: Purdy 2″ Angled Nylox Paint Brush, Purdy Revolution Jumbo Mini Roller Frame, Purdy White Dove 1/4″ Nap Mini Roller Cover, and a Purdy Paint Pail. These products helped me create a super smooth finish on my cabinet!
STEP 8: Spray paint furniture hardware.
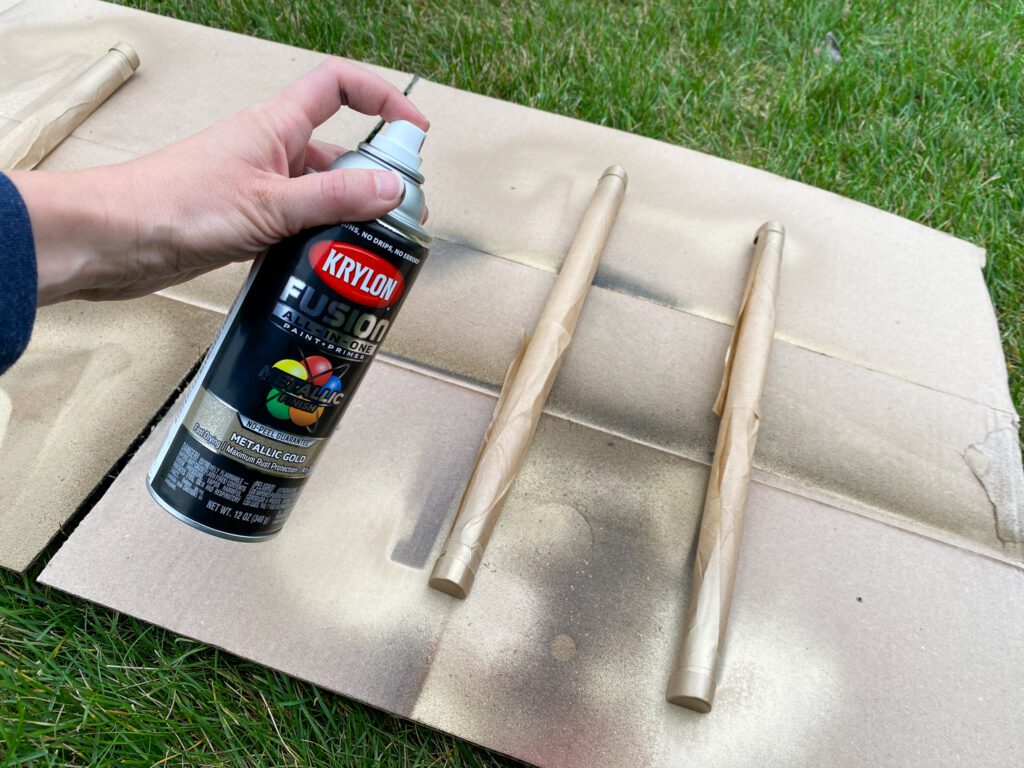
I freshened up the hardware on the sideboard cabinet by spray painting it a brushed gold color using Krylon Fusion All-in-One Spray Paint in Metallic Gold. I applied two coats of spray paint, following the directions for dry times.
STEP 9: Attach the hardware
Using a screwdriver or drill, put the hardware back on the cabinet.
Enjoy your beautiful upcycled piece of furniture!
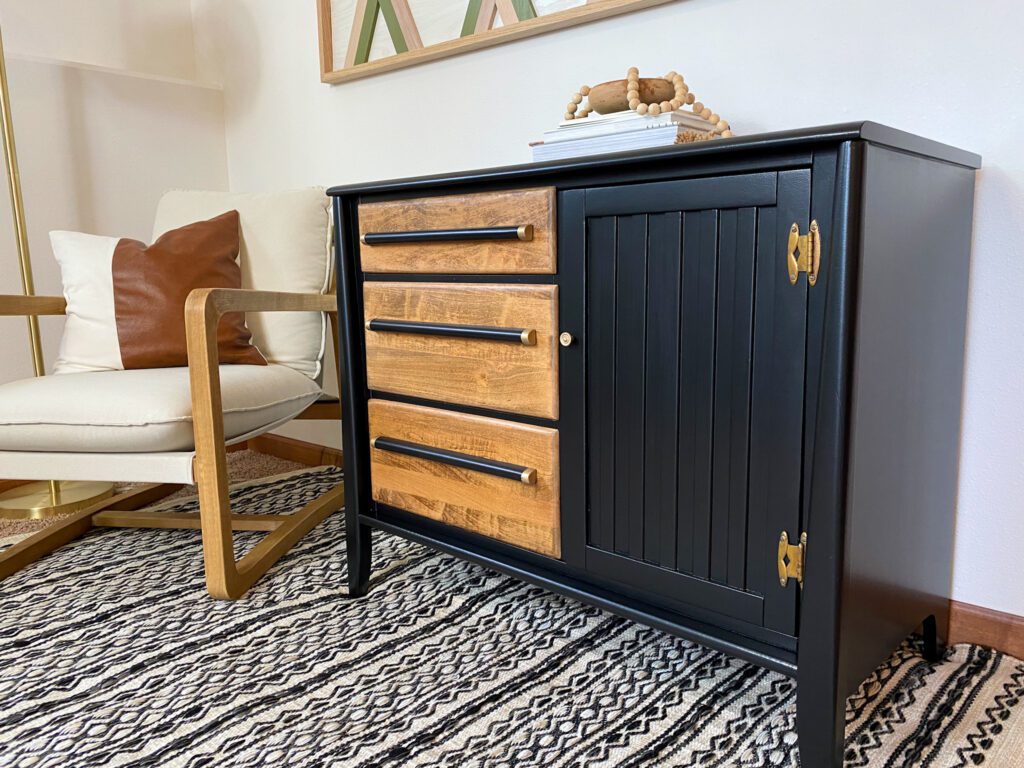
I love how this piece turned out! It has a completely different vibe than the piece I started with.
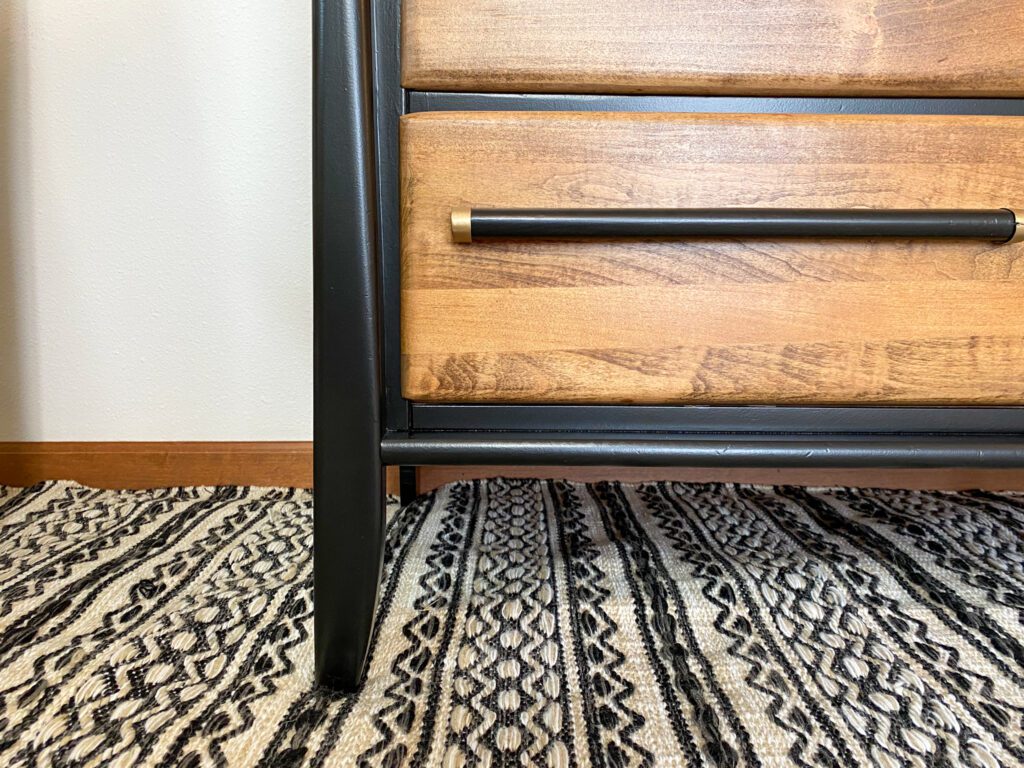
Check out this close-up of the gorgeous stained drawer fronts!!
Honestly not every piece turns into something I immediately love. Sometimes I love it more over time and sometimes I just repaint it. That’s the good thing – you can always change it if you don’t like it. So just go for it and see what happens!
Want more furniture flipping tips and tutorials?
Head HERE to see a beautifully upcycled farmhouse style coffee table!
Follow along with me on Instagram and Pinterest to see all my past projects and be in the know when my future projects happen!
Head to the Minwax website for more project ideas and to explore all their different amazing stain colors!