Linen Closet Organization Makeover in just ONE DAY!
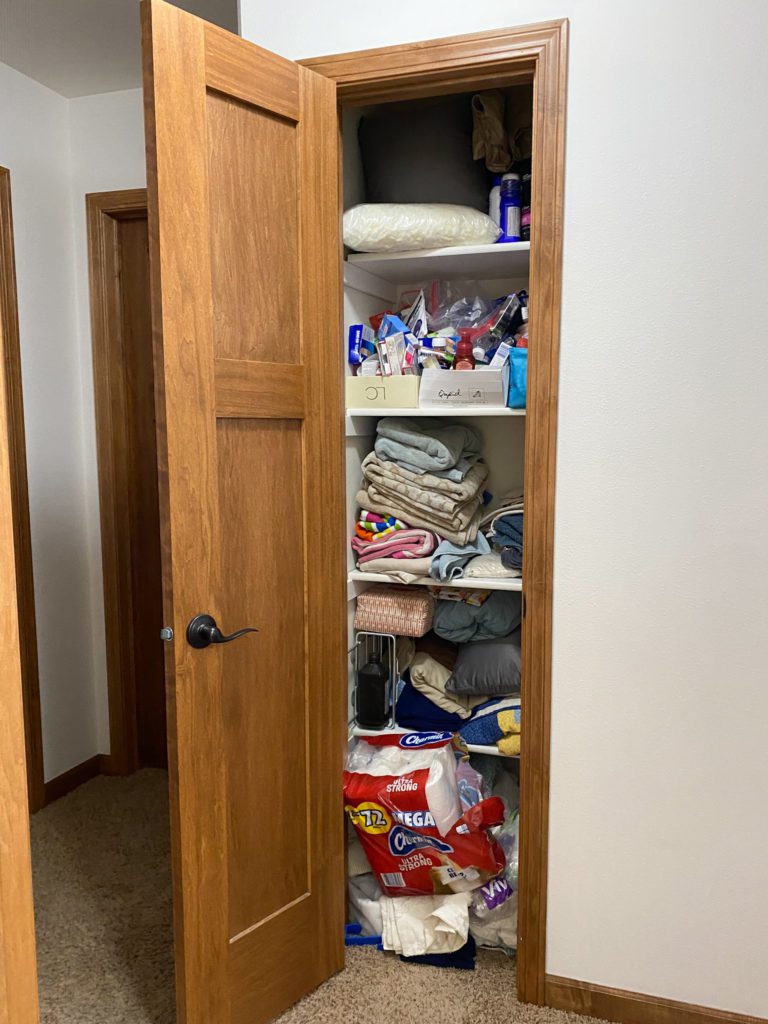
Anyone else have the messiest linen closet? It’s where we keep our linens, plus all our medicine and stocked-up toilet paper. It was DISASTROUS! The good news: I tidied it up in just one day with a few simple steps. Get ready for some linen closet organization!
Here’s how I did it so that you can do the same (unless you like an avalanche of towels on your head when you open your linen closet! Eeek!).
Thanks to Minwax for sponsoring this post. I received compensation from Minwax but all opinions stated here are my own.
Time to Complete Linen Closet Organization
One Day! Seriously. You can do it too.
Tools & Materials
- Minwax Water-Based Pre-Stain Wood Conditioner
- Minwax Wood Finish Water-Based Solid Color Stain in Vintage Blue
- Minwax Polycrylic Protective Finish in Matte Finish
- Minwax Stainable Wood Filler
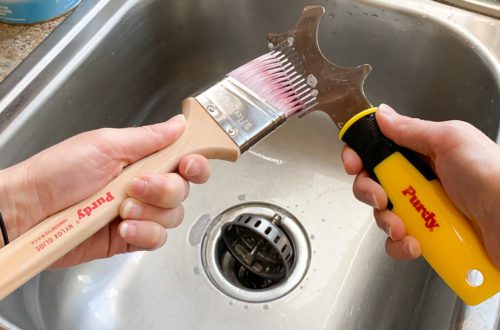
- Purdy 2” XL Sprig Paintbrush
- Synthetic Pad
- 220 Grit Sandpaper
- Tack Cloth
- Putty Knife
- Wood Glue
- Rags
- 3 1×8 Pine or Oak Boards
- Miter Saw
- Tape Measure
- Nail Gun
- Clamps
- Drill
- Drawer Pulls (your choice of style!)
- New towels or linens if needed or if you want new ones
Click HERE to find a local retailer for Minwax products!
Step by Step Tutorial for Linen Closet Organization
STEP 1: Get rid of old, unused stuff!
This might be the most important step. Purge all your old things that you never use or don’t like. I probably got rid of about half of the items in our linen closet. (And yes, if you’re wondering: I did have all of our medicine heaped up in shoe boxes – hah! This closet really needed some help.)
STEP 2: Start making boxes by cutting boards with a miter saw.

Using a miter saw, cut your 1×8 boards into 5 pieces each to make the sides and bottom of each box.
Cut List for Each Box:
Sides and Bottom of Box: Three 13″ long boards
Front & Back of Box: Two 8 3/4″ long boards
Cut enough boards to make three boxes.
STEP 3: Assemble boxes with glue, a nail gun and clamps.

Apply wood glue to edges of box. Secure wood pieces using a nail gun. Clamp the boxes to ensure that everything holds together seamlessly.
STEP 4: Apply Minwax Stainable Wood Filler to nail holes.
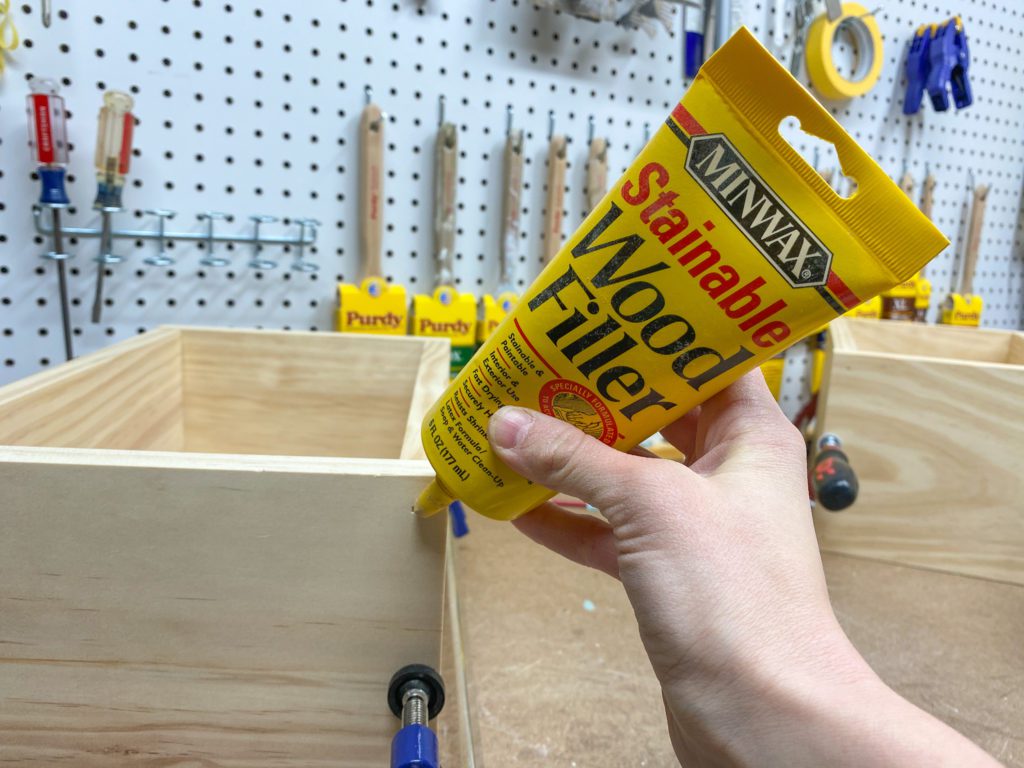
Push wood filler into holes with a putty knife. Slightly overfill holes and allow the wood putty to dry. Most holes will dry within two hours. Since these holes are very small, the wood filler dried in 30 minutes for me.
STEP 5: Sand down wood filler and lightly sand wood boxes.
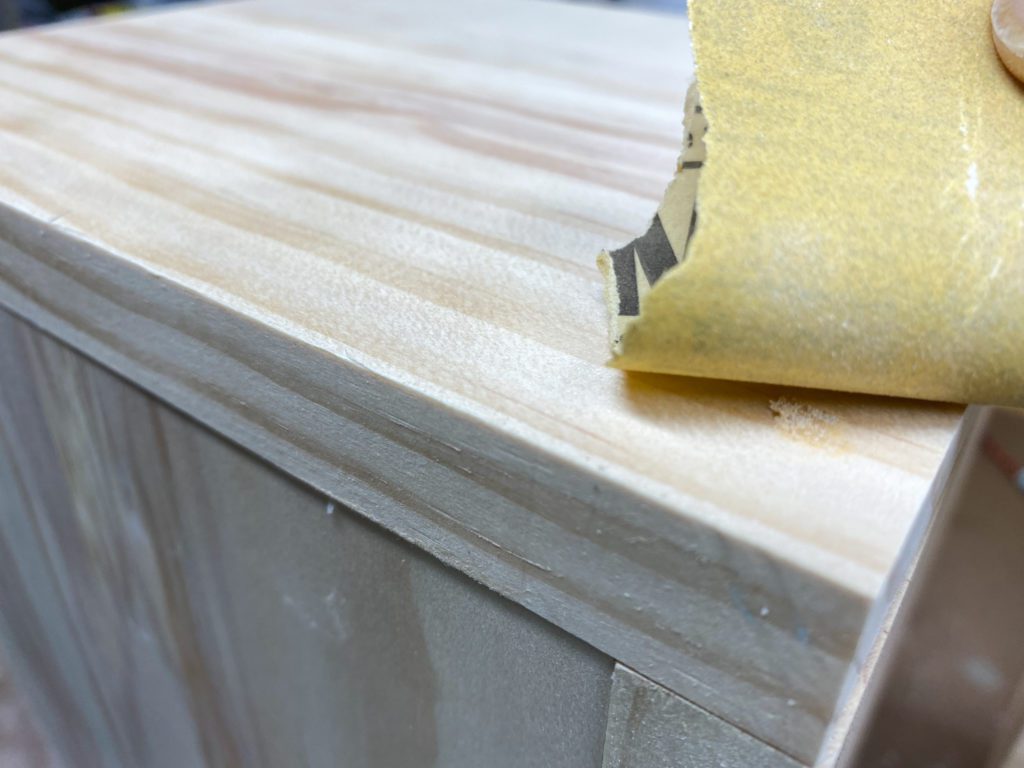
Using 220 grit sandpaper, sand over the wood filler until the surface is smooth. Also lightly sand the other areas of the wood boxes to prep the wood for staining. Just a quick light sanding is sufficient.
Remove any sanding dust with a tack cloth.
STEP 6: Apply Minwax Water-Based Pre-Stain Wood Conditioner
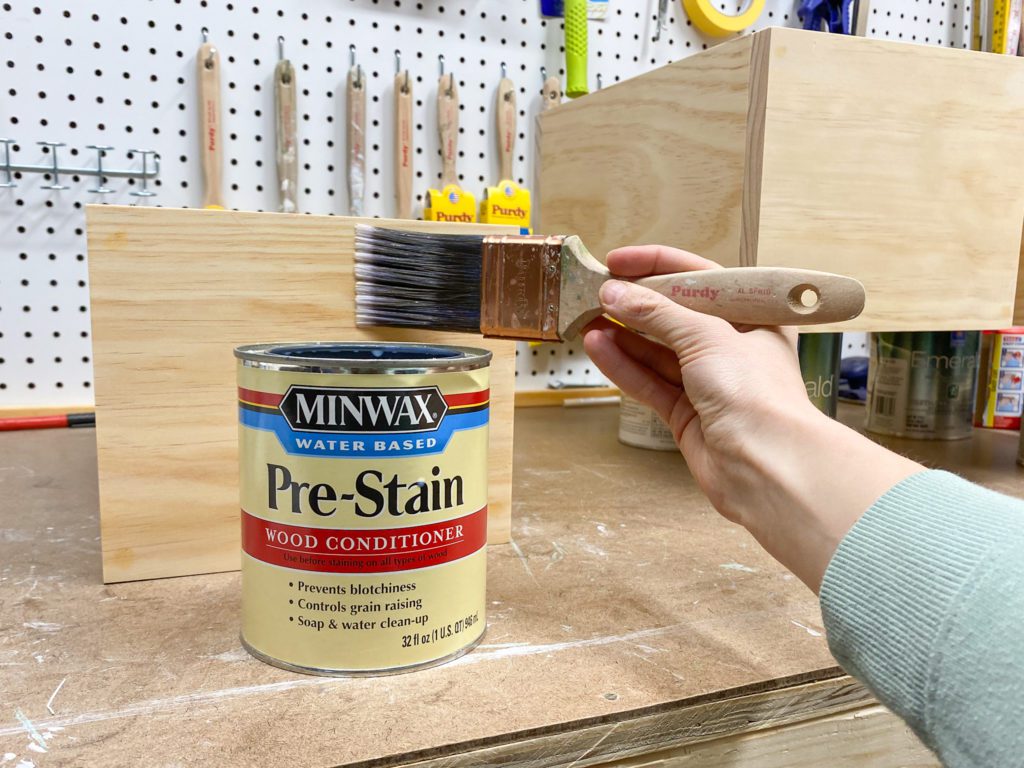
Whenever you are going to stain wood, it is a good idea to first apply pre-stain wood conditioner. This helps prepare the wood for staining. It helps prevent blotchiness when staining. It also controls grain raising, which is basically when your wood feels fuzzy after staining it.
I chose to use water-based pre-stain wood conditioner because I planned to use water-based stain. If you plan to use oil-based stain, you would want to choose oil-based pre-stain wood conditioner.
Apply it with a Purdy 2” XL Sprig Paintbrush.
After 1-5 minutes, remove any excess with a clean rag.
Wait 15-30 minutes. Then sand the wood with 220 grit sandpaper and use a tack cloth to remove any dust.
Now you are ready to stain!
STEP 7: Apply Minwax Wood Finish Water-Based Solid Color Stain in Vintage Blue
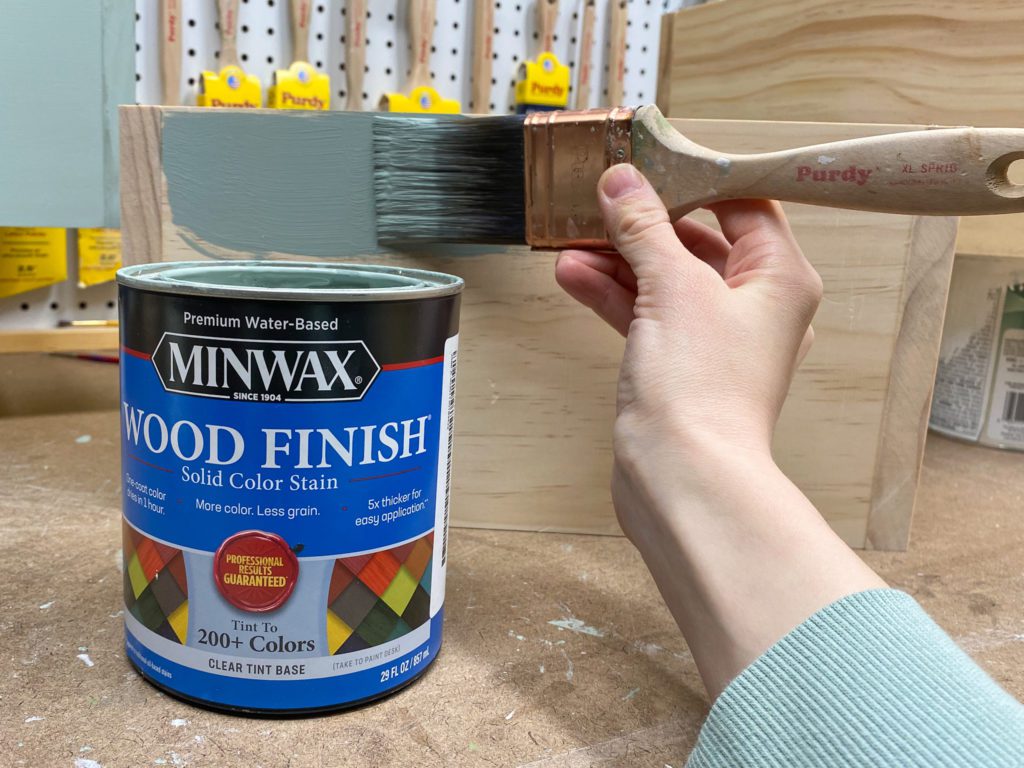
Minwax Wood Finish Solid Color Stain is one of my favorite products to use! There are over 200 colors to choose from and it’s such a unique product in that it’s stain but it has a solid opacity. I LOVE the look of it! The wood grain shows through a bit, which is really pretty.
I chose to use Minwax’s Vintage Blue color, which was their 2021 Color of the Year. It’s calming, soothing and already all over my home!
Apply it with a Purdy 2” XL Sprig Paintbrush.
Within 2 minutes, remove any excess with a synthetic pad. Go in the direction of the wood grain.
Allow stain to dry for 1 hour. Only one coat is needed, which I love since it saves on time.
STEP 8: Apply Minwax Polycrylic Protective Finish in Matte Finish
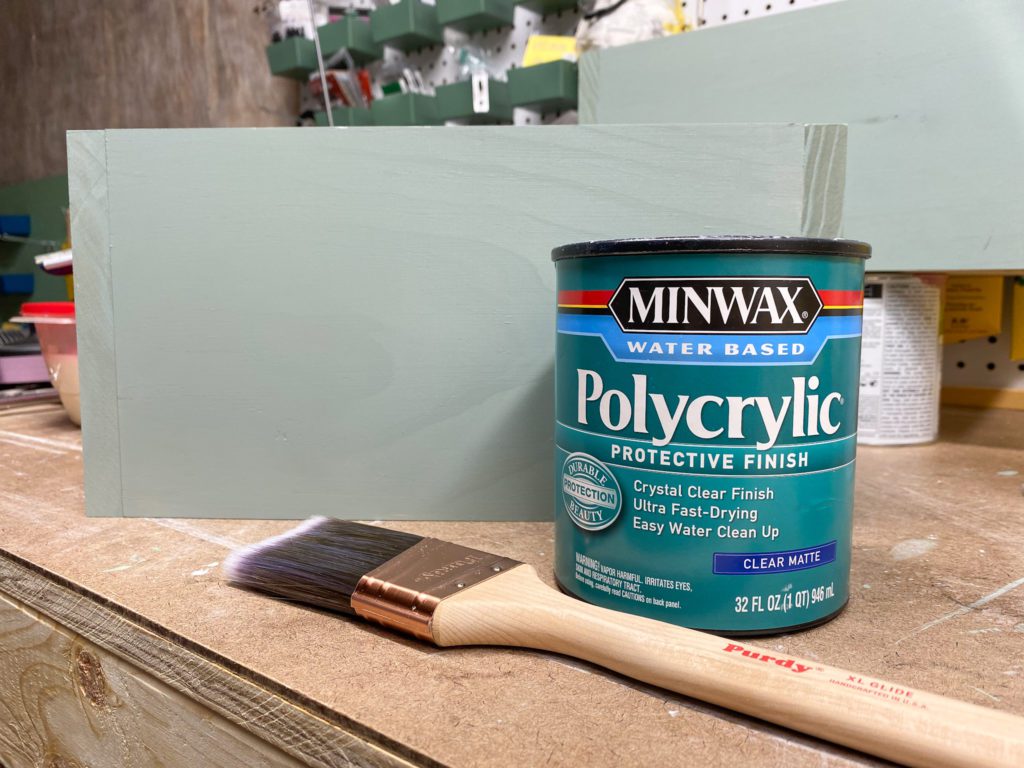
Whenever you stain wood, you should apply a protective finish to the top of it. Minwax Polycrylic is my favorite top-coat because it dries clear, doesn’t yellow over time, dries quickly and easily cleans up with soap and water.
Apply it using a Purdy 2” XL Sprig Paintbrush.
Once dry, lightly sand it with 220 grit sandpaper.
Apply one more coat to fully protect the wood.
STEP 9: Add drawer pulls to boxes.
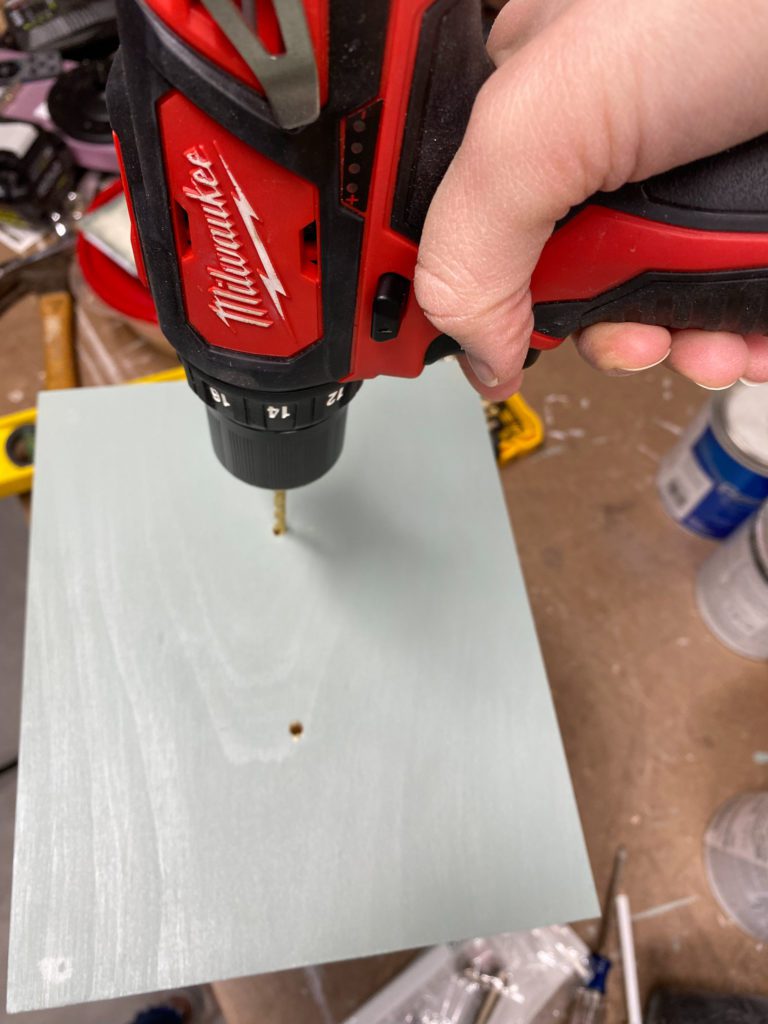
Choose whatever style drawer pull you love and add them to the front of each box.
Measure where the center of your box is and drill holes to match up with your drawer pulls
Insert drawer pulls and your boxes are done!
STEP 10: Reorganize your linen closet, putting medicine and smaller items in the boxes.
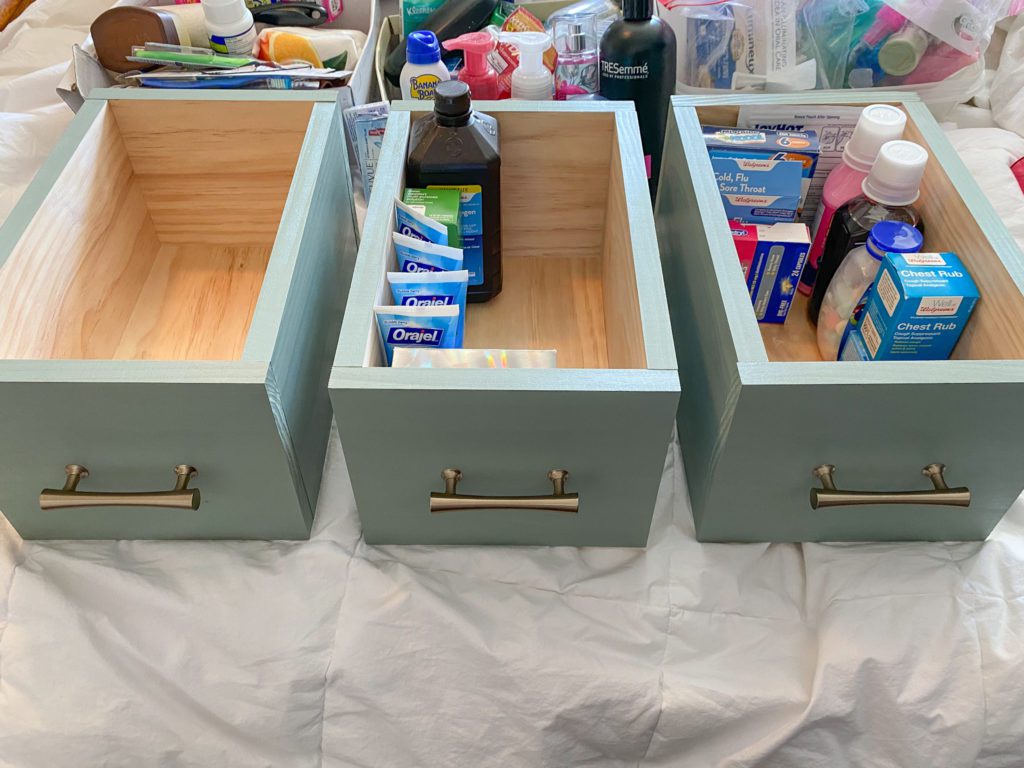
Fill your boxes with medicine, extra toothpaste tubes and whatever else you like to keep in your linen closet.
Organize the linen closet with other storage items like baskets as needed for other items.
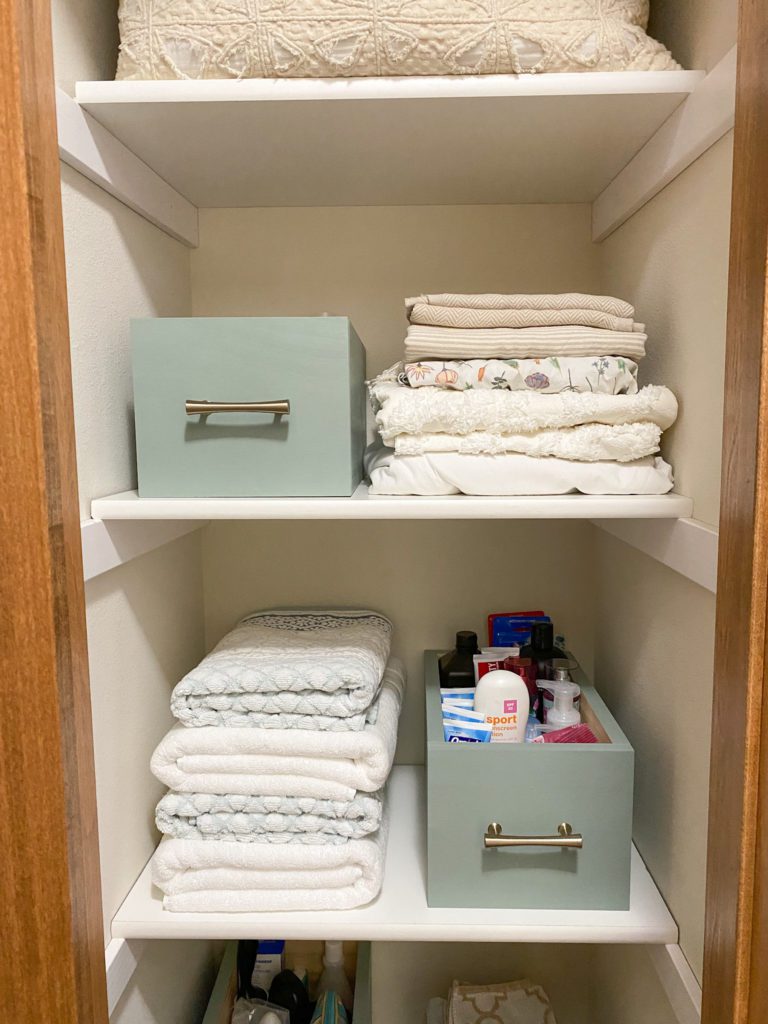
The Completed Linen Closet Organization Makeover!
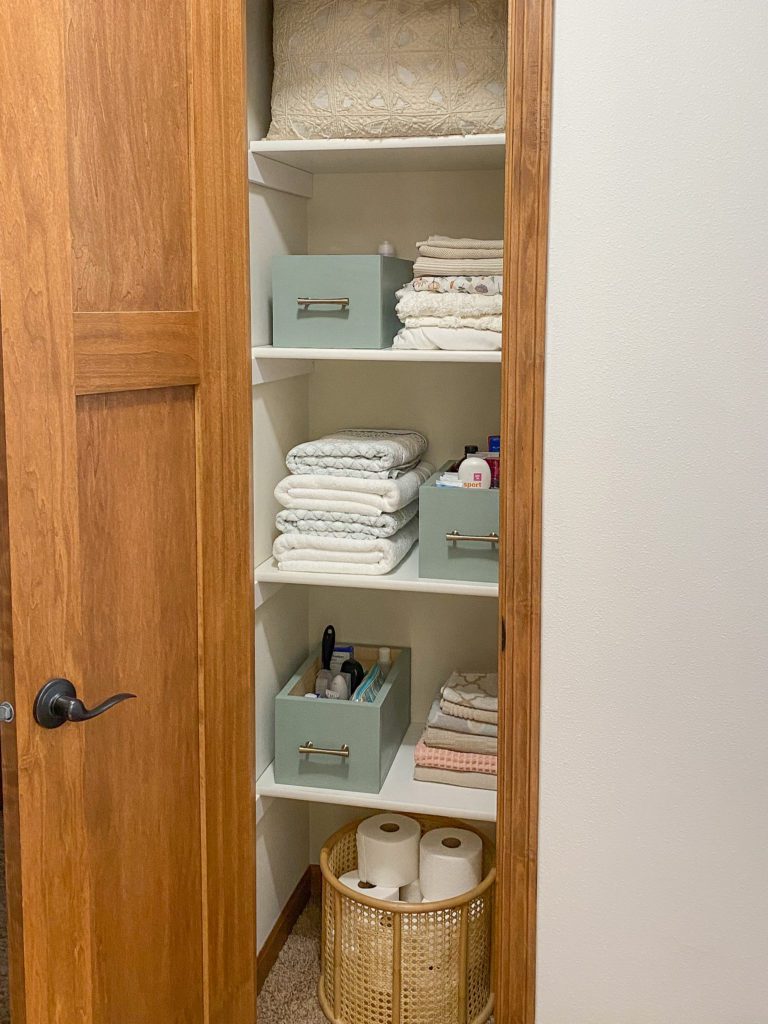
Enjoy your beautifully organized linen closet!
Rather than getting hit with an avalanche of medicine, now when I open our linen closet, I smile 🙂 It’s beautifully organized, looks pretty and it’s so easy to find everything. I love it. I hope you’ll love yours too.
Any questions, leave a comment below.
Looking for more Home DIY projects using this gorgeous Vintage Blue stain?
Check out these fun wood dowel planters! They have a unique fluted look to them.
Or explore this super simple entryway bench design!
Head here for more project inspiration from Minwax – and to hear all about this gorgeous Vintage Blue color!