How to Stain Outdoor Furniture: Plus a Black and White Modern Outdoor Bench!
The older I get the more I love amazing outdoor spaces. Something about the sunshine, warmth, good food, and laughter of kids playing in the backyard. Lately I’ve been building more planters and furniture to go on my back deck. Most recently I completed a modern outdoor bench that I wanted to share with you today. I’ll also be sharing with you how to stain outdoor furniture. It is a really simple process as long as you have the right stain and applicator, and follow the simple instructions.
Thanks to Cabot for sponsoring this post. I received compensation but all opinions stated here are my own. I’ve loved and used Cabot premium woodcare products for a long time.
Tools & Materials
- Cabot Semi-Solid Stain + Sealer in Black
- Cabot Semi-Transparent Stain + Sealer in Ultra White
- Purdy 2″ White Bristle Sprig Brush
- 7 2×4 8′ cedar boards
- 3 1×4 8′ cedar boards
- Miter saw
- Tape measure
- Random Orbital Sander with 120 grit sandpaper
- Tack cloth
- 2″ exterior coated screws
- Drill and drill bits
Wondering where you can purchase Cabot premium woodcare products? Head HERE to see what retailers near you carry Cabot products.
Time to Complete
It took me about a day to complete this project.
Modern Slat Bench Tutorial & How to Stain Outdoor Furniture
I used Ana White’s basic slat bench tutorial as the basis for my bench build. However, I modified some of the measurements, the type of wood, and the stain colors. See below for the details on my project.
STEP 1: Cut boards
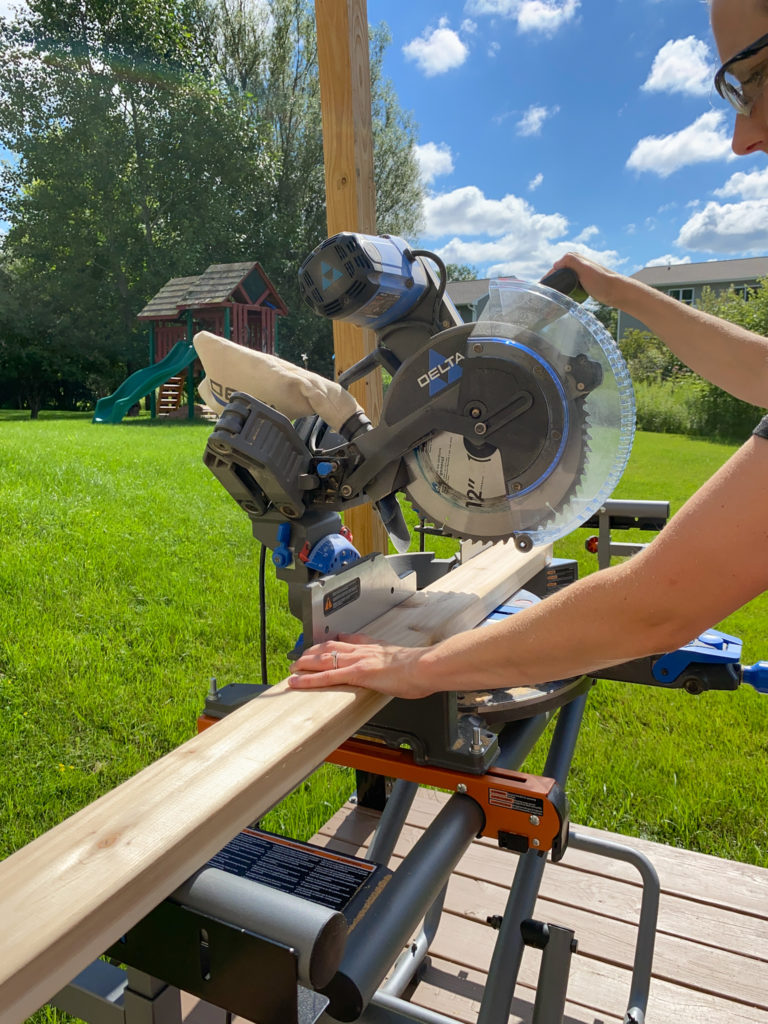
Using a miter saw, cut your 2×4 cedar boards in the following ways: 7 at 50″ long, 14 at 14 1/2″ long.
Cut your 1×4 cedar boards into 12 18″ boards.
All should be cut at the ends with straight 90 degree angles.
STEP 2: Sand boards
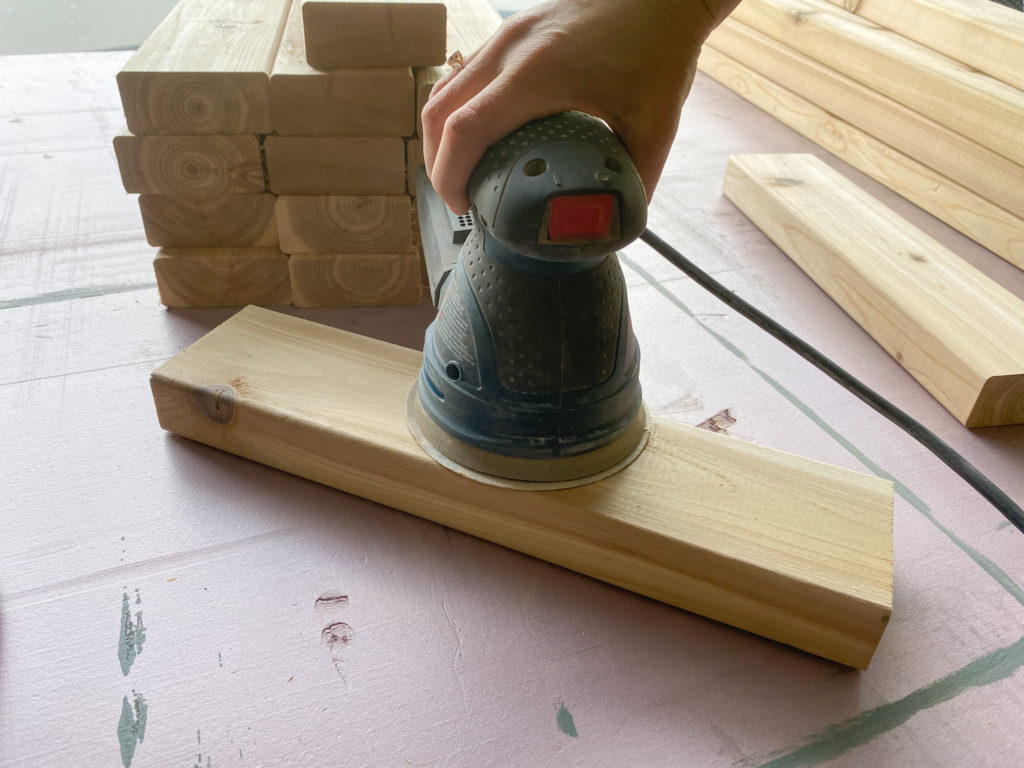
Next use a random orbital sander to sand down all of the boards. Since this is an outdoor bench, I used 120 grit sandpaper. If you would be making an indoor bench, you would probably want to sand down to 220 grit sandpaper to get an even smoother finish.
Sanding it is important because it helps open up the wood grain and make it ready to accept stain well.
Remove any sanding dust with a tack cloth.
STEP 3: Stain the 14 1/2″ 2x4s and the 18″ 1x4s using Cabot Semi-Solid Stain + Sealer in the color Black.
If you haven’t yet tried Cabot stain, you should! It’s a high-quality and durable exterior stain. The last thing you want is a peeling outdoor project to deal with so I recommend using a high-quality stain like Cabot.
They offer stain in a variety of opacities. I’ve used their solid stain and their transparent stains in the past. I hadn’t tried their semi-solid stain yet so I decided to give it a try with this project!
They have a wide variety of color options that you can get your stain tinted to. I chose black for these boards since I wanted a modern look for my bench.
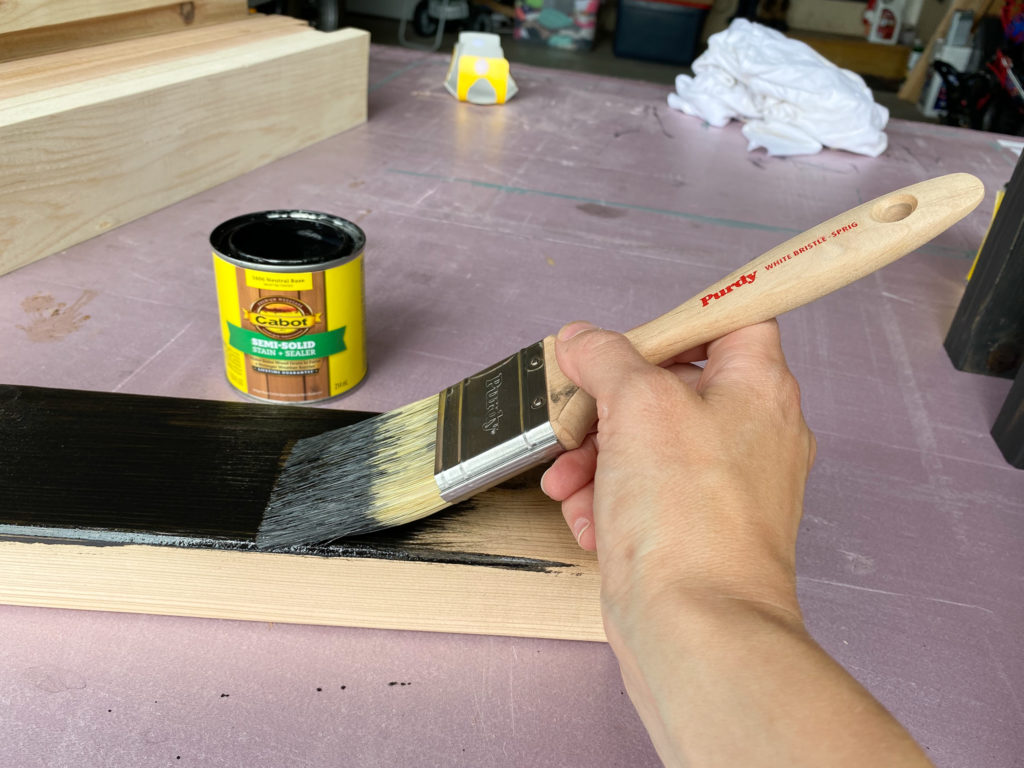
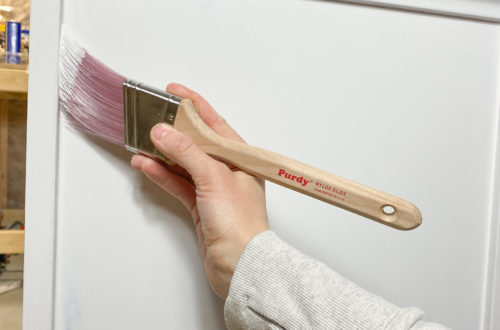
Apply the stain with a natural bristle brush like the Purdy White Bristle brush.
Only one coat of stain is needed. There is no need to wipe off stain after you apply it (like sometimes you would with interior stain).
When these boards have been stained, clean the brush with mineral spirits and then soap and water.
STEP 4: Stain the 50″ 2x4s using Cabot Semi-Transparent Stain + Sealer in the color Ultra White.
This stain is similar to the black stain in how you apply it but since it’s semi-transparent, you will be able to see more of the wood grain than you could with the semi-solid black stain.
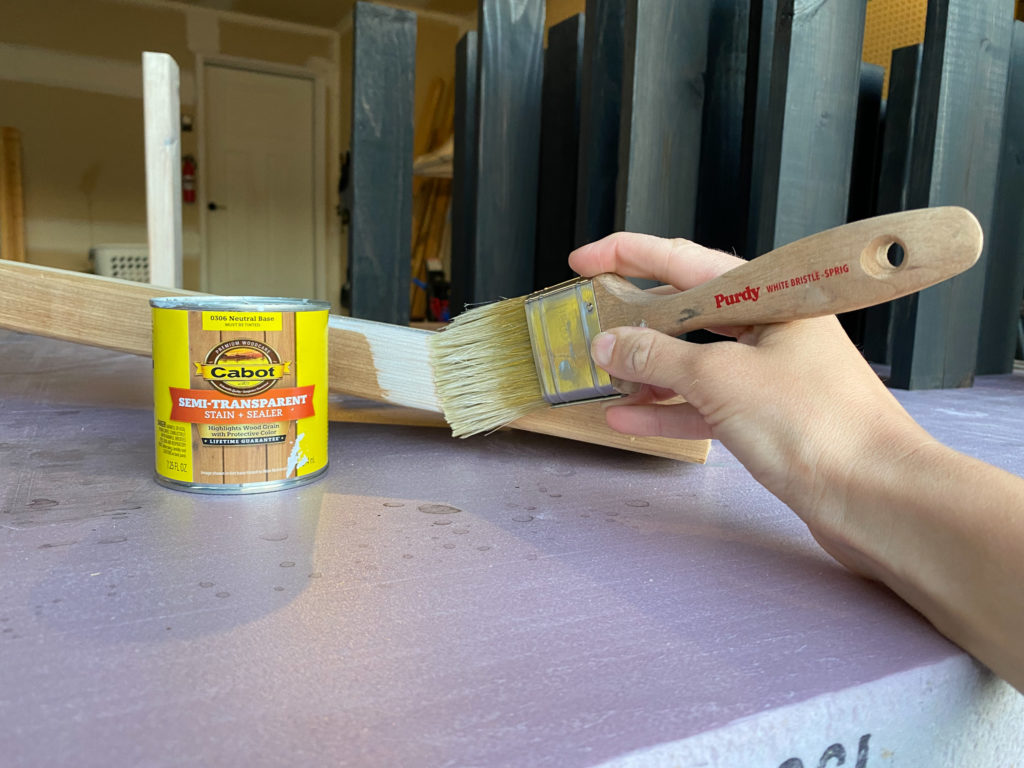
Apply the stain using a natural bristle brush like the Purdy White Bristle brush.
Apply only one coat. Ensure that you don’t over-apply or it won’t dry well and will look shiny.
Once all the boards have been stained, clean the brush with mineral spirits and then soap and water.
Step 5: Assemble the bench
Ana White has a very detailed tutorial on how to assemble this bench. I’ll summarize my assembly process below.

Start by laying down a white 2×4 with two 2×4 black legs coming out the bottom sides of it. Then layer on top of the black 2×4 legs a black 1×4.
Predrill holes and screw in 2″ screws to hold the 1×4 to the 2x4s below it.

Continue this process, alternating between laying down 2x4s and 1x4s as shown in the above picture. Each time ensure that you screw down boards using 2″ screws.
Continue until you have used up all your stained boards.
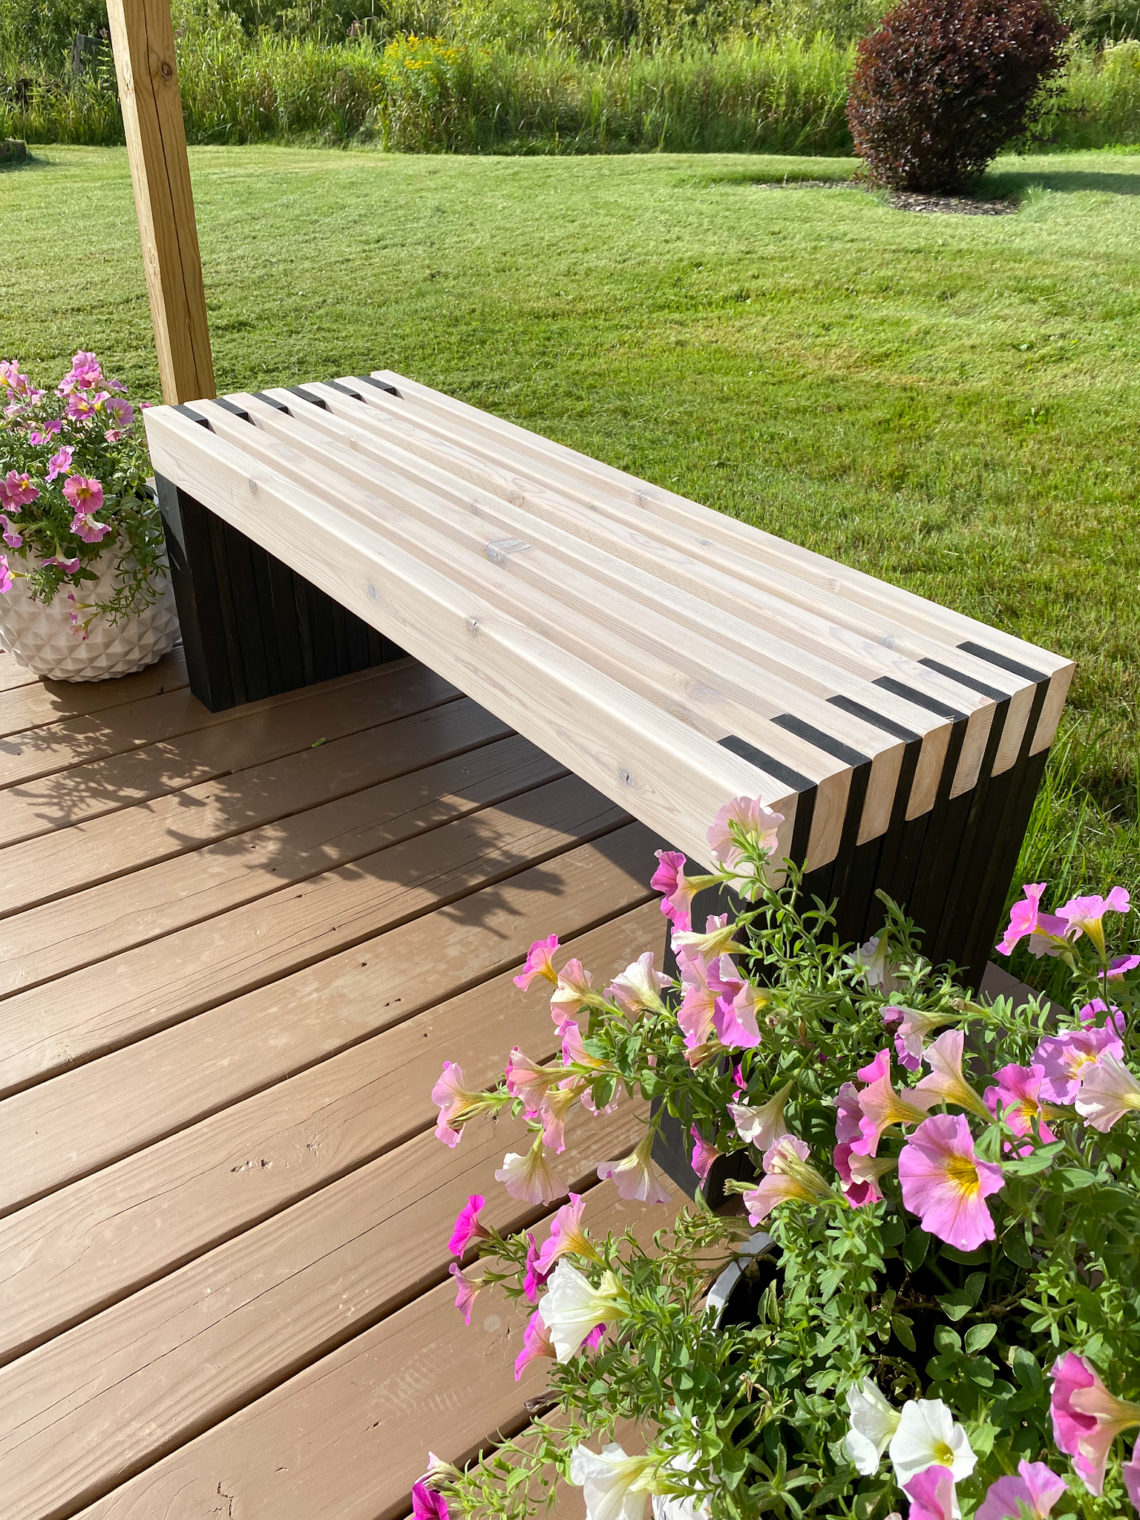
The Completed Modern Slat Bench!
And then you’re done! Stand it up, put some gorgeous flowers around it, and enjoy your modern sitting place in your backyard.

My favorite part is the corner view where the alternating black and white directly contrast one another.
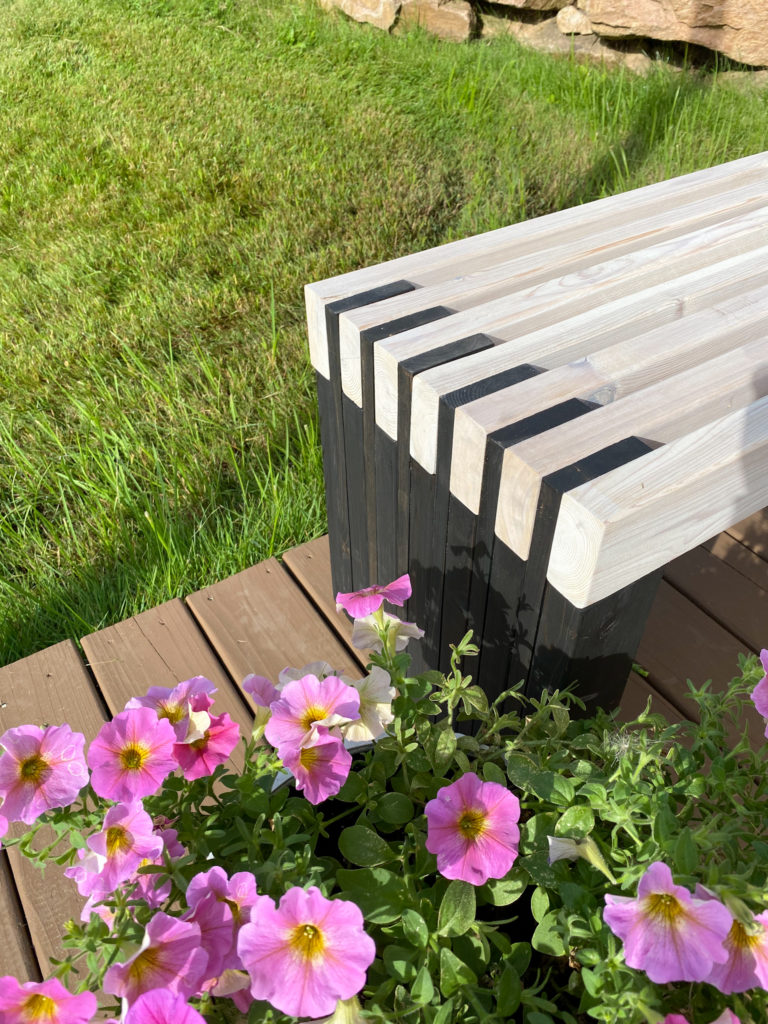
I love the clean, modern lines of it!
A Few Closing Reminders about How to Stain Outdoor Furniture
- Always use EXTERIOR stain on outdoor projects. It seems obvious but you would be surprised by how many people use interior stain on outdoor projects and they just don’t hold up well.
- Buy a high-quality and durable stain. You want this stain to last!
- Consider what opacity is best for your project. This will depend on the look you are going for and also the current condition of your wood. In general, the more solid the opacity, the more durable the stain is.
- Always sand before staining.
- Make sure that your wood is clean before staining it.
- Know the type of wood you are using and if you can stain it right away. Cedar you can stain right away but pressure-treated lumber like pine often requires months of drying before you can stain it.
Want to See More Gorgeous Outdoor Projects?
Have a deck to stain or refinish? Head here for a full deck refinishing tutorial.
Want to add a planter with some gorgeous flowers to your outdoor space? Here’s a super simple and inexpensive DIY planter tutorial.
Follow me on Instagram and Pinterest to see more upcoming outdoor projects!