How to Refinish Metal Lockers
Nearly everyone is looking for ways to have more storage in their home. Storage solutions are especially great when they keep clutter out of sight. Storage solutions are even better when they are unique and add to the overall look and feel of a room, rather than detract from it. Therefore, let me share with you an idea: refinished metal lockers!
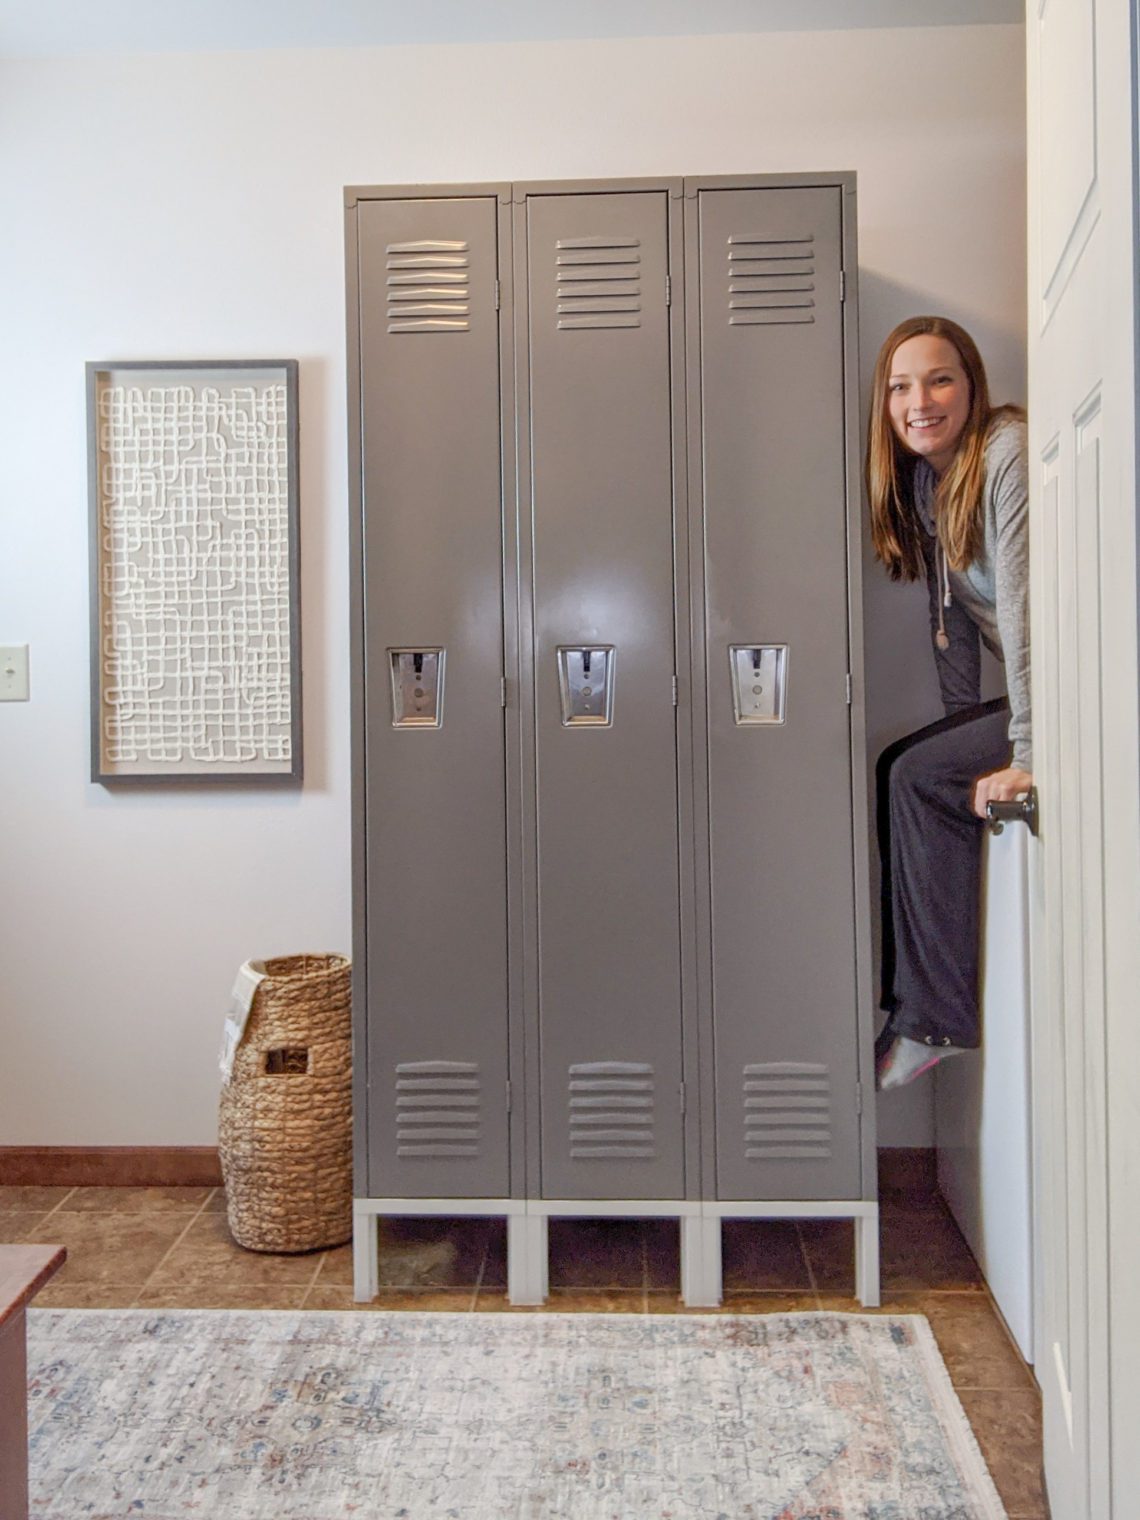
They are a unique storage solution for a mudroom, entryway, laundry room, bedroom or any other room in your home. They keep clutter out of sight and bonus: they can be very inexpensive! In this tutorial I’ll show you how I refinished old rusty metal lockers. I then placed them in my mudroom to provide some great storage for my family’s belongings.

Here are the materials you will need for this project: A very soft paint brush such as a Purdy Syntox Brush, a wire brush, painter’s tape, Rust-Oluem Ultra Cover paint, Rust-Oleum Stops Rust Universal Bonding Primer, and felt furniture pads. It would also be good to have TSP cleaner on hand.

Step 1: Purchase old metal lockers. This is the fun hunt to find the treasure. Look on Facebook Marketplace and Craigslist. Some people will try to sell them for hundreds of dollars. However, if you are patient, you can likely find them for only $20-50. Don’t worry about rust. You can paint over it.

Step 2: Remove rust with a wire brush or hand sander. My lockers did not have a lot of rust on them so the wire brush worked well for me. However, if you have large areas to tackle, a hand sander will be a better option. You do not have to fully remove all the rust. Simply get off any flaky parts.

Step 3: Clean off the lockers with TSP cleaner. You will want to remove all dirt and grease from your lockers to prep them for paint. Be careful to avoid sharp areas.

Step 4: Tape off any areas that you do not want painted. I decided to just paint the legs of my lockers so I needed to tape off just that area. If you decide to paint lockers in their entirety, you will want to ensure that you tape off the areas where you open the lockers so that you do not accidentally get paint on those areas.

Step 5: Paint the lockers with a Rust-Oleum primer that stops rust.

You will want to ensure that your primer stops rust. The Rust-Oleum Stops Rust Universal Bonding Primer is a great option. I used a very soft Purdy paintbrush to try to minimize brush strokes. If you are able to paint outdoors in temperatures above 50 degrees Fahrenheit, I recommend using spray paint instead to get the best finish on your lockers.

Step 6: Paint over the primer with a durable paint such as Rust-Oleum Painter’s Touch Ultra Cover paint.

I chose a gloss finish to match the finish of the other parts of the lockers I decided not to paint right now. Similar to my comment above on the primer, if you are able to paint outdoors in temperatures above 50 degrees Fahrenheit, I recommend using spray paint instead to get the best finish on your lockers.

Step 7: Add felt pads to the bottom of the legs of your lockers to prevent scratching the floor. I bought sheets of felt pad material, cutting them to the size of the legs.

Press them onto the bottom of the legs of the lockers. Use super glue if you want them to really stay affixed.

Set them up in your home and you are set to go! I’m already so pleasantly surprised by how much they hold.
Want more ideas for how to update your mudroom or entryway? Check out this DIY Rustic Wood Coat Rack. It adds a nice rustic farmhouse style look to your home and is functional as well.
Want to explore other ways to update your home using Rust-Oleum products? Check out this post on How to Update Vents and Doorknobs in your Home.
Please note: This post contains affiliate links meaning that I earn a small commission when you purchase an item after clicking on one of my links. You don’t pay anything extra. Thank you for your support!