5 Amazing Staining Tips! Including how to prevent blotchy stain, how to choose the right stain opacity, and more!
I love staining wood. (I love painting wood too but something about the wood grain showing through stain makes me so happy!) Staining wood isn’t difficult but it’s important to follow the instructions and also have a few staining tips in your back pocket to help prevent some common mistakes. Therefore, I wanted to share with you 5 Amazing Staining Tips!
I recently built a mini nightstand for my 3-year-old daughter. It sits next to her toddler bed and I must admit: Something about mini things is just so cute! I love it!
Next I’ll walk you through how I made this nightstand while sharing 5 amazing staining tips along the way.
Let’s get going!
Thanks to Minwax for sponsoring this post. I received compensation from Minwax but all opinions stated here are my own. I’ve used and loved Minwax products for years!
Time it Took to Complete Toddler Nightstand Build
I completed it in 2 days but you could easily do it in 1 day if you dedicated a day to it!
Tools & Materials
- Minwax Water-Based Pre-Stain Wood Conditioner
- Minwax Wood Finish Water-Based Solid Color Stain in Pure White
- Minwax Wood Finish Water-Based Semi-Transparent Color Stain in Pure White
- Minwax Polycrylic Protective Finish in Matte Finish
- Minwax Stainable Wood Filler
- Purdy Premium Folding Multi-Tool
- Purdy 2” XL Sprig Paintbrush
- Synthetic Pad
- 220 Grit Sandpaper
- Tack Cloth
- Wood Glue
- Rags
- 1 1×10 4′ Oak Board
- 1 1×3 8′ Oak Board
- Miter Saw
- Tape Measure
- Wood Screws
- Clamps
- Drill
Click HERE to find a local retailer for Minwax products!
Toddler Nightstand Tutorial (Including 5 Amazing Staining Tips!)
I recently moved my daughter from a crib to a toddler bed and wanted to give her a little nightstand to set her things on and put a lamp on. Therefore, I grabbed some oak boards and got to work!
STEP 1: Cut boards to size using a miter saw.
Cut the 1×10 boards into 4 pieces: Two pieces that are 12 1/2″ long and two pieces that are 6 1/4″ long. Cut at a 90 degree angle for all these boards.
Cut the 1×3 into 6 pieces: Four pieces that are 15″ long with each end cut at a 12 degree angle. Ensure that the angles on each end are perpendicular to one another. Then cut 2 pieces that are 3″ long that are cut at 12 degree angles, slanting in towards each other so that the pieces look like acute trapezoids.
STEP 2: Sand the boards by hand with 220 grit sandpaper.
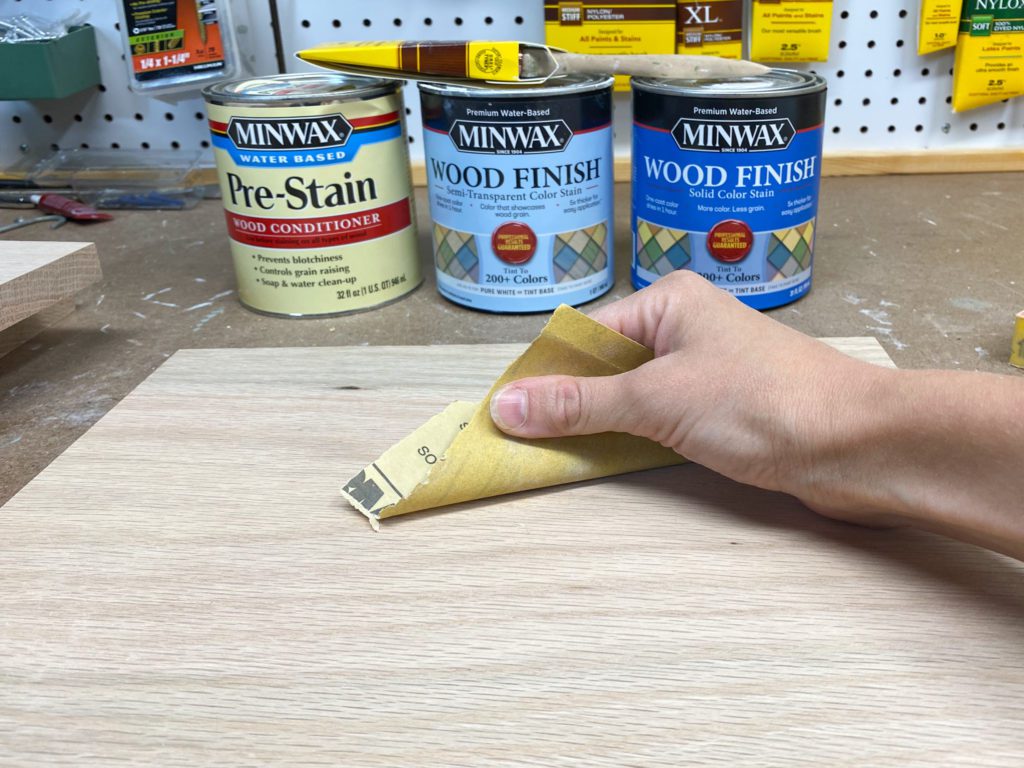
Here’s your FIRST STAINING TIP!! ALWAYS sand wood before you stain it. Even if it’s brand new wood. If it’s wood that has paint, stain, or a protective sealer on it, ensure that you sand off ALL that previous finish before trying to stain it. This will ensure that your wood is ready to accept stain evenly.
(One rare exception here is Polyshades, which are specifically designed to go over previously stained or painted surfaces without stripping. However, this is an exception! The vast majority of stains require sanding down to bare wood before applying stain.)
Once you’ve sanded the boards, remove any sanding dust with a tack cloth.
STEP 3: Apply Minwax Water-Based Pre-Stain Wood Conditioner
I have two staining tips to share with you for this step!
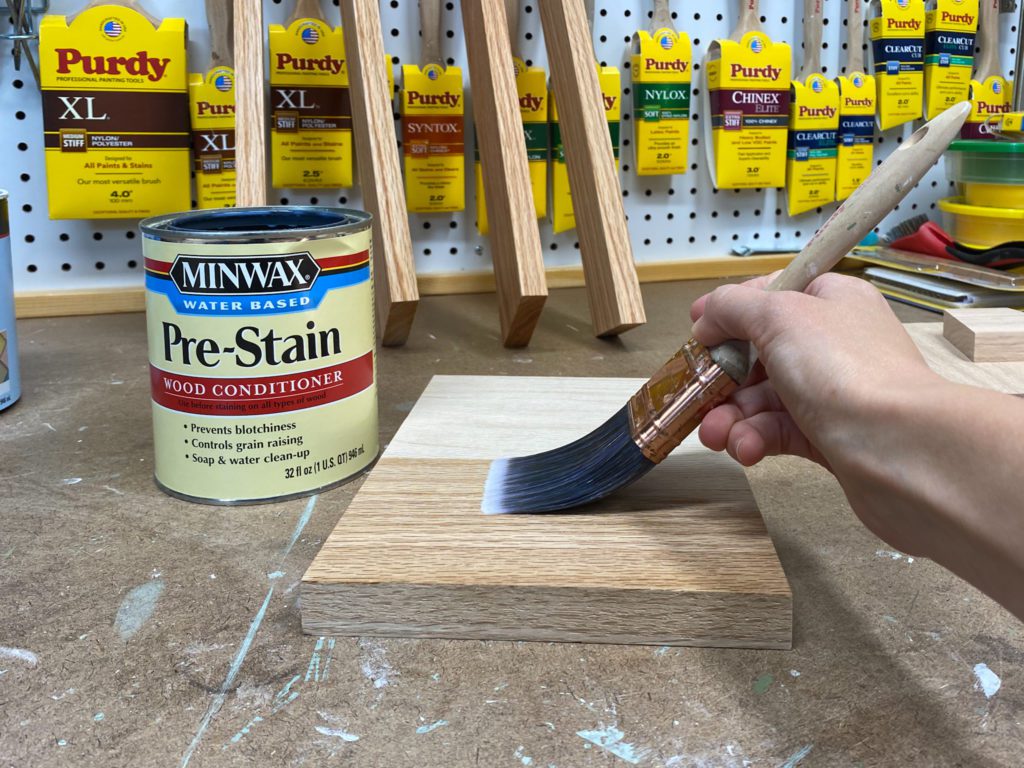
STAINING TIP 2: ALWAYS use pre-stain wood conditioner before staining. This product helps reduce blotchiness that can happen when you stain wood, especially when its soft wood species like pine. Therefore, this is especially important when working with pine boards. However, I recommend using it on all wood types!
STAINING TIP 3: Use water-based products with water-based products, and oil-based with oil-based. What do I mean by that? I mean that if you are planning to stain with water-based stain, use a water-based pre-stain wood conditioner. If you plan to stain with oil-based stain, use an oil-based pre-stain wood conditioner.
Apply Minwax Water-Based Pre-Stain Wood Conditioner using a Purdy 2” XL Sprig Paintbrush. After 1-5 minutes, remove any excess with a rag. Allow it to dry for 15-30 mins.
Then sand with 220 grit sandpaper to remove any raised grain. Next remove sanding dust with a tack cloth.
STEP 4: Apply your choice of stain. I used Minwax Wood Finish Water-Based Solid Color Stain in Pure White and Minwax Wood Finish Water-Based Semi-Transparent Color Stain in Pure White.
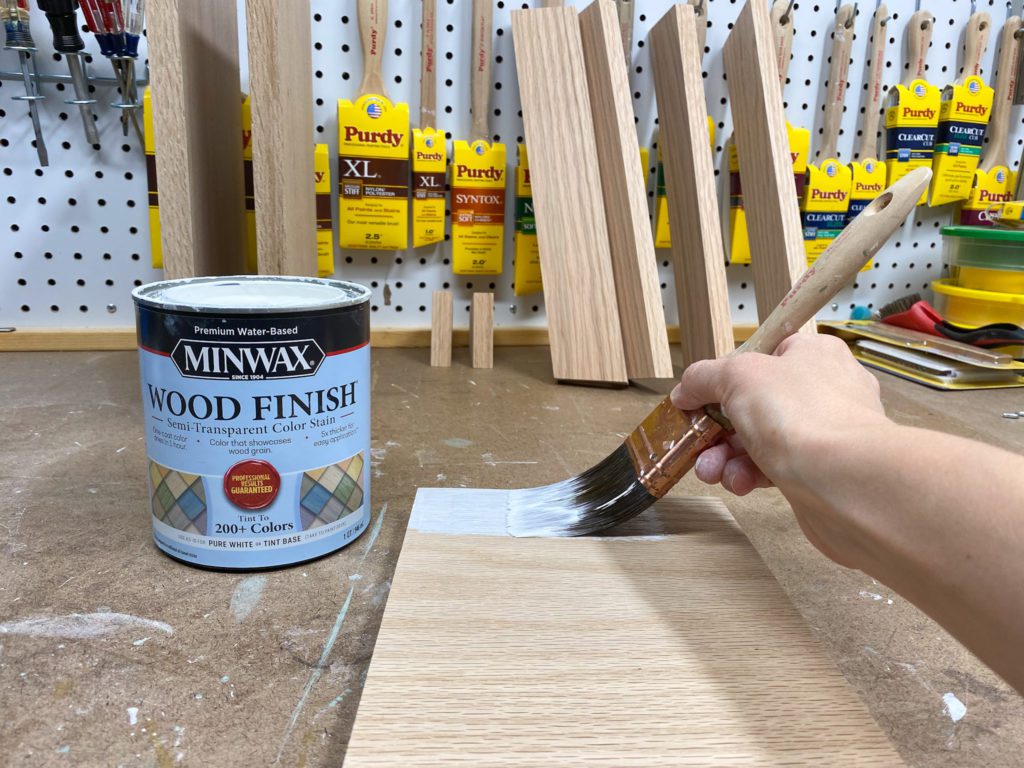
Apply the stain using a Purdy 2” XL Sprig Paintbrush. For the semi-transparent stain, immediately (within 2 minutes) remove any excess with a rag. For the solid color stain, immediately (within 2 minutes) remove any excess with a synthetic pad.
STAINING TIP 4 coming at you! Pay attention to the opacity of the stain. You can purchase transparent, semi-transparent, or solid stain (some exterior stains are also available in semi-solid). The final look of the stain finish will vary a lot depending on the opacity. You can see the wood grain really well with the transparent stain options. On the other end of the spectrum, the solid color stain you can barely see the wood grain at all! I use them all depending on the look I am going for.
STEP 5: Assemble the nightstand using screws, glue, and clamps.
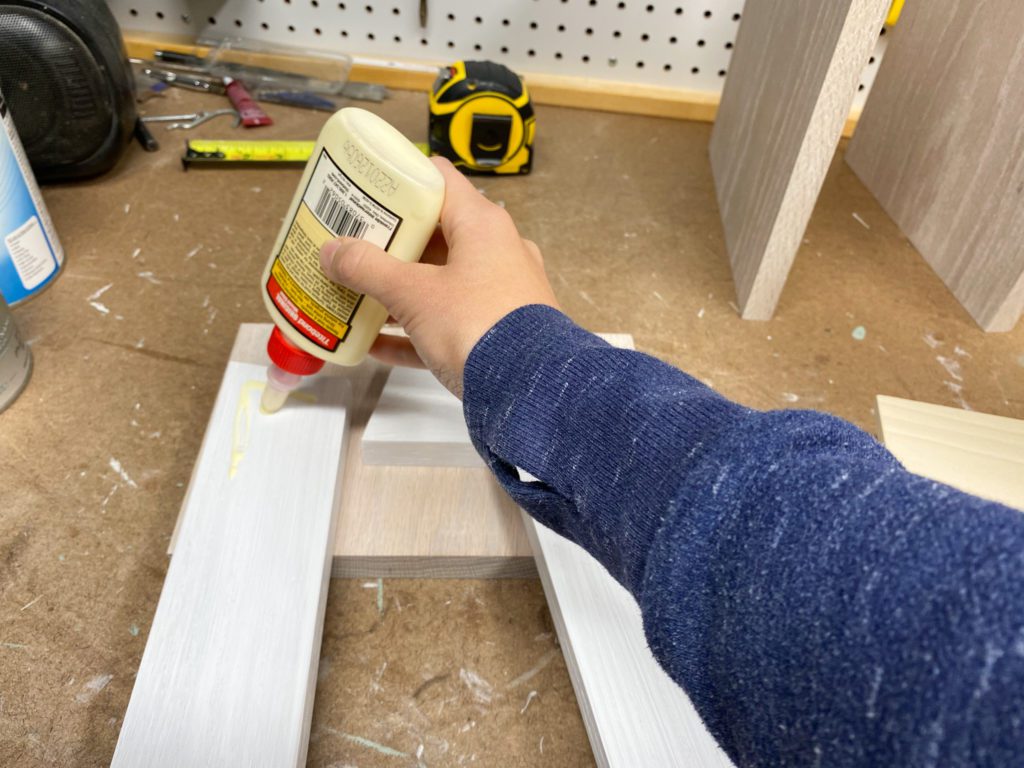
This is a pretty easy assembly. I simply glued and screwed together the boards so that I had a simple nightstand that is basically a rectangular box with legs. See my final pictures below to see how it all fit together.
Fill any screw holes with Minwax Stainable Wood Filler using a Purdy Premium Folding Multi-Tool. Dab some stain on top of them to hide them.
STEP 6: Apply Minwax Polycrylic Protective Finish in Matte Finish.
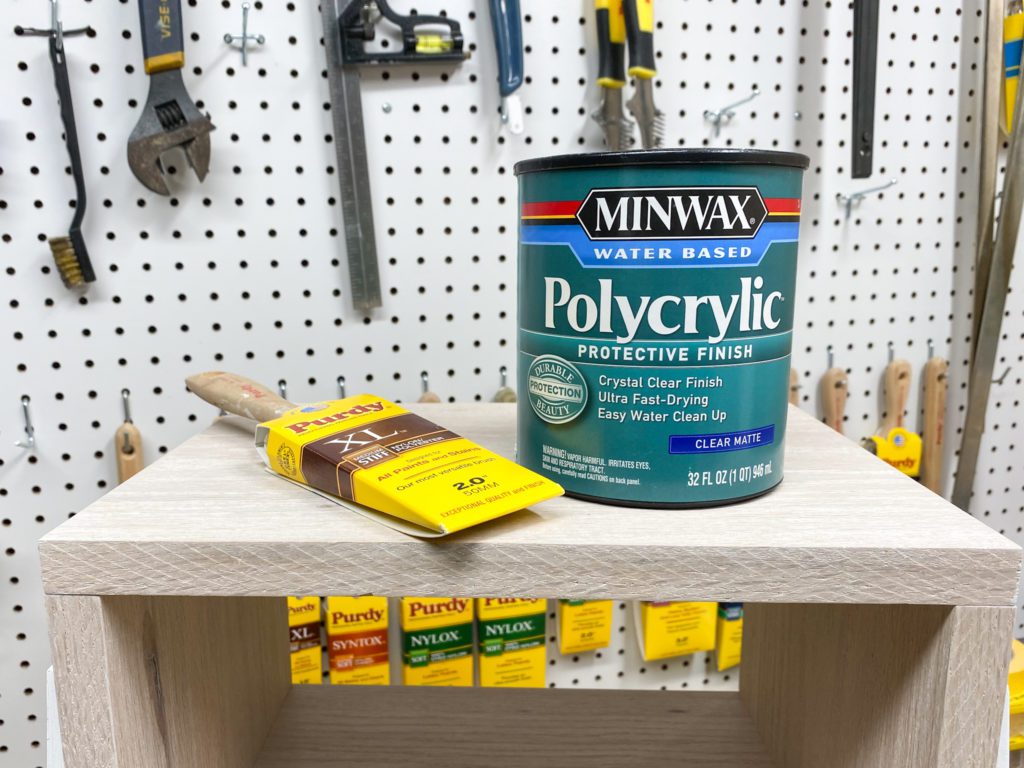
Using a Purdy 2” XL Sprig Paintbrush, apply the polycrylic protective finish. Once it dries, sand it lightly with 220 grit sandpaper and apply one more coat.
HERE’S THE LAST STAINING TIP! STAINING TIP 5: Don’t forget to apply a protective topcoat to your stained surface. This isn’t always needed for exterior staining projects but for all interior projects, make sure to protect your stained wood. You can use a wax, polycrylic, or polyurethane product. I prefer Minwax Polycrylic Protective Finish in Matte Finish. It’s more durable than wax. It doesn’t yellow over time. Also, it’s water-based and easy to work with a clean up.
The Completed Toddler Nightstand!
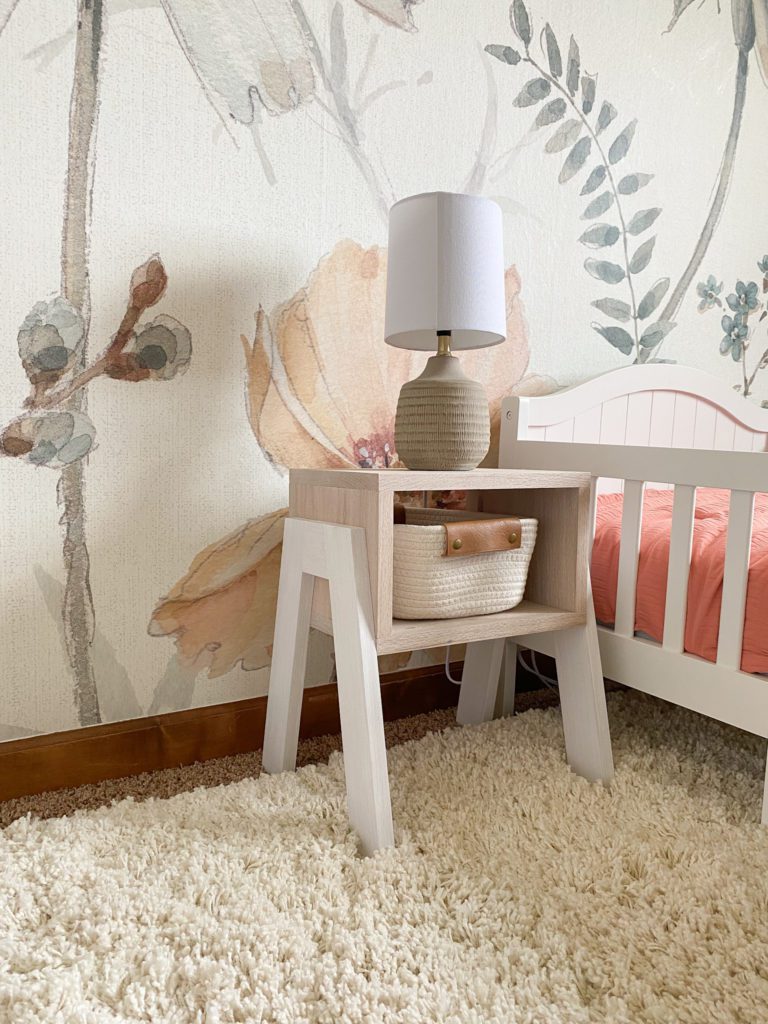
Here’s the sweet mini nightstand in my daughter’s room.
I also love the mini lamp I found to go with it. I guess you could say I think mini things are quite cute 🙂
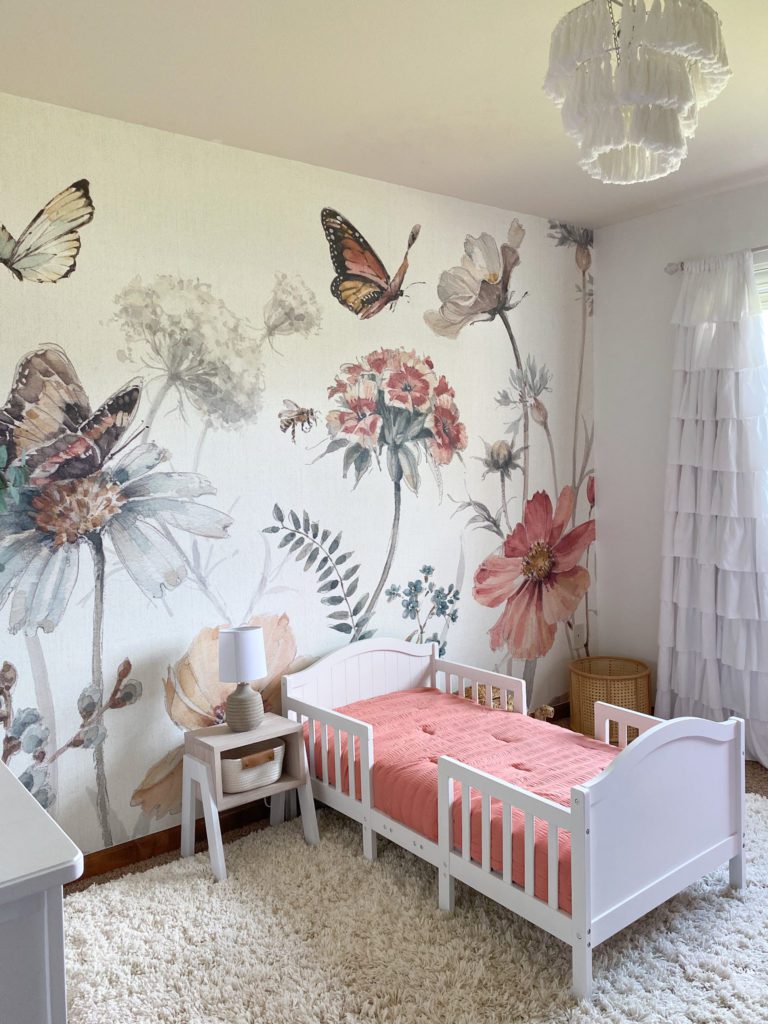
Here is a full view of the room, complete with bold floral wallpaper.
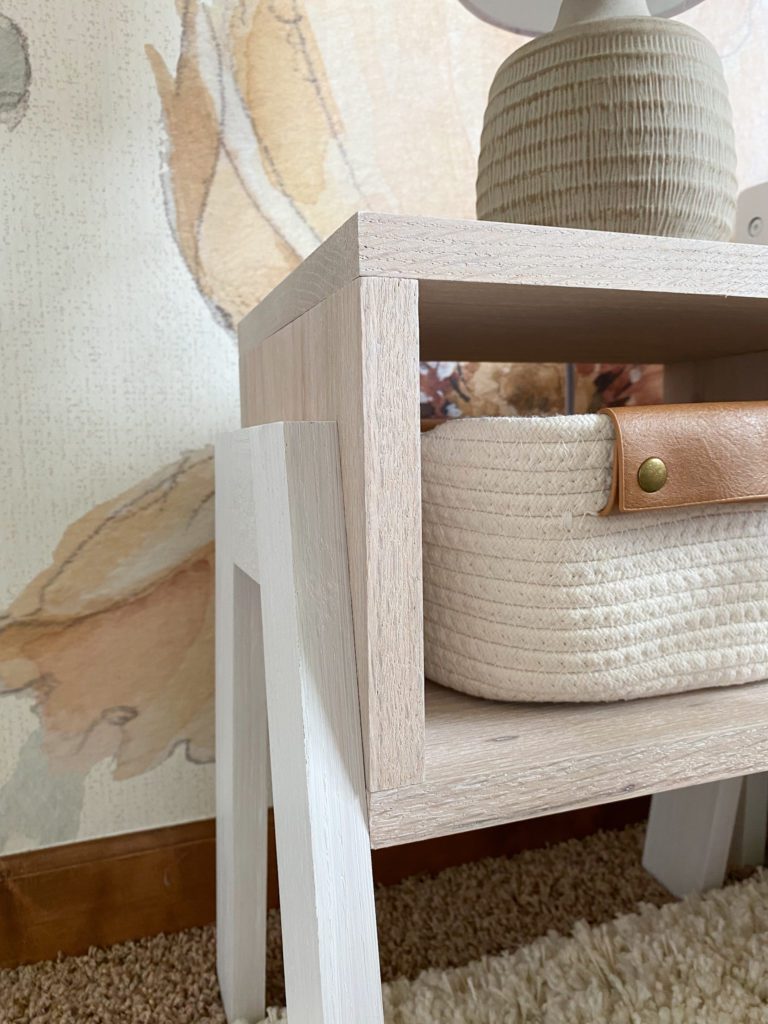
Here’s a close-up of the nightstand so you can really see the difference in transparency between the two stains I used. Both are Pure White in color but the legs are stained in SOLID color stain while the box part of the nightstand is stained in SEMI-TRANSPARENT color stain. They definitely look different! I love pairing them with one another.
Looking for more staining tips and project ideas?
Follow along with me on Instagram and Pinterest to see all my past projects and be in the know when my future projects happen!
Head to the Minwax website for more project ideas and to explore all their different amazing stain colors!