
My son LOVES Star Wars. When I painted his sister’s dresser, he pleaded with me to paint his too. I knew this would be a great opportunity to do something fun. Therefore, the Ikea Hack R2-D2 Dresser was born!
Follow me HERE on Instagram to see all my home DIY project reveals! Not into Instagram? Sign up for my emails here instead!
Below I’ll share with you the steps you need to take to make this happen. It is time consuming because it’s artistic. You spend hours drawing out all the details and painting them perfectly. Honestly, I loved the process.
I worked on it mostly after my son went to bed and every morning he would wake up and rush to see how much more I had added the night before. He would jump up and down and squeal with excitement. It was the sweetest; it made every hour working on this R2-D2 dresser well worth it.
This post contains affiliate links which means I may get a small commission off any purchases made from my links. It’s no extra cost to you. Thank you for your support!
Tools & Materials for R2-D2 Dresser
- White Ikea Hemnes 3-drawer dresser (or any dresser you can find!)
- Krylon Chalky Finish Paint in Blue, Red, Black and Gray
- Small Paint Brushes
- Gray Sharpie Marker
- Yardstick
- Level
- Plywood (at least 30″ x 15″)
- Jigsaw
- String/Twine
- FrogTape Painter’s Tape – Green
- Minwax Polycrylic Satin Finish Spray
- 2 L Brackets/Corner Braces
Time to Complete the Dresser
This really depends on how quickly you draw and paint on the design. It took me about 2 weeks because I worked on it mostly in the evenings when my son was asleep. And of course I took some days off to do other things 🙂
Step 1: Draw the Design on with a Pencil

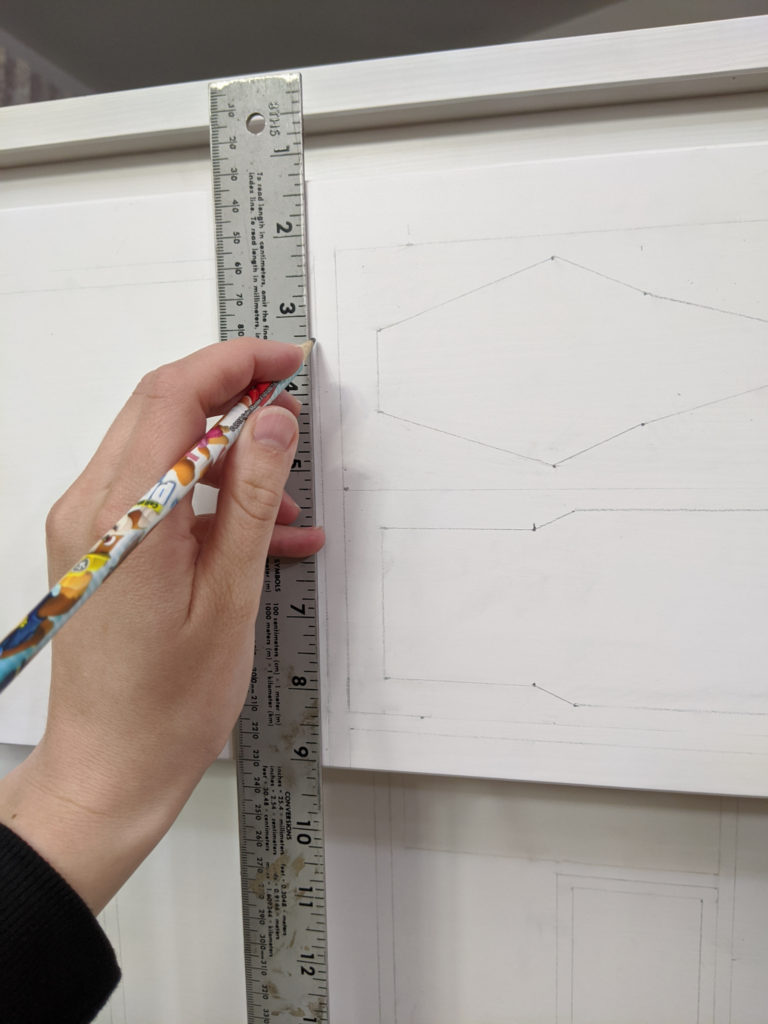
This is the most time-consuming part so just take your time and enjoy it! While looking at a picture of my dresser or a little R2-D2 figurine like I had by my side, draw out the design onto the front of the dresser. Use a level and a ruler to make sure your lines are straight and level.
Step 2: Outline the White Shapes in Gray Sharpie Marker
Using a gray sharpie marker and a yardstick, put lines around the shapes that will remain white in the inside. The gray sharpie just gives them permanence.
Step 3: Paint the Different Sections with Blue and Gray Paint

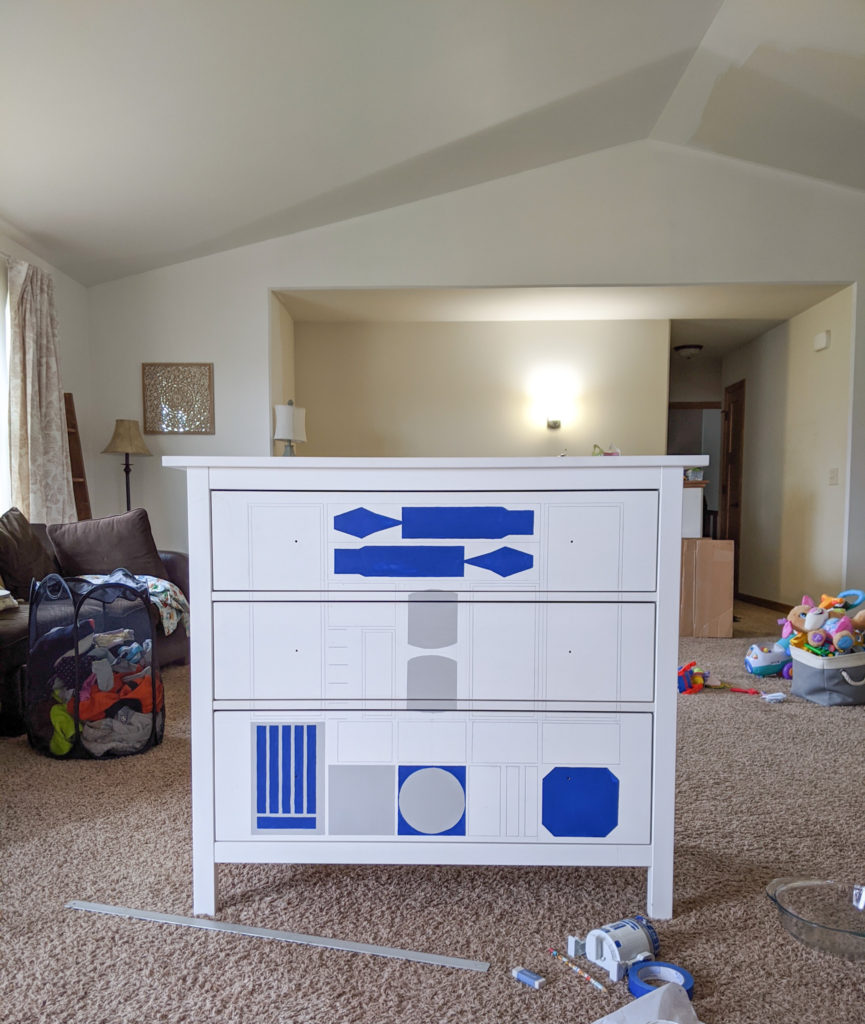
The best type of paint to use for this is Krylon Chalky Finish Paint. This paint will adhere well to the dresser and will cover well, often not requiring a second coat. I tried using other types of paint but they didn’t work very well. Most didn’t adhere well.
Use small painter’s paint brushes to get in the small areas. Use FrogTape painter’s tape as needed to get really smooth, crisp lines.
Step 4: Cut the Head out of Plywood
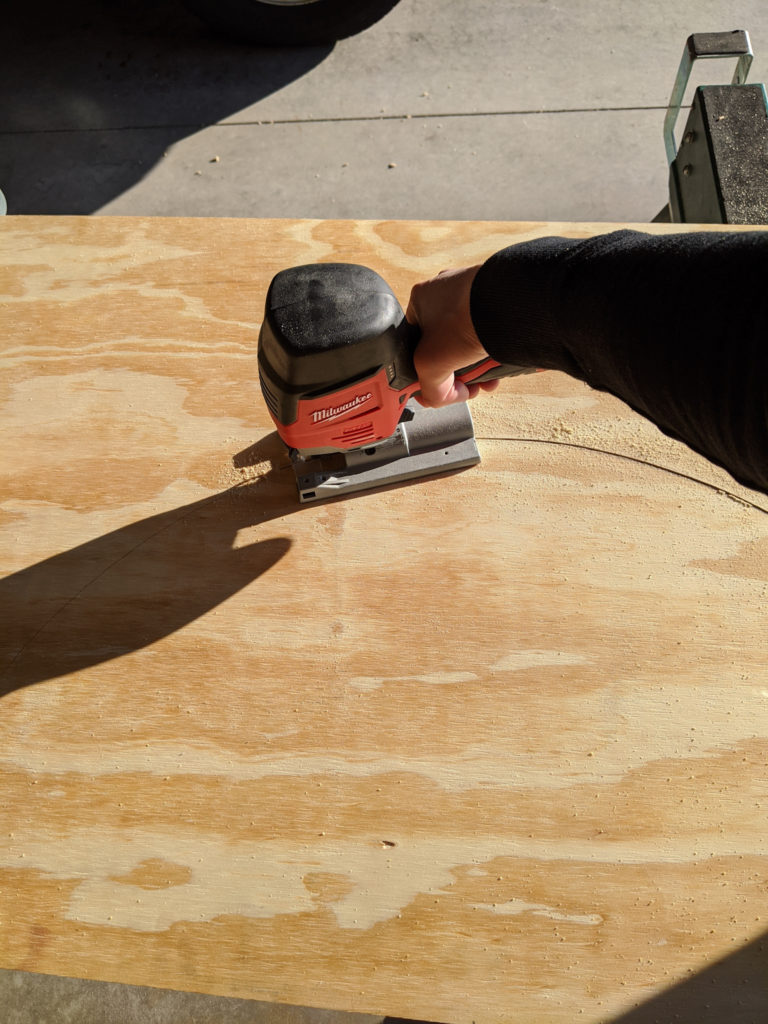
Using a jigsaw, cut out a semicircle from a piece of plywood. Your semicircle should be 30″ in diameter.
You can draw a perfect circle by tying a pencil to a string. Let 30″ of string out from away from the pencil. Place the end of that 30″ string in the center of the circle. Then move the pencil along the plywood, making a mark that is always 30″ away from the center of the circle. Then cut along this line with a jigsaw.
If you have trouble getting a perfect semicircle, you can always sand the edge of the plywood a bit to smooth it out.
Step 5: Paint the Semicircle Gray
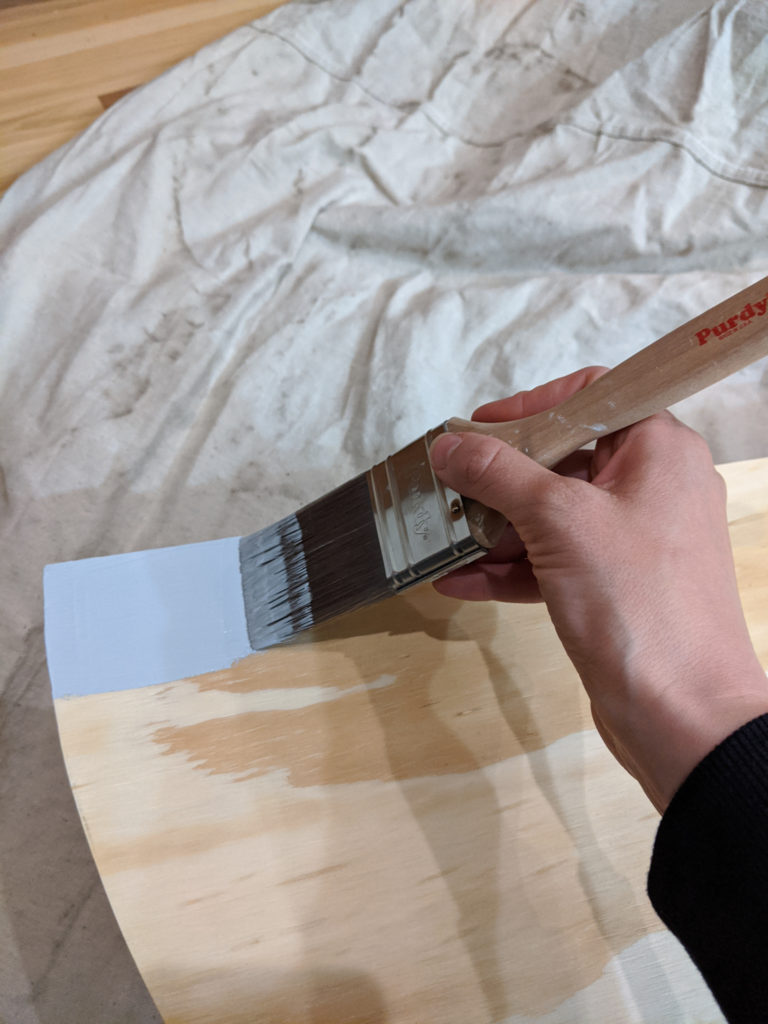
Paint the semicircle gray with Krylon Chalky Finish paint. I only painted the front and edges but if I would do it again, I’d paint both sides!
Step 6: Draw the Design on with a Pencil
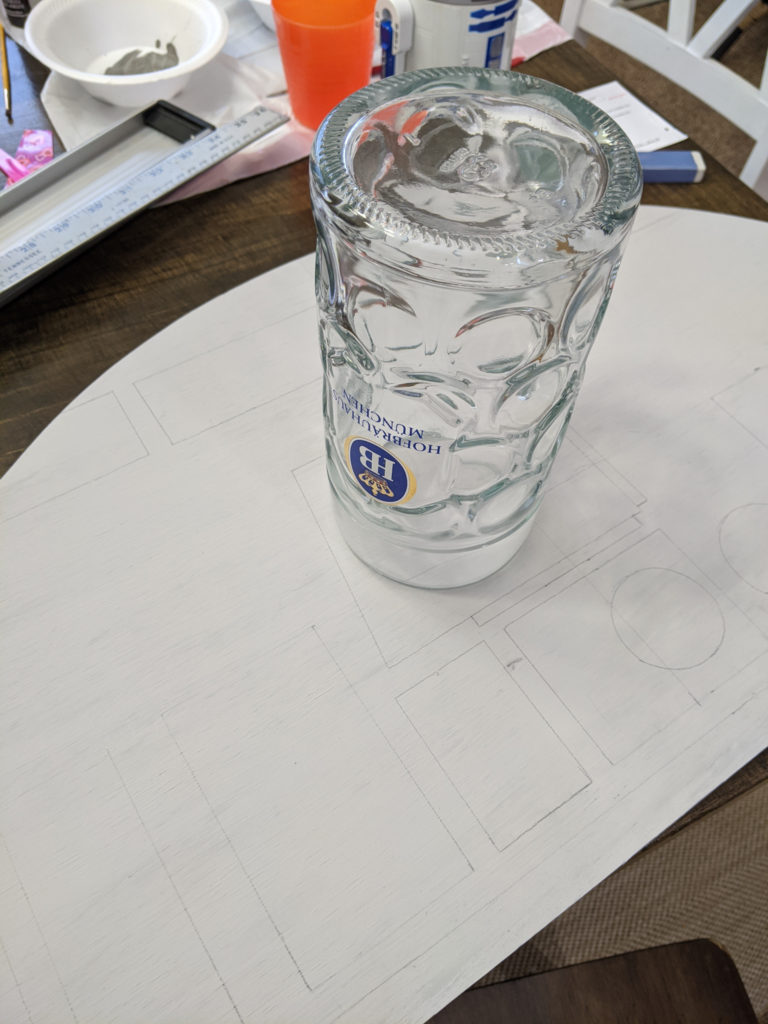
Carefully draw out the design on the head. This part is pretty intricate so make sure to leverage random objects around your home to help you – like this giant German beer stein for a large circle!
Step 7: Paint the Different Sections

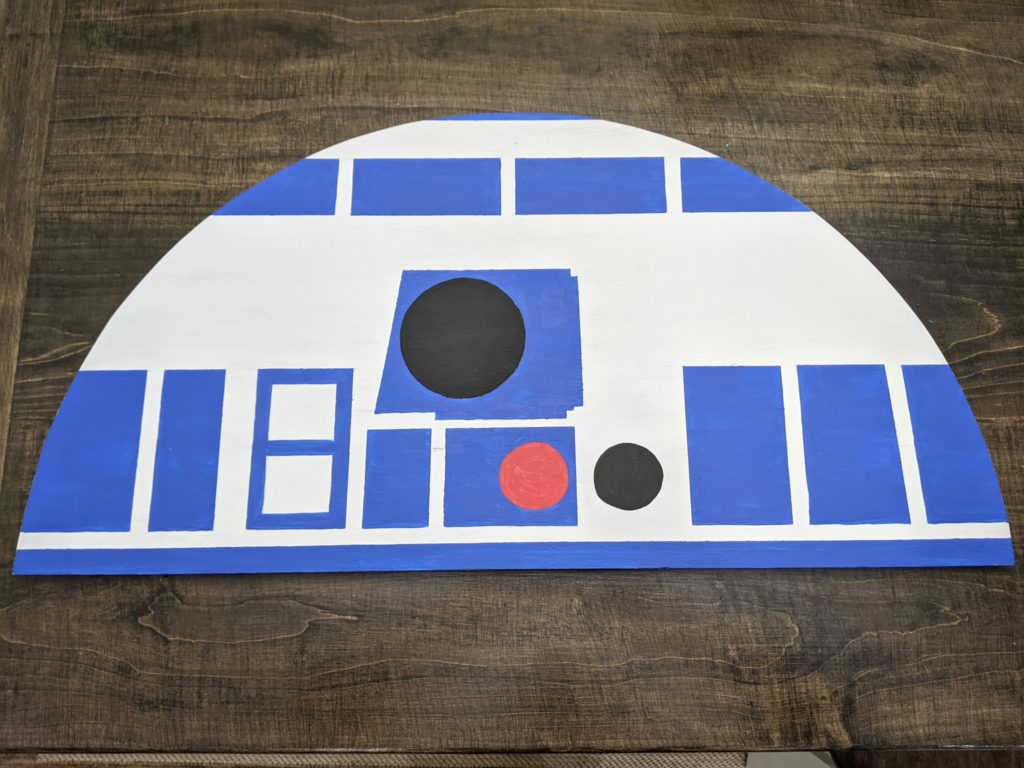
I have to admit – I didn’t get red chalky finish paint for this. It just didn’t seem worth the cost. I used acrylic paint and it worked out okay in this instance.
Step 8: Apply Polycrylic Protective Finish to the Dresser and Head
This step is really important in order to protect your painted dresser from scratches. I applied the spray polycyrlic. The polycrylic in a can that you paint on would probably create a more protected surface. It’s up to you but just make sure to apply at least 2 coats of polycrylic to protect it.
Step 9: Attach the Head to the Dresser using L Brackets
Attach L brackets to the head and dresser in two places, securing on the head.
Beep Boop Bop! He’s Finished!

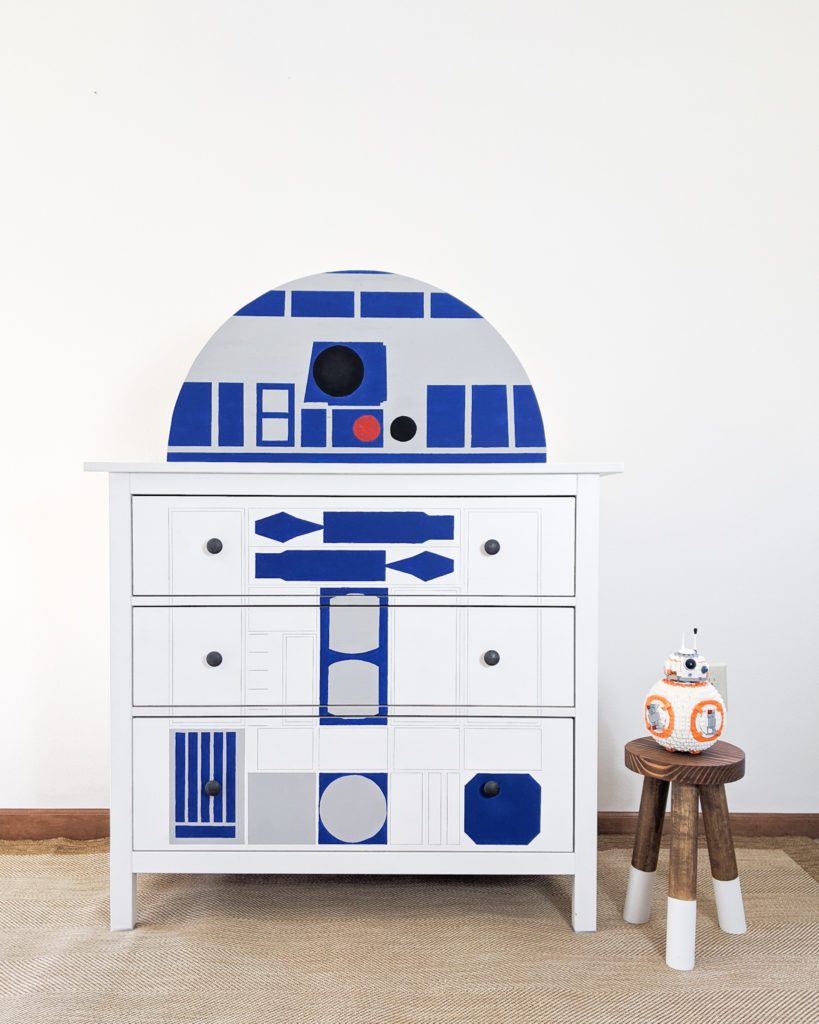
The Star Wars R2-D2 dresser is done and my son loves him! Definitely an Ikea hack that I had a ton of fun with.
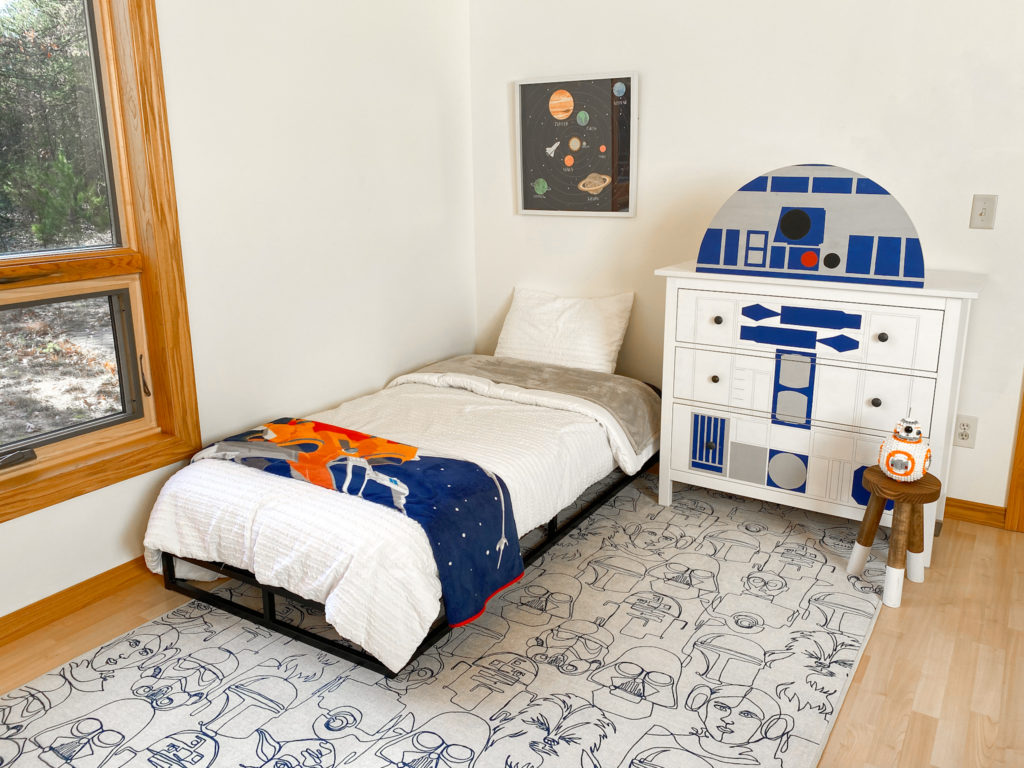
Add a fun rug, blanket and some Star Wars legos to complete the room! It’s my son’s dream room – until he stops loving Star Wars, which will probably happen in about 5 days (hah! just kidding….kinda).
Here are links to the other items in the room in case you are interested:
Dipped Leg Round Wood Stool (or learn how to make your own HERE)
Any questions on this Ikea Hack R2-D2 Dresser project, of course just message me.
Interested in other fun home DIY projects?
Sign up for my emails here so that you always know about my new projects and DIY tips!
Head here to see a great storage solution for a kid’s room!
What about an art deco color block wall?! Head here to see that beauty.
Simple DIY bookends for kids’ rooms or gifts are here.