
How to Remove Stains from a Bathtub
Do you have an old stained bathtub that you have tried over and over again to clean? The soap scum. The iron stains. All the dirt and grime just won’t come off. The good news is that I have a DIY bathtub cleaner solution that will clean your tub. It only takes two simple household items. It works wonders!
First, a little background on my tub.
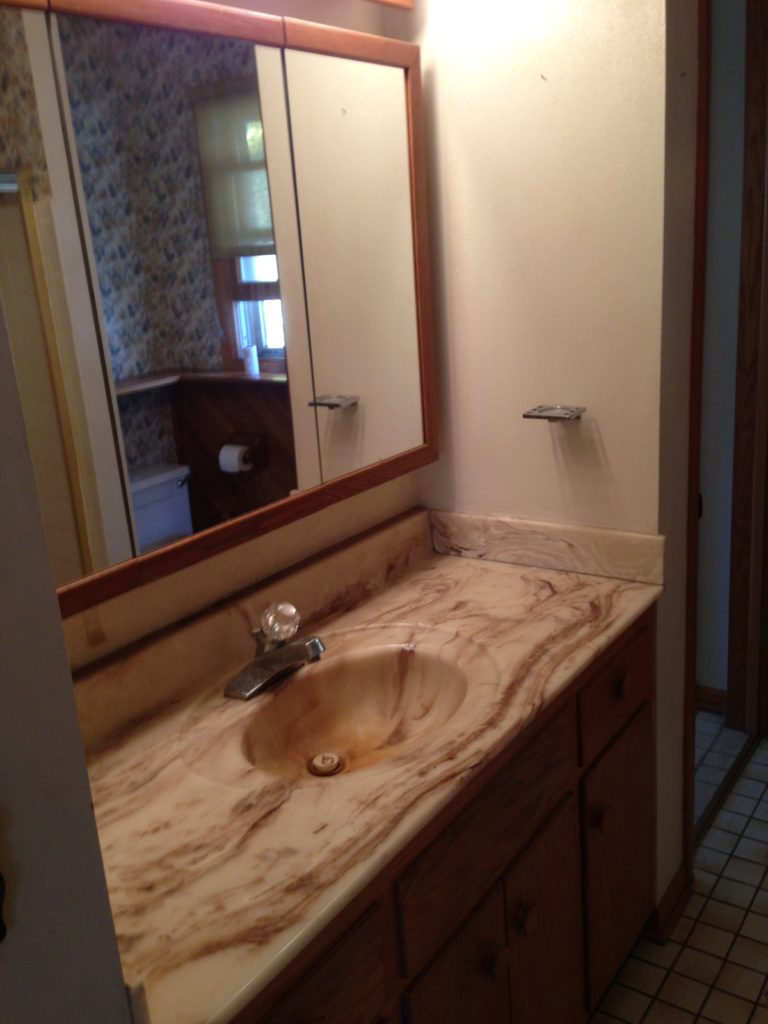
If you haven’t yet heard, I normally tell people that we bought the dirtiest, least updated 70’s home we could find. Some people think “Eh, I’m sure I’ve seen dirtier!” Well, check out the pictures below for what the bathroom looked like when we purchased the home. How did I agree to purchasing this house?!? Well, I never touched or used anything in the bathroom until it was all gutted and redone! Clearly we looked past all of this and saw the potential in the home.
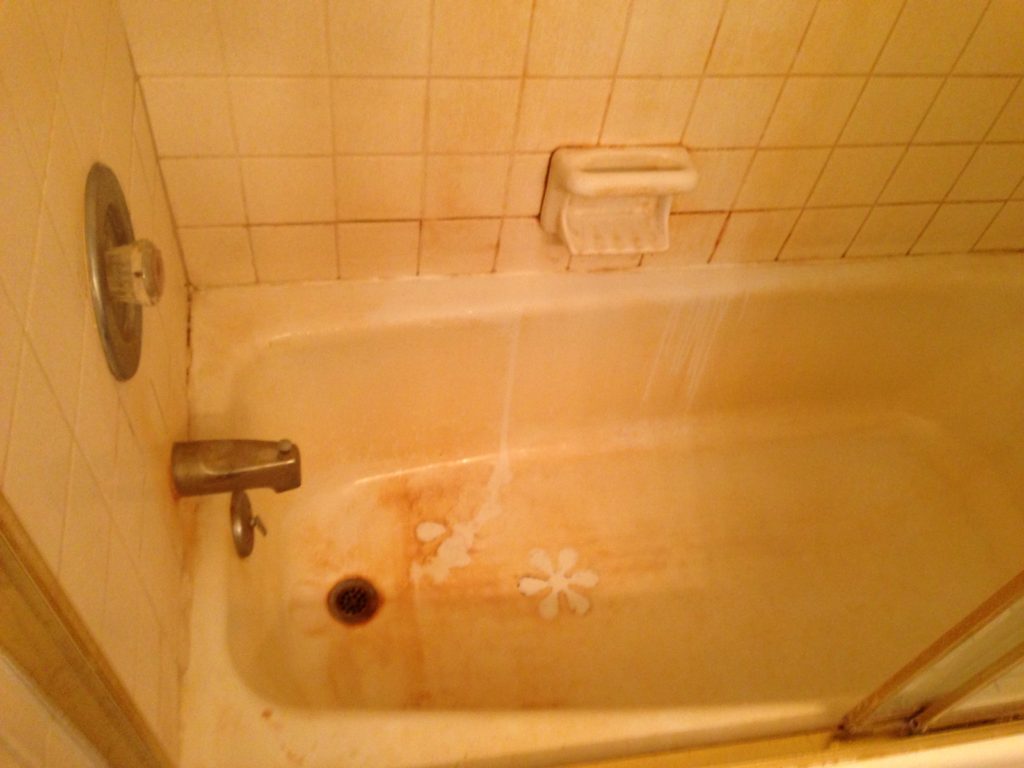
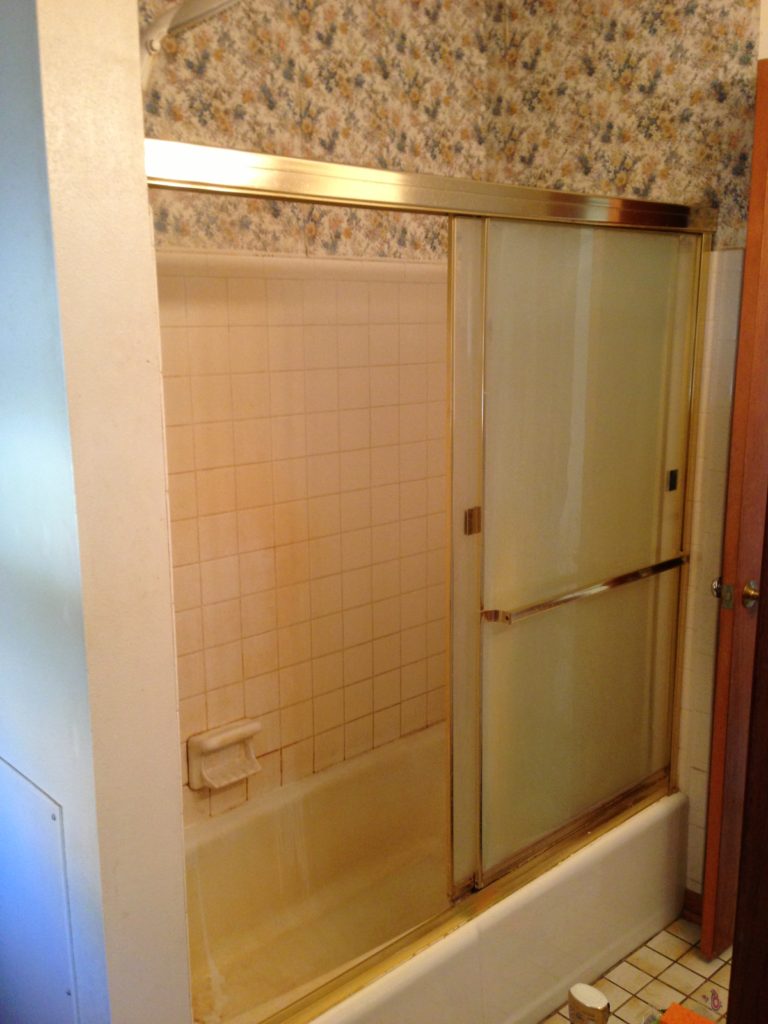
I still gag when I look at these pictures. Thank goodness my husband has absolutely no problem with nasty stuff (probably because he’s been a nursing assistant and a mechanic).
Now the magic formula for cleaning a bathtub!
That nasty tub you see in these pictures? We did not replace it. We simply cleaned it. YUP! I can’t believe it either. My husband had the crazy idea to try to clean it before completely replacing it.
Here’s the magic formula to clean the nastiest, dirtiest, most iron-stained tub you have ever seen: White vinegar and Dawn dish soap (the blue kind is the best!).
Want more DIY home tips and tricks? Sign up for my emails here to stay in the know!
A few easy steps and some scrubbing and our tub was literally sparkling clean.
Here are the steps:
- Put a mixture of 50% vinegar and 50% dish soap in a spray bottle. Shake it up a bit to mix the vinegar and dish soap together.
- Spray down the whole tub! Be generous about it! Let it sit for 5 minutes.
- Put on gloves, grab a non-scratch sponge and wipe it all down. You might have to scrub a little bit. You might not need to scrub. It depends on how stained your tub is and how long it has been since the stains started.
- Repeat this process if needed. Try experimenting with leaving it on longer or using a little elbow grease. It really just depends on how dirty your tub is and how long it’s been like this. Chances are this won’t require much effort.
One more cleaning option for stained bathtubs
Now your tub is probably sparkling and you are amazed! However, since we are on the topic of nasty tubs: Another option to try is Bar Keepers Friend Cleaner. I do not understand the name (hah!) but it is amazing at removing grime and iron stains from bathtubs. Simply follow the directions on the bottle.
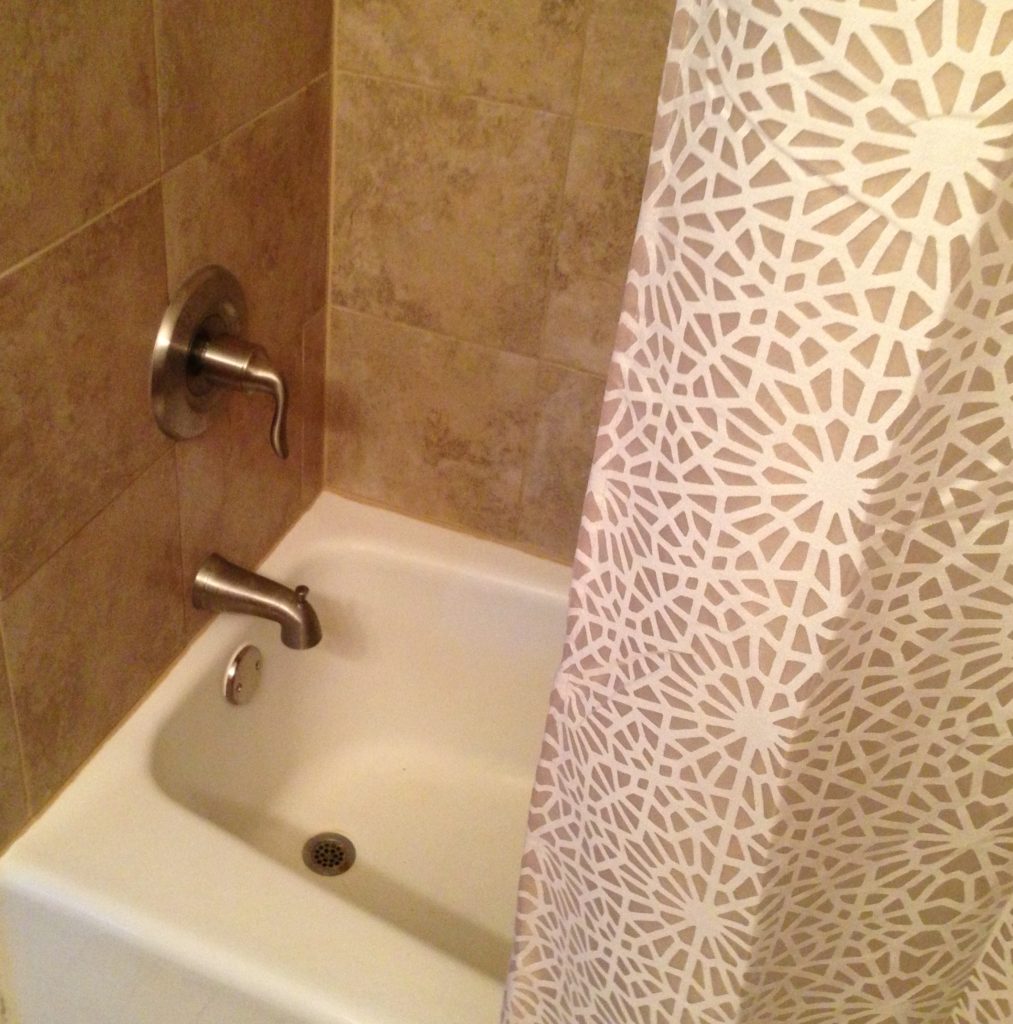
Here are some “After” pictures of the bathroom. You can clearly see the crazy change in the tub!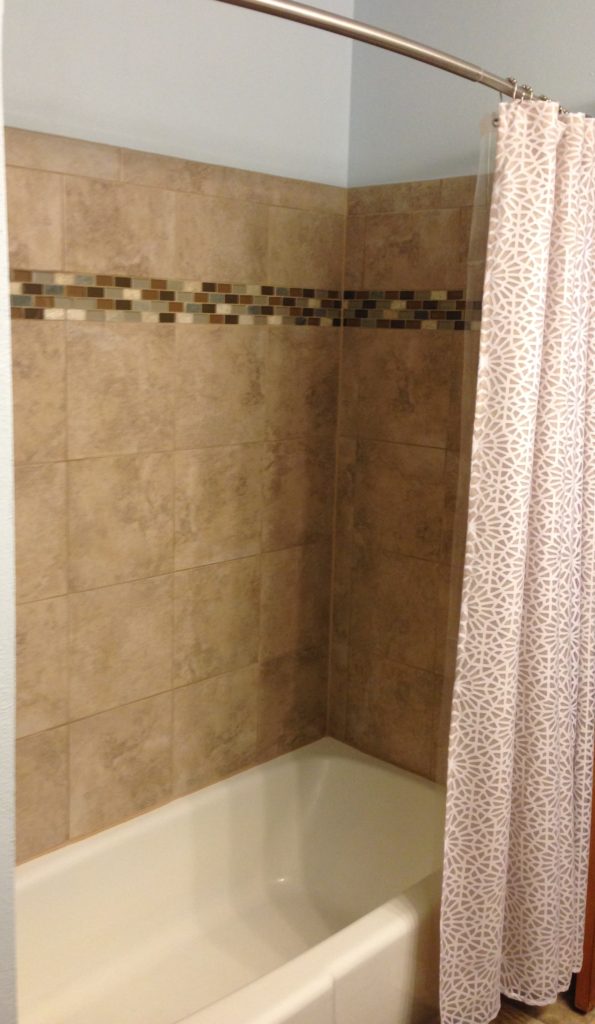
3 Do’s & Don’ts for Cleaning your Bathtub
- Do not use bleach or an abrasive sponge. You can damage the finish on your tub if you use chemicals that are too abrasive. Also, you can scratch off the finish if you use scrubbing agents that are too abrasive.
- Do not mix chemicals. Always follow the directions on cleaning products.
- Do regularly clean your tub. This might seem obvious but perhaps the person who owned your house before you didn’t think this was obvious (or did not care enough to do it). If you regularly clean it, you can avoid having to spend extra time deep-cleaning it to remove stains.
Years later…
If you are wondering how this tub held up over time, it held up perfectly. We lived in this house for 5 years and never had any issues with the tub. Of course you need to clean the tub but you clean it like you would any other tub.
If stains would ever come back, simply use the magic vinegar and Dawn dish soap combination. However, I never had to use it again!
So many more bathroom updates!
While the bathtub was the worst part of the bathroom, the rest of the bathroom was also pretty awful. The vanity was old, stained and coated in soap scum and hard water stains. There was a metal soap holder attached to the wall to the right of the vanity. The lights were 70’s – and not in a good way.
Therefore, we ripped everything out and installed a new vanity, a new mirror and a new towel bar. We decided to go with quartz counter tops similar to how we did in our kitchen because of quartz’s durability and beauty.
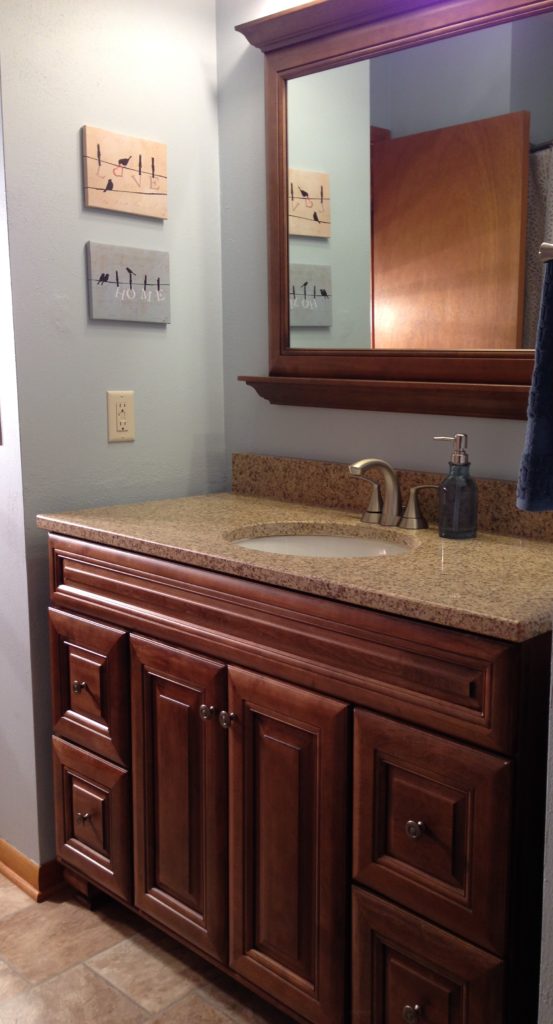
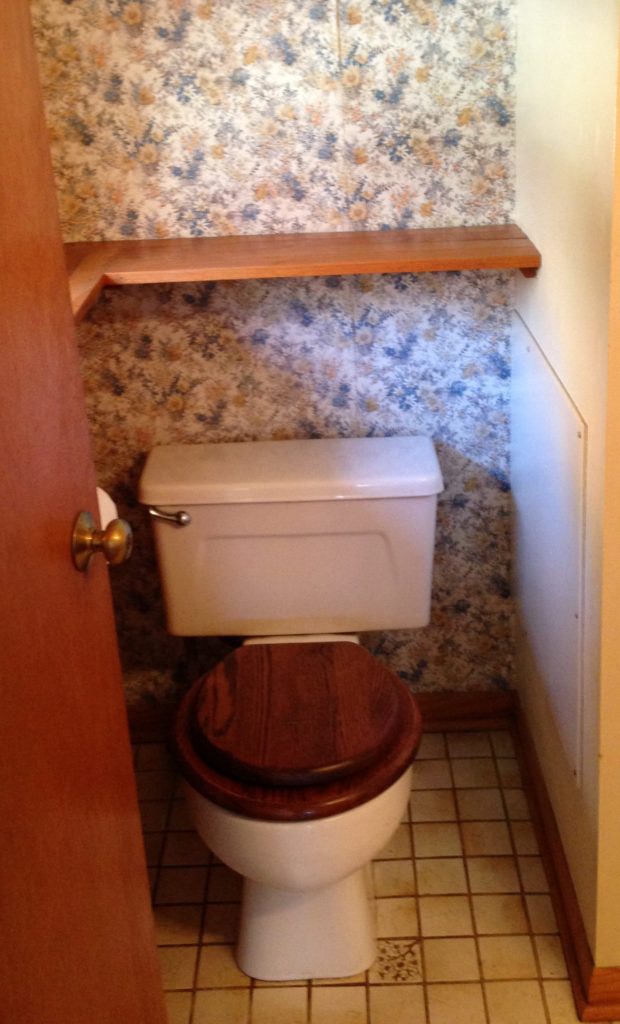
Furthermore, we updated the walls. We removed the “gorgeous” peeling floral wallpaper. We also removed the flooring that they had adhered to the wall (a style statement apparently!). We repaired the drywall and painted.
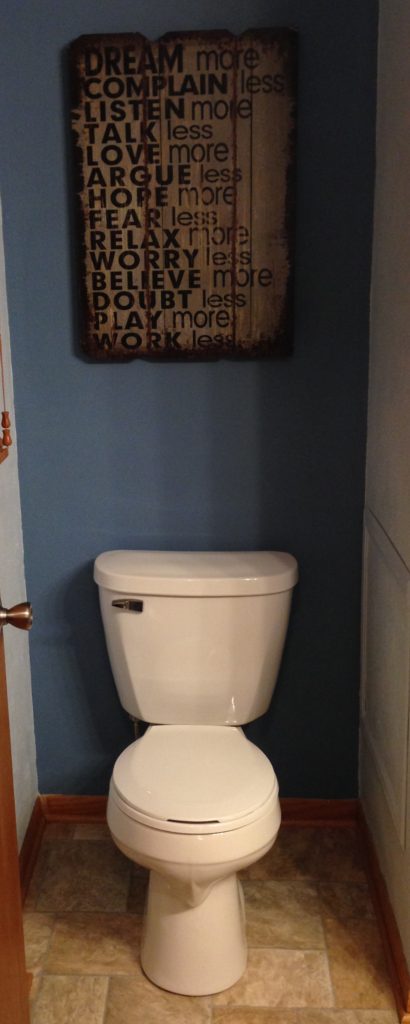
I know you are sad to see that we removed the wood toilet seat. I simply could not live with not knowing what nasty liquids had seeped into it. We installed a completely new toilet
Additionally, we put in new flooring. Previously the flooring was yellowish tile with a floral design on it. The grout was nasty. We installed vinyl flooring that looks like tile. It’s easy to clean and you cannot break it when you drop something on it. We love this flooring option.
The bathroom looks completely different now!
If you’re looking for other home DIY projects that helped turn our nasty 70’s home into a beautiful home, check these out:
How to Remove and Update Half Wall 70’s Spindles
How to Paint Old Kitchen Cabinets
A Simple Way to Update Old Doorknobs and Vents
I hope this inspires you to buy that nasty home, have that low mortgage payment and turn your house into one you love. Happy renovating!
Disclaimer: This post contains affiliate links which means I might get a small commission from your purchases on some links. It costs nothing extra for you. Thanks!


One Comment
Cathy Duncan
I love bar keepers friend cleaner. Your bathroom is amazing!